X
wikiHow is a “wiki,” similar to Wikipedia, which means that many of our articles are co-written by multiple authors. To create this article, 34 people, some anonymous, worked to edit and improve it over time.
This article has been viewed 683,783 times.
Learn more...
If you are a machinist, manufacturing, or engine professional, exact measurements are an everyday must. When it comes to measuring cylindrical or spherical objects, an outside micrometer would be the best tool to use. A well calibrated micrometer can be difficult to use, but with patience and practice, this tool can be a part of your skill set.
Steps
Method 1
Method 1 of 3:
Measuring with the Micrometer
-
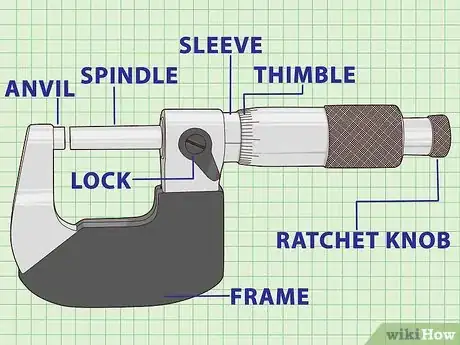
1Familiarize yourself with the anatomy of a micrometer. Some parts are stationary while others are movable.
- Ratchet stop
- Thimble
- Frame
- Thimble lock
- Spindle
- Anvil
- Sleeve
-
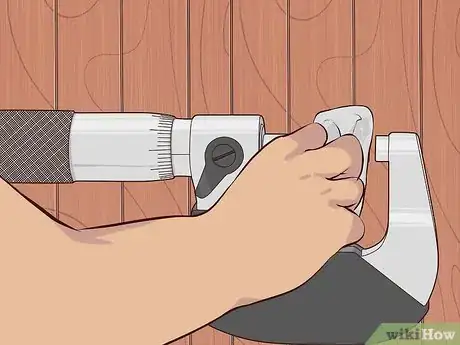
2Clean the anvil and spindle before beginning. Use either a clean sheet of paper or soft cloth, and hold it between the anvil and the spindle. Gently twist and close on the sheet or cloth. Slowly, pull out the sheet or the cloth.[1]
- This practice isn't a necessary step for measuring, but keeping the surfaces of the anvil and spindle clean ensures precise measurements.
Advertisement -
3Hold the object in your left hand and place it against the anvil. The anvil is stationary and can withstand more pressure than the spindle. Make sure the object doesn't move or scratch the surface of the anvil.
-
4Hold the micrometer with your right hand. The frame will rest gently on your palm.
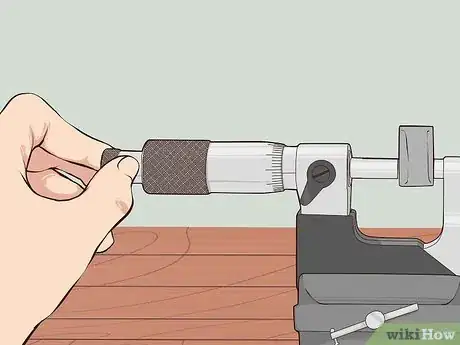
- You can also fasten the frame on a stationary vise; this helps free up both hands for the measuring process.
-
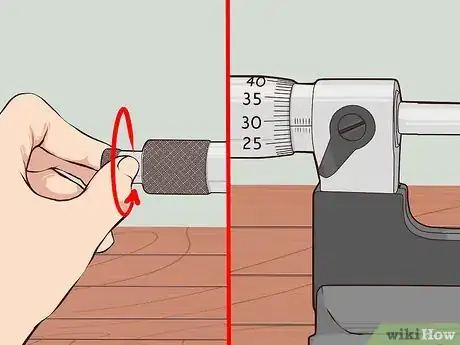
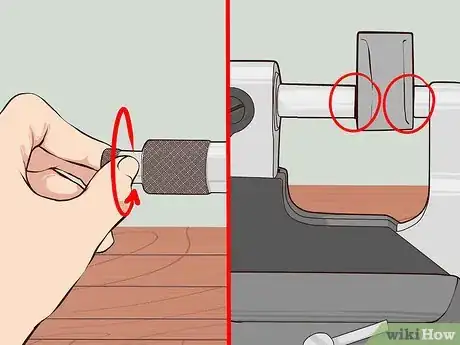
5Spin the ratchet counter clockwise. Be sure the 0 on the thimble is lined up with the scale on the sleeve.
-
6Twist until the spindle is against the object. Apply enough force. The thimble often clicks. Three clicks is a good stopping point.
-
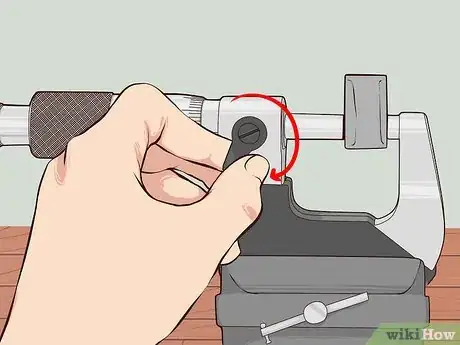
7Set the thimble lock while the micrometer is still on the object. Even though it is on lock, the spindle can still be moved.
-
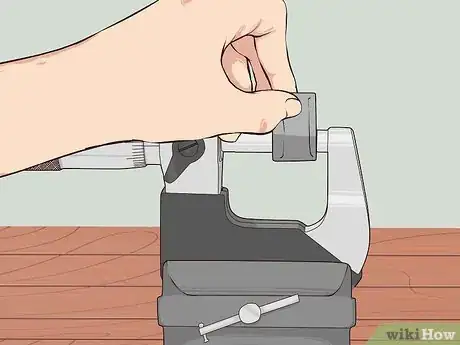
8Slide out the object carefully. Be sure to avoid scratching either surfaces of the anvil or spindle; the slightest scratch can ruin the micrometers measuring accuracy.
-
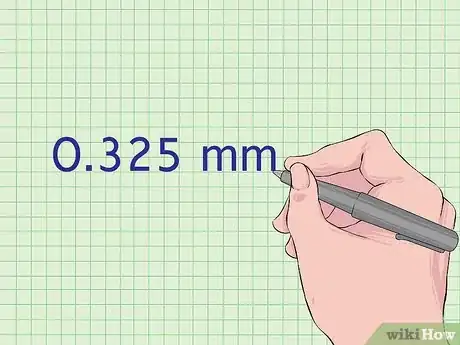
9Write down the measurements before unlocking the spindle. If the spindle loosens, be sure to remeasure.
Advertisement
Method 2
Method 2 of 3:
Reading an Inch Micrometer
-
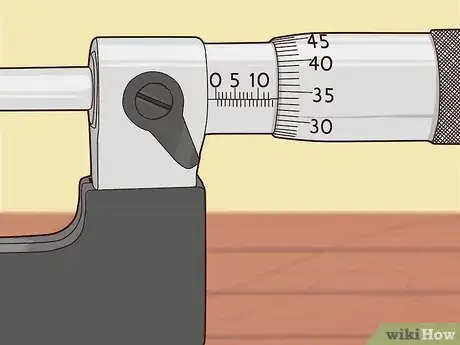
1Learn the different number scales on the thimbles.[2]
- On the sleeve is a scale that measures by the one-hundred thousands or 1/10 of an inch; in decimal form it would be .100.
- In between those whole numbers are three lines that represent twenty-five thousandths of an inch; in decimal form, it would look like .025.
- The thimble has evenly spaced lines that represent one-thousandth of an inch; in decimal form it would be .001.
- Above the whole number scale on the sleeve are lines that measure to ten-thousandths of an inch; in decimal form it looks like .0001.
-
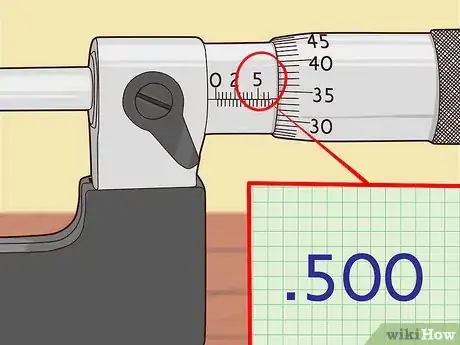
2Read the whole number on the sleeve first. The last visible number will read as the thousandths. For example, if the last number you can see on the sleeve is 5, then it would read 500 thousandths, or .00005.
-
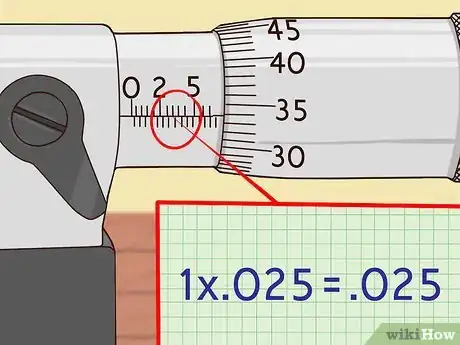
3Read how many lines come after the whole number. Look at the individual markings exposed next to the 100 thousandths and multiply each marking by .25.. In this case 1 x .025 would be .025.
-
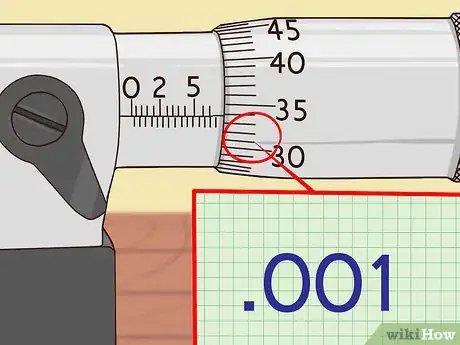
4Find the number and corresponding marking on the thimble scale closest to but underneath the measurement line on the stock. If it's closest to 1, then it would be .001.
-
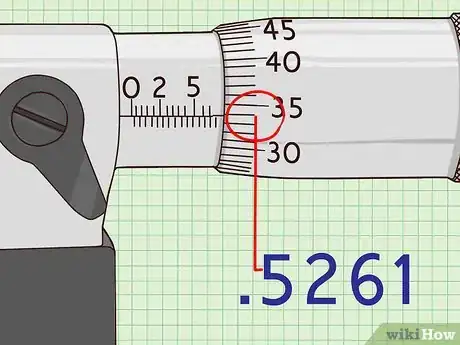
5Add those three numbers together. In this case it would be .500 + .025 + .001 = .526.
-
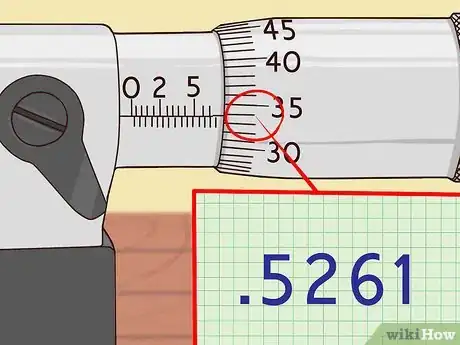
6Flip the micrometer over to read to the 10 thousandths marking. Read that line that lines closest with the sleeve. If, for example, it lines with 1, then the measurement will will read .5261
Advertisement
Method 3
Method 3 of 3:
Reading a Metric Micrometer
-
1Learn the different number scales on the thimbles.[3]
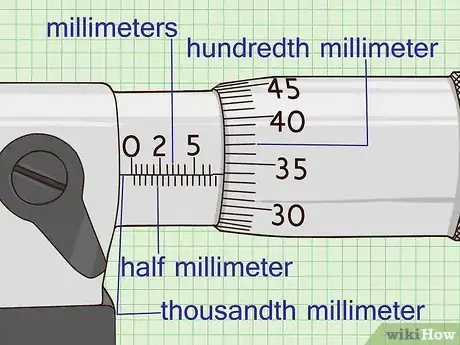
- The line on the sleeve usually has top line showing millimeters, and below that line the marks represent half millimeters.
- The marks on the thimble usually go to 50, and each line represents a hundredth of a millimeter or .01 mm.
- The horizontal lines above the scale on the sleeve will measure to the thousandth of a millimeter, or .001 mm.
-
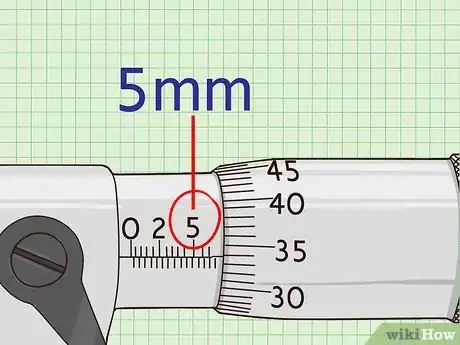
2Read the number of millimeters first. If the last line you saw were a 5, then you would have 5 mm thus far.
-
3Incorporate all the half millimeters in your measurement. If you have one mark that would be .5 mm.
- Don't count a mark that is barely showing; the reading on the thimble might be getting close to 50. [4]
-
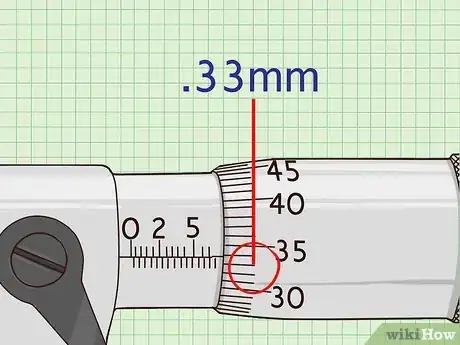
4Find the number of .01 millimeters. If the line on the thimble reads 33, then you'd have .33 mm.
-
5Add up all three lines. In this example, add 5 + .5 + .33. The measurement is 5.83 mm.
-
6Add the thousandths. If the thousandths read a 6, then at .006 to the measurement. In this example, it would be 5.836
- The main time you should incorporate the thousandths measurement is if the object has less tolerance for the pressure applied by the micrometer.[5]
Advertisement
Community Q&A
-
QuestionHow do you measure a bearing's half-thickness?
 Community AnswerUse a ball bearing on the inside then subtract the ball bearing diameter from the overall dimension of the ball bearing and the plain bearing shell.
 -
QuestionWhat are micrometers used for in mechanics?
 Community AnswerThe most common use I can think of would be measuring piston diameter and inside of cylinder bore to check wear. There are probably many other uses, thickness of shims, wear of transmission parts, thickness of break rotors, etc.
 -
QuestionHow do I clean an inside micrometer?
 Gerald Phillip HarveyCommunity AnswerA piece of paper or a soft cloth close the spindle, gently pulling the paper or cloth out.
Advertisement
Warnings
- It is assumed when a micrometer is used, that an accurate and precise measurement is desired. Ensure your micrometer is properly calibrated. They do lose accuracy with use, and must be adjusted every 36 months according to NIST. Check more often when frequently used.⧼thumbs_response⧽
Advertisement
Things You'll Need
- Micrometer
-
Micrometer tools:
- Standard – The standard is an item of precisely calibrated length and flatness which is used to verify the accuracy of the micrometer or to reset it if it is found to be inaccurate. Standards are typically a round or rectangular piece of steel. They are employed just prior to using a micrometer or may be used on a set schedule as part of a calibration program.
- Wrench – insert in hole on back of the stock to adjust the micrometer if needed.
About This Article
Advertisement
