This article was co-authored by Ryan Glynn, CPA and by wikiHow staff writer, Christopher M. Osborne, PhD. Ryan Glynn is a Plant Specialist, Interiorscaper, and the Founder of Chicago Plants, LLC. He specializes in houseplant care, interior plant-scaping, and gardening. Ryan and Chicago Plants have been featured in several media outlets such as TimeOut Magazine and the Chicago Tribune. Ryan holds a BBA and Master’s degree in Accounting from The University of Wisconsin-Madison.
This article has been viewed 27,417 times.
Begonias are a large family of beautiful tropical flowers that can liven up any garden. You can maintain fibrous begonias, which often have waxy leaves and always have traditional root balls, for 2-3 years with proper indoor and outdoor care. For tuberous begonias, which often have larger and more abundant leaves than their fibrous cousins, your goal is to preserve only the tubers (which reside underground in the root ball) so that they can regenerate the following spring.
Steps
Bringing Fibrous Begonias in for Winter
-
1Bring your begonias in at night when temperatures fall below 50 °F (10 °C). Like tuberous begonias, most fibrous begonias cannot survive temperatures below 45 °F (7 °C). Keep a close eye on the weather forecast during the fall and be ready to move your begonia pots indoors when the evenings become chilly.[1]
- For overnight storage on a chilly evening, simply move the pots to a garage or basement that stays above 50 °F (10 °C).
- If your begonias are planted directly in the soil, your only recourse is to loosen the soil around the root ball, pull out the entire root ball and attached soil, and move each begonia to an individual pot filled with nutrient-rich potting mix.
-
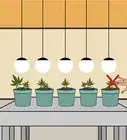
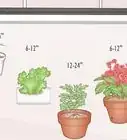
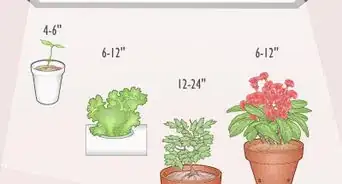
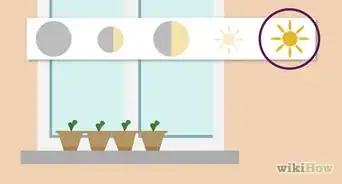
2Choose a warm, humid, partly sunny indoor spot for your begonias. While temporary storage in the garage is fine for chilly nights, your begonias need a permanent indoor growing location for the winter. This should be an area that remains between 65–73 °F (18–23 °C), has moderate humidity, and gets either partial or shaded sunlight.[2] Do not place it near a drafty window where it might be chilly.[3]
- You can add humidity by misting the plants daily with a water bottle or using a room humidifier.
Advertisement -
3Keep the plants indoors for increasing amounts of time as it gets colder. While making sure to keep them indoors whenever it falls below 50 °F (10 °C), also bring the begonias in to their permanent indoor growing spot for increasing stretches over a period of about 2 weeks. This helps acclimate the plants to indoor conditions.[4]
- For example, bring the plants in for 2-4 hours for 3-4 days, then 4-6 hours, then 6-8 hours, and so on.
-
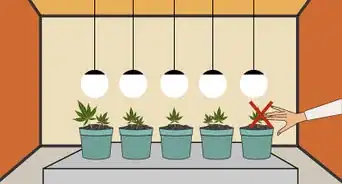
4Remove dead blooms and brown stems when the pots come in for good. Once the acclimation period is over and the pots are indoors full-time, give each begonia plant a “winter haircut.” Pluck off brown, wilted, and dry blooms and leaves with your fingers, and use pruners to snip off stems that look similarly lifeless.[5]
- This helps the plant concentrate its energy, which is reduced during the winter, on the healthier stems, leaves, and blooms.
-
5Water the plant so that only the top half of the soil stays moist. The soil is properly moistened if the top half feels damp while the bottom half feels dry. Test this by putting your finger into the soil in a smaller pot, or by putting a chopstick into a deeper pot and checking for signs of moisture and mud on the stick when you remove it.[6]
- Add water as needed to maintain the proper moisture level.[7]
-
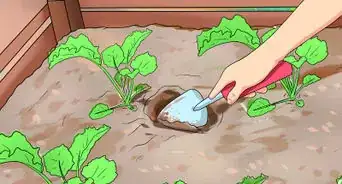
6Fertilize the soil no more than once per month during the winter. Your begonias will be growing quite slowly (if at all) at this time, so they don't require much fertilizer to maintain their health. Mix a general purpose, water-soluble fertilizer for indoor potted plants according to the package instructions and add the recommended amount to each pot.[8]
-
7Reverse the transition process when the weather starts to warm again. When you get within about 2 weeks of the typical last frost date in your area, start moving the pots back outdoors for increasing amounts of time—perhaps 2-4 hours for 3-4 days, then 4-6 hours, and so on. After being indoors all winter, your begonias must acclimate to outdoor conditions once again.[9]
- Even once you’ve transitioned the pots outdoors full-time, be prepared to pull them back into a garage or basement if you get a chilly night that falls below 50 °F (10 °C).


Storing Tuberous Begonias in Winter
-
1Pull the root ball from the pot or ground before the first frost. For an outdoor pot, grasp the base of the plant’s stalk and pull the entire root ball out. If the plant is planted in the ground, loosen the surrounding soil a bit before pulling up the root ball.[10]
- Most varieties of begonia cannot survive temperatures below 45 °F (7 °C).
- If you don’t get frost where you live, wait until the plant shows signs of decline—wilting, browning, shedding of leaves, and so on—in the fall.
- Tuberous begonias can’t be kept alive year-round even in warmer climates or if brought indoors. The only option is to salvage the tubers and help them regenerate the following spring.
-
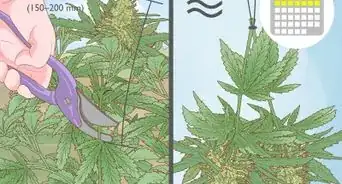
2Separate the stalk of the plant from its root ball. Use pruners to cut the stalk right about at the previous ground level. Discard the entire top part of the plant—everything visible above ground—and keep only the root ball with the surrounding soil attached to it.[11]
- To reduce the risk of transmitting diseases from plant to plant, wipe down your pruners with a cloth dampened with rubbing alcohol when you're finished using them.
-
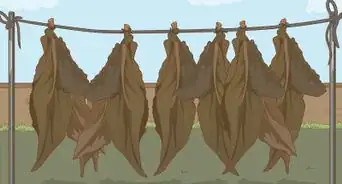
3Store the soil-coated root ball in a cool, dry area for about 2 weeks. You might, for example, store your begonia root balls on newspaper in a basement or garage that stays above 45 °F (7 °C). Keep the root balls this way until all the surrounding soil and outer roots are completely dried out.[12]
- This drying process is called “curing” the tubers. The ideal temperature range for curing is 50–60 °F (10–16 °C).
-
4Discard everything but the tubers and bury them in cool, dry conditions. Once the surrounding soil is dried out, shake it off of the root ball, then trim away all the roots with pruners. Get rid of everything but the actual tubers, which look like small, brown bowls—you can probably fit 1 or 2 in your palm. Bury the tubers in a bucket of dry peat, sawdust, or sand and keep them in the curing spot through the winter.[13]
- Burying the tubers in a dry medium like sand helps them stay at the proper temperature and moisture levels, and keeps them away from sunlight.
-
5Lay the tubers on damp peat in early spring. About 4 weeks before the typical last frost in your area, remove the tubers from the sand, sawdust, or dry peat. Lay them out on trays or shallow bowls filled with 2–3 in (5.1–7.6 cm) of damp peat moss, indentation facing up. Continue to store them in the curing spot, but spray the peat with a water bottle every 1-2 days to keep it moist.[14]
- Don’t cover the tubers with the peat moss—just nestle them on top of it.
-
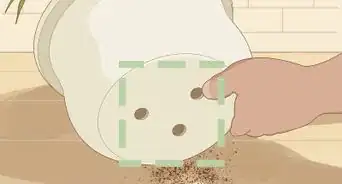
6Plant the tubers in rich potting soil when roots and stems emerge. After 1-2 weeks on the damp peat, you should see roots and stems emerging from the tubers. At this point, move each tuber to an individual pot. Choose 6–9 in (15–23 cm) diameter pots that can handle the outdoors and fill them with a high-nutrient, dense outdoor potting mix. Plant each tuber indentation-side up about 1–2 in (2.5–5.1 cm) below the surface.[15]
- Once potted, move the plants to an indoor location that stays in the 65–73 °F (18–23 °C) temperature range and gets shaded or partial sunlight.
- If you live in a frost-free area, you can instead plant the tubers directly in the ground at this point, if you wish. Make sure the soil is nutrient-rich and dense but well-draining.
-
7Move the pots outdoors once the risk of frost has passed. When daytime temperatures exceed 50 °F (10 °C), move the pots outdoors for 2-4 hours at a time for several days, then bring them back to their indoor spot. Increase this to 4-6 hours, 6-8 hours, and all day long over the course of about 2 weeks. If the risk of frost has passed by this point, start keeping the pots outside all day and night.[16]
- Choose an outdoor location that gets shaded or partial sunshine.
- You can transfer the plants into the ground if you wish, but you may get better results by keeping them in the pots all through the growing season.


References
- ↑ https://www.gardenloversclub.com/ornamental/flowers/wax-begonia/overwintering-begonias/
- ↑ https://todayshomeowner.com/how-to-grow-begonias-indoors-during-the-winter/
- ↑ Ryan Glynn, CPA. Plant Specialist & Interiorscaper. Expert Interview. 4 November 2021.
- ↑ https://www.gardenloversclub.com/ornamental/flowers/wax-begonia/overwintering-begonias/
- ↑ https://www.gardenloversclub.com/ornamental/flowers/wax-begonia/overwintering-begonias/
- ↑ https://todayshomeowner.com/how-to-grow-begonias-indoors-during-the-winter/
- ↑ Ryan Glynn, CPA. Plant Specialist & Interiorscaper. Expert Interview. 4 November 2021.
- ↑ https://todayshomeowner.com/how-to-grow-begonias-indoors-during-the-winter/
- ↑ https://www.gardenloversclub.com/ornamental/flowers/wax-begonia/overwintering-begonias/
- ↑ https://extension.oregonstate.edu/news/dont-toss-those-tuberous-begonias-save-next-summer
- ↑ https://extension.oregonstate.edu/news/dont-toss-those-tuberous-begonias-save-next-summer
- ↑ https://extension.oregonstate.edu/news/dont-toss-those-tuberous-begonias-save-next-summer
- ↑ https://extension.oregonstate.edu/news/dont-toss-those-tuberous-begonias-save-next-summer
- ↑ https://extension.oregonstate.edu/news/dont-toss-those-tuberous-begonias-save-next-summer
- ↑ https://www.rhs.org.uk/advice/profile?pid=815
- ↑ https://www.rhs.org.uk/advice/profile?pid=815
About This Article