X
wikiHow is a “wiki,” similar to Wikipedia, which means that many of our articles are co-written by multiple authors. To create this article, volunteer authors worked to edit and improve it over time.
There are 8 references cited in this article, which can be found at the bottom of the page.
This article has been viewed 54,777 times.
Learn more...
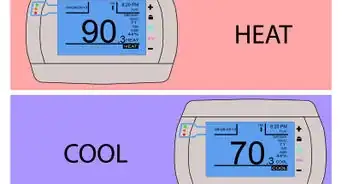
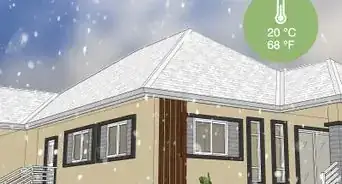
A thermostat turns your furnace and air conditioner on or off depending on the temperature in the room and the setting on the thermostat. Programmable and standard thermostats are installed the same way. A new or improved thermostat can help increase energy efficiency when running your furnace or air conditioner. Use these tips to wire a thermostat.
Steps
-
1Read the manufacturer's instructions. Before wiring a new thermostat into your wall, review all tips, suggestions and pictures provided in the instructions. Take heed to any special directions given for your particular model.
-
2Turn the electricity off to the thermostat. Flip the switches at the breaker box that corresponds to your furnace and air conditioner. Turning the electricity off helps to avoid any electrical problems or injuries.[1]Advertisement
-
3Take down the old thermostat and wall plate. The thermostat will usually slide up to come off the wall plate. Loosen and remove the screws that hold the wall plate in place.[2]
-
4Keep track of how the wires are connected to the back of your old thermostat.
- Label or make note of which wires were connected to the letter designations on the old thermostat. If there are stray wires that are not connected to anything, label those, too.[3]
- Disregard the colors, except for your own labeling and referral purposes. While professional installations are usually color-coded, not all thermostats were wired by professionals originally.[4]
-
5Keep the wires from falling back into the wall. Tie or bundle the wires together. If they still won't stay in place, tape them to the wall.[5] Wires that fall back into the wall must be fished out in order to complete the wiring installation.
-
6Put up the replacement wall plate, if there is one. Mark new holes to match the holes in the wall plate. Use a level to ensure that the wall plate is straight.[6] Drill the holes for the new plate. Screw the new plate onto the wall.
-
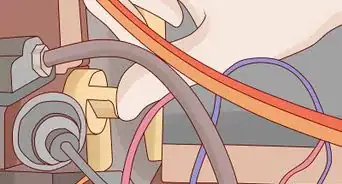
7Connect the wires from the wall to the thermostat. Refer to your labels or the notes you made to connect them correctly.[7] Twist the wires to the connectors on the back of the thermostat or follow the directions provided with the manufacturer's instructions.
-
8Attach the thermostat face to the new wall plate. Push all wires back into the wall, and slide the plate onto the wall plate. It should sit flush against the wall and be straight.
-
9Turn the electricity back on to the furnace and air conditioner. Flip the switches in your breaker box to restore the electricity to the items.[8]
-
10Test the thermostat by causing the furnace and air conditioner to come on at various temperatures. Review all steps if the thermostat fails to work.


Advertisement
Community Q&A
-
QuestionWhat is the name and size of the wire?
 Community Answer18-gauge wire would be needed to carry 24 volts, with red being the power wire and white being the common wire.
 -
QuestionWill the thermostat have the markings as to where each color wire goes?
 IsaacCommunity AnswerThermostats always have labeling on the terminals, such as R,Y, G. These refer to the colors red, yellow and green. Make sure the same color wire is landed on the same spot at both the furnace and thermostat for proper function.
Advertisement
Things You'll Need
- Drill
- Level
- Screwdriver


References
About This Article
Advertisement