Lion-class battlecruiser
The Lion class were a pair of battlecruisers built for the Royal Navy before World War I. Nicknamed the "Splendid Cats",[1] the ships were a significant improvement over their predecessors of the Indefatigable class in speed, armament and armour. These improvements were in response to the German battlecruisers of the Moltke class, which were in turn larger and more powerful than the first British battlecruisers of the Invincible class.
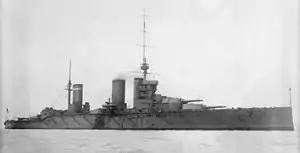 Princess Royal at anchor, before 1916 | |
| Class overview | |
|---|---|
| Builders | |
| Operators | |
| Preceded by | Indefatigable class |
| Succeeded by | Queen Mary |
| Built | 1909–1912 |
| In commission | 1912–1920 |
| Completed | 2 |
| Scrapped | 2 |
| General characteristics (as built) | |
| Type | Battlecruiser |
| Displacement | 26,270 long tons (26,690 t) (normal) |
| Length | 700 ft (213.4 m) |
| Beam | 88 ft 6.75 in (27 m) |
| Draught | 32 ft 5 in (9.9 m) (deep load) |
| Installed power |
|
| Propulsion | 4 × shafts; 2 × steam turbine sets |
| Speed | 27.5 knots (50.9 km/h; 31.6 mph) |
| Range | 5,610 nmi (10,390 km; 6,460 mi) at 10 knots (19 km/h; 12 mph) |
| Complement | 1,092 |
| Armament |
|
| Armour | |
Lion served as the flagship of the Grand Fleet's battlecruisers throughout World War I.[2] She sank the German light cruiser Cöln during the Battle of Heligoland Bight in August 1914 and participated in the battles of Dogger Bank in 1915 and Jutland the following year. She was so badly damaged at the Battle of Dogger Bank that she had to be towed back to port. During the Battle of Jutland, Lion suffered a serious cordite fire that could have destroyed the ship.
Her sister ship, Princess Royal, also played a role in the Battle of Heligoland Bight, and was then sent south to the Caribbean to intercept the German East Asia Squadron in case they used the Panama Canal. After the squadron was sunk at the Battle of the Falkland Islands in December 1914, Princess Royal rejoined the 1st Battlecruiser Squadron (BCS). During the Battle of Dogger Bank, she scored only a few hits, but one crippled the German armoured cruiser Blücher, which allowed the enemy vessel to be caught and sunk by the concentrated fire of the British battlecruisers. Shortly afterwards, Princess Royal became the flagship of the 1st BCS and participated in the Battle of Jutland. Both ships were present during the inconclusive Action of 19 August 1916.
The sisters spent the rest of the war on uneventful patrols in the North Sea; they provided distant cover during the Second Battle of Heligoland Bight in 1917. In 1920, they were put into reserve and were then sold for scrap a few years later in accordance with the terms of the Washington Naval Treaty of 1922.
Design and description
The acceleration of the German naval building programme in 1907–1908 forced H. H. Asquith's Liberal Government to yield to public pressure and authorise more ships for the 1909–1910 Construction Programme. Only a single battleship and a battlecruiser had been authorised in 1908–1909, but three battleships and a battlecruiser were authorised in 1909–1910 with another three battleships and a battlecruiser planned as contingency ships to placate the public and the Admiralty. Continuing pressure forced the government to announce in July 1909 that the contingency ships would also be built. This pressure also allowed the Admiralty to gain approval to improve the size and power of its new ships so as to maintain qualitative superiority over the new German dreadnoughts then under construction.[3]
The Lion-class battlecruisers were designed to be as superior to the new German battlecruisers of the Moltke class as the German ships were to the Invincible class. The increase in speed, armour and gun size forced a 40% increase in size over the Indefatigable class and made them the largest warships in the world.[4] Their layout was adapted from the design of the first "super-dreadnought" class, the Orion-class battleships of 1910, with 13.5-inch (343 mm) guns. The ships were the first battlecruisers to be armed with the new 13.5-inch Mk V gun. The design of the Lions remedied some of the shortcomings of the preceding battlecruisers, which suffered from an inability of the en echelon amidships turrets to safely fire across the deck, limiting them to a three-turret broadside. This was done because the greater size and weight of the new guns rendered wing turrets impracticable. As such, all four turrets in the Lions were arranged on the centreline; 'Q' turret was located amidships and could only fire on the broadside.[5] The Director of Naval Construction, Sir Philip Watts, suggested that a fifth turret, superfiring over the rear turret, could be added if the ship was lengthened by three frames, 12 feet (4 m) in total, and that this would add very little cost other than the £175,000 for the additional turret but add 25% more firepower to the ship.[6] This was not approved, possibly because of doubts about its feasibility.[5]
General characteristics

The Lions were significantly larger than their predecessors of the Indefatigable class. They had an overall length of 700 feet (213.4 m), a beam of 88 feet 6.75 inches (27 m), and a draught of 32 feet 5 inches (9.9 m) at deep load. They displaced 26,270 long tons (26,690 t) at normal load and 30,820 long tons (31,310 t) at deep load, over 8,000 long tons (8,100 t) more than the earlier ships. They had a metacentric height of 6 feet (1.8 m) at deep load.[7]
Propulsion
The Lion-class ships were equipped with two sets of Parsons direct-drive steam turbines, each of which drove two propeller shafts.[8] Their three-bladed propellers were 12 feet 3 inches (3.73 m) in diameter on the inner shafts and those on the outer shafts were 11 feet 8 inches (3.56 m) in diameter. The turbines, rated at 70,000 shaft horsepower (52,199 kW), used steam provided by forty-two Yarrow boilers that operated at a pressure of 235 psi (1,620 kPa; 17 kgf/cm2). Lion did not reach her designed speed of 28 knots (52 km/h; 32 mph) during her sea trials despite exceeding 76,000 shp (56,673 kW), but Princess Royal achieved 28.5 knots (52.8 km/h; 32.8 mph). The ships carried 3,500 long tons (3,556 t) of coal and an additional 1,135 long tons (1,153 t) of fuel oil that was sprayed on the coal to increase its burn rate.[9] At full capacity, they could steam for 5,610 nautical miles (10,390 km; 6,460 mi) at a speed of 10 knots (19 km/h; 12 mph).[1]
Armament
The Lion-class ships mounted eight BL 13.5-inch Mark V guns in four twin hydraulically powered gun turrets, designated 'A', 'B', 'Q' and 'Y'. Unlike the two previous classes of battlecruiser in the Royal Navy, which had turrets fore, aft and on each side of the ship, the Lion-class ships had their main armament mounted in a single line from front to rear, with 'B' turret superfiring over 'A' turret, 'Q' turret mounted amidships, and 'Y' turret aft. The guns had elevation ranges from −3° to +20°; their gunsights were limited to +15° until super-elevating prisms were installed before the Battle of Jutland in May 1916 to allow full elevation.[10] They fired 1,250-pound (567 kg) projectiles at a muzzle velocity of 2,540 ft/s (770 m/s); at +20° elevation, they had a range of 23,820 yards (21,781 m). Their rate of fire was two rounds per minute.[11] The ships carried a total of 880 rounds during wartime for 110 shells per gun.[12]
The secondary armament of the Lion class consisted of sixteen BL 4-inch Mark VII guns, most of which were mounted in casemates in single mounts.[12] The guns had maximum elevations of +15°, which gave them a range of 11,400 yd (10,424 m). They fired 31-pound (14.1 kg) projectiles at muzzle velocities of 2,821 ft/s (860 m/s). They were provided with 150 rounds per gun.[14] The ships were fitted with two 21-inch (533 mm) submerged torpedo tubes, one on each broadside.[1]
Fire control
The main guns were controlled from the conning tower. Data from a nine-foot (2.7 m) Argo rangefinder located on top of the conning tower was input into a Mk I Dreyer Fire-Control Table located in the transmitting station (TS) below the conning tower where it was converted into range and deflection data for use by the guns. The target's data was also graphically recorded on a plotting table to assist the gunnery officer in predicting the movement of the target. 'B' and 'X' turrets were provided with nine-foot rangefinders and were fitted as secondary control positions.[15]
Fire-control technology advanced quickly during the years immediately preceding World War I and the development of the director firing system was a major advance. This consisted of a fire-control director mounted high in the ship which electrically provided gun data to the turrets via a pointer on a dial, which the turret crewmen only had to follow. The director layer fired the guns simultaneously, which aided in spotting the shell splashes and minimised the effects of the roll on the dispersion of the shells.[16] Lion received her system in early 1915 while undergoing repairs after the Battle of Dogger Bank[17] and Princess Royal got hers in early 1916. A second director was added to each ship in 1918.[14]
Armour
The armour protection given to the Lions was heavier than that of the Indefatigables; their waterline belt of Krupp Cemented Armour measured 9 inches (229 mm) thick amidships in contrast to the 6-inch (152 mm) belt of their predecessors. It thinned to 4 inches towards the ships' ends, but did not reach either the bow or the stern. They were also given an upper armour belt with a maximum thickness of 6 inches over the same length as the thickest part of the waterline armour and thinned to 5 inches (127 mm) abreast the end turrets. The ends of the armoured citadel were closed off by 4-inch transverse bulkheads. Nickel-steel plating was used for the protective decks. The lower armoured deck was generally only 1 inch (25.4 mm) thick except outside the citadel where it was 2.5 inches (64 mm). The upper armoured deck was situated at the top of the upper armour belt and was also only 1 inch thick. The forecastle deck armour ranged from 1.25 to 1.5 inches (32 to 38 mm).[18]
The gun turrets had 9-inch fronts and sides and their roofs were 2.5 to 3.25 inches (64 to 83 mm) thick. The barbettes were protected by 9 inches of armour above the deck, thinning to 8 inches (203 mm) above the upper armour deck and 3 inches (76 mm) below it. The sides of the conning tower were 10 inches (254 mm) thick and it had a three-inch roof and communication tube. Nickel-steel torpedo bulkheads 2.5 inches (64 mm) thick were fitted abreast the magazines and shell rooms. Their funnel uptakes were protected by nickel-steel splinter armour 1.5 inches (38 mm) thick on the sides and 1 inch on the ends between the upper and forecastle decks. After the Battle of Jutland revealed their vulnerability to plunging shellfire, 1 inch of additional armour, weighing approximately 130 long tons (132 t),[19] was added to the magazine crowns and turret roofs.[20]
Construction
Only Lion was completed to the original design, which had the fore funnel placed between the forward superstructure and the tripod foremast. This meant that hot clinkers and flue gases from the boilers made the spotting top on the foremast completely unworkable when the ships were steaming at high speed, that the upper bridge could easily be rendered uninhabitable, depending on the wind, and that the signal flags and halyards were at risk of burning.[21] Both ships were altered to correct this problem, Lion before being commissioned, and Princess Royal as she was fitting out, at a total cost of £68,170.[4] The fore funnel was moved aft, the original fore and mainmasts exchanged position, and the foremast was now just a pole mast, not a tripod. The spotting tower at the rear of the conning tower was removed, the conning tower enlarged, the nine-foot Argo rangefinder was moved from the foremast spotting top to the roof of the conning tower, and all the funnels were raised to the same height.[22] As part of these modifications, the two 4-inch guns mounted above the forward group of casemates were enclosed in casemates of their own to protect the gun crews from weather and enemy action.[5]
| Name | Builder | Laid down[5] | Launched[5] | Completed[1] | Cost (including armament)[23] |
|---|---|---|---|---|---|
| Lion | HM Dockyard, Devonport | 29 November 1909 | 6 August 1910 | May 1912 | £2,086,458 |
| Princess Royal | Vickers, Barrow | 2 May 1910 | 29 April 1911 | November 1912 | £2,089,178 |
Modifications
The Lion-class ships were built without anti-aircraft (AA) guns, but a variety of weapons were fitted over the course of the war. These included the quick-firing (QF) 6-pounder (57 mm) Hotchkiss gun on a High Angle (HA) Mk Ic mounting that had a maximum elevation of 60°. Each ship was fitted with one in October 1914, but Lion's gun was removed in July 1915, and Princess Royal's was removed in December 1916.[12] It fired a 6-pound (2.7 kg) shell at a muzzle velocity of 1,773 ft/s (540 m/s).[24] QF 3-inch (76 mm) 20 cwt[Note 1] AA guns on high-angle Mk II mounts were also used that had an elevation range between -10° and +90°. They fired a 12.5-pound (5.7 kg) shell at a muzzle velocity of 2,604 ft/s (794 m/s). The guns had a maximum ceiling of 23,000 ft (7,000 m).[25] Lion received a pair of these weapons in 1915 and retained them for the rest of the war. Princess Royal was fitted with one gun in January 1915 and it was removed in April 1917. She received two 4-inch Mark VII guns on HA Mk II mounts capable of 60° of elevation in April 1917[12] and a pair of single 2-pounder Mk II "pom-poms" were added in April 1919.[19] They fired 40-millimetre (1.6 in) shells weighing 2 pounds (0.9 kg) at a muzzle velocity of 2,040 ft/s (620 m/s) to a maximum range of 6,900 yards (6,309 m). Their cyclic rate of fire was 200 rounds per minute; the actual rate was significantly less.[26]
The pole foremast was modified to a tripod after 1916. This was due to the increased weight of masthead fire-control equipment associated with director firing. In 1917 Lion and Princess Royal received searchlight towers on the aft funnel and mainmast while losing one four-inch gun each from the aft battery. In early 1918, both ships received flying-off platforms on 'Q' and 'X' turrets for Sopwith Pup and Sopwith 1½ Strutter aircraft, and Lion was fitted with a torpedo control station at the aft end of her aft superstructure.[27]
Service
Pre-war career
Upon commissioning, both Lion and Princess Royal were assigned to the 1st Cruiser Squadron, which was renamed the 1st Battlecruiser Squadron (BCS) in January 1913, of which Lion became the flagship. Rear-Admiral David Beatty assumed command of the 1st BCS on 1 March 1913. The sisters, along with the rest of the 1st BCS, made a port visit to Brest in February 1914 and the squadron visited Russia in June.[4]
Battle of Heligoland Bight
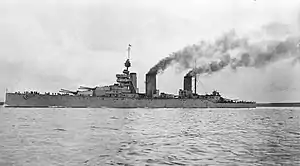
The first action for Lion and Princess Royal was during the Battle of Heligoland Bight on 28 August 1914. Beatty's ships had originally been intended as distant support of the British cruisers and destroyers closer to the German coast in case the large ships of the High Seas Fleet sortied in response to the British attacks. They turned south at full speed at 11:35[Note 2] when the British light forces failed to disengage on schedule and the rising tide meant that German capital ships would be able to clear the sand bar at the mouth of the Jade Estuary. The brand-new light cruiser Arethusa had been crippled earlier in the battle and was under fire from the German light cruisers Strassburg and Cöln when the battlecruisers loomed out of the mist at 12:37. Strassburg was able to duck into the mists and evade fire, but Cöln remained visible and was quickly crippled by fire from the squadron. Beatty was distracted from the task of finishing her off by the sudden appearance of the elderly light cruiser Ariadne directly to his front. He turned in pursuit and reduced her to a flaming hulk. The battlecruisers encountered the crippled Cöln shortly after turning north and she was sunk by Lion after a few salvoes.[28]
Princess Royal was detached in November to reinforce the North Atlantic and Caribbean Squadrons in the search for Admiral Graf Spee's East Asia Squadron after it destroyed the West Indies Squadron of Rear-Admiral Christopher Cradock during the Battle of Coronel. She returned home the next month after the German ships had been sunk at the Battle of the Falkland Islands.[29]
Raid on Scarborough
The German Navy had decided on a strategy of bombarding British towns on the North Sea coast aiming to draw out the Royal Navy and destroy elements of it in detail. An earlier raid on Yarmouth on 3 November 1914 had been partially successful, but a larger-scale operation was devised by Admiral Franz von Hipper afterwards. The fast battlecruisers would conduct the bombardment while the entire High Seas Fleet was to station itself east of Dogger Bank to provide cover for their return and to destroy any elements of the Royal Navy that responded to the raid. The Germans did not know that the British were reading the German naval codes and were planning to catch the raiding force on its return journey; they were not aware that the High Seas Fleet would be at sea as well. Admiral Beatty's 1st BCS, now reduced to four ships, including Lion, as well as the 2nd Battle Squadron with six dreadnoughts, was detached from the Grand Fleet in an attempt to intercept the Germans near Dogger Bank.[30]
Hipper set sail on 15 December for another raid and successfully bombarded several English towns, but British destroyers escorting the 1st BCS had already encountered German destroyers of the High Seas Fleet in the early morning and fought an inconclusive action with them. Communications failures meant that Beatty was not notified of this encounter for several hours afterwards, but he turned in pursuit of the German ships once he learned of their presence. The lead British ships were closing in on the Germans when Beatty learned that Scarborough was being shelled later that morning and he turned west to intercept the other German force.[31]

The British forces split going around the shallow Southwest Patch of the Dogger Bank; Beatty's ships passed to the north while the 2nd Battle Squadron passed to the south as they headed west to block the main route through the minefields defending the English coast. This left a 15-nautical-mile (28 km) gap between them through which the German light forces began to move. At 12:25, the light cruisers of the II Scouting Group began to pass the British forces searching for Hipper. They spotted a German cruiser a few minutes later and Beatty turned his battlecruisers towards the German ships, thinking they were the advance screen for Hipper's ships. Those were 50 km (31 mi) behind. Another British communications failure allowed the German light cruisers to escape and they alerted Hipper to the location of the British battlecruisers. The German battlecruisers wheeled to the northeast of the British forces and escaped.[32]
Battle of Dogger Bank
On 23 January 1915, a force of German battlecruisers under the command of Hipper sortied to clear the Dogger Bank of any British fishing boats or small craft that might be there to collect intelligence on German movements. The British were reading their coded messages and sailed to intercept them with a larger force of British battlecruisers. Contact was initiated the following morning when Arethusa spotted the German light cruiser SMS Kolberg and the Germans spotted Beatty's force a few minutes later. Hipper ordered a turn to the south at 20 knots (37 km/h; 23 mph), believing that this would suffice if the ships that he saw to his northwest were British battleships and that he could always increase speed to Blücher's maximum speed of 23 knots (43 km/h; 26 mph) if they were British battlecruisers.[33]
Beatty ordered his battlecruisers to make all practicable speed to catch the Germans before they could escape. The leading ships, Lion, Princess Royal and Tiger, were doing 27 knots (50 km/h; 31 mph) in pursuit and Lion opened fire at very long range. The German battlecruisers opened fire themselves about 20 minutes later and concentrated their fire on Lion. Moltke and Derfflinger combined their fire to cripple Lion over the next hour even though Princess Royal engaged Derfflinger during this period.[34] Another signalling failure caused the British ships to focus on sinking Blücher when Beatty intended most of his ships to continue the pursuit of the battlecruisers.[35] During this time Princess Royal hit Blücher at least twice, including the hit that crippled her and allowed the other British ships to engage.[36] Beatty tried to correct the mistake, but he was so far behind the leading battlecruisers that his signals could not be read amidst the smoke and haze. He then transferred to a destroyer and set off in pursuit of his battlecruisers. He caught up to them shortly before Blücher sank and boarded Princess Royal. Beatty ordered the pursuit of the German battlecruisers resumed, but rescinded the order when it became clear that too much time had been wasted sinking Blücher and that Hipper's ships would be able to reach German waters before the British could catch them. Lion was headed home at 10 knots (19 km/h; 12 mph) when the rest of the battlecruisers caught up with her.[37] Later that afternoon, the battlecruiser Indomitable was ordered to take Lion under tow. It took almost two days to reach port.[38] The ship was under repair for the next three months and did not rejoin the fleet until 7 April.[29] Princess Royal was not damaged during the battle.[39]
Battle of Jutland
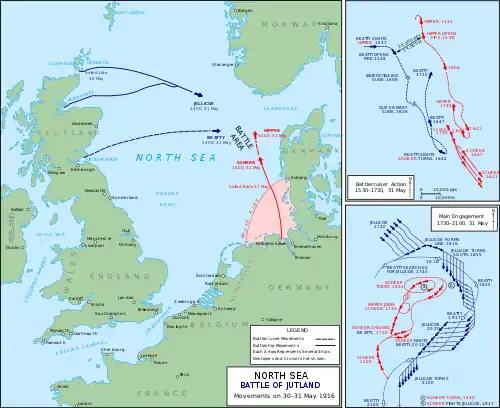
On 31 May 1916, Princess Royal was the flagship of the 1st BCS, under the command of Rear-Admiral Osmond Brock.[36] The squadron had put to sea with the rest of the Battlecruiser Fleet, led by Beatty in Lion, to intercept a sortie by the High Seas Fleet into the North Sea. Hipper's battlecruisers spotted the British ships to their west by mid-afternoon and turned about to fall back on the German battleships, then about 60 miles (97 km) behind him. Beatty turned to cut him off but was out of position to do that and had to settle for a pursuit. This began what was to be called the "Run to the South" as Beatty changed course to steer east south-east at 15:45, paralleling Hipper's course. The Germans opened fire first, three minutes later, followed almost immediately afterward by the British. The sisters were in the lead and were engaged by their opposite numbers, the battlecruisers, Lützow and Derfflinger. Fire from both German ships was very accurate, and both Lion and Princess Royal were hit twice within three minutes of the Germans' opening fire.[40]
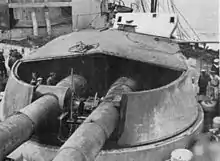
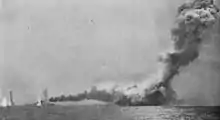
Lion scored her first hit on Lützow two minutes later, but one of Lützow's 305 mm (12 in) shells hit 'Q' turret at 16:00.[41] It blew the front roof and the centre face plates off the turret, killed or wounded everyone inside, and started a fire that continued to smoulder despite efforts to put it out. Accounts of subsequent events differ, but the magazine doors had been closed and the magazine flooded when the smouldering fire ignited the propellant charges in the turret working room at 04:28. They burnt violently, with the flames reaching as high as the masthead, and killed most of the magazine and shell room crews still in the lower part of the mounting. The gas pressure severely buckled the magazine doors, and it is probable that the magazine would have exploded, sinking the ship, if it had not already been flooded.[42] At 16:30 the light cruiser Southampton, scouting in front of Beatty's ships, spotted the lead elements of the High Seas Fleet charging north at top speed. After confirming the sighting himself, Beatty ordered his ships to turn around and fall back upon the oncoming Grand Fleet.[43] During the Run to the South. Princess Royal was hit a total of six times by Derfflinger, but none of them were serious.[44]
Lion was hit twice more, during what came to be called the "Run to the North", after the German battlecruisers made their own turn north.[45] Beatty's ships slowly moved out of range and rendezvoused with the main body of the Grand Fleet. Beatty gradually turned more towards the east to allow him to cover the deployment of the Grand Fleet into its battle formation and to move ahead of it, but he mistimed his manoeuvre. By 18:35 Beatty was following the 3rd Battlecruiser Squadron as they were steering east-southeast, leading the Grand Fleet, and continuing to engage Hipper's battlecruisers to their southwest. A few minutes earlier Scheer had ordered a simultaneous 180° turn and Beatty lost sight of them in the haze. Beatty then turned his ships southeast and to the south-southeast to search for Hipper's ships.[46]
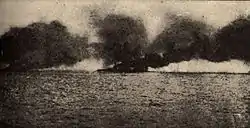
Scheer finally disengaged around 19:15 and the British lost sight of the Germans until 20:05 when the light cruiser Castor spotted smoke bearing west-northwest. Ten minutes later she closed the range enough to identify German torpedo boats and engaged them. Beatty turned west upon hearing the sounds of gunfire and spotted the German battlecruisers only 8,500 yards (7,800 m) away. Inflexible opened fire at 20:20, followed almost immediately by the rest of Beatty's battlecruisers.[47] Shortly after 20:30 the pre-dreadnought battleships of Rear Admiral Mauve's II Battle Squadron were spotted and fire switched to them. The Germans were able to fire only a few rounds in reply because of the poor visibility and turned away to the west. The British battlecruisers hit the German ships several times before they blended into the haze around 20:40.[48] After this Beatty changed course to south-southeast and maintained that course, ahead of both the Grand Fleet and the High Seas Fleet, until 02:55 the next morning when the order was given to reverse course.[49]
Lion, Princess Royal and the rest of the battlecruisers reached Rosyth on the morning of 2 June[50] where Lion began repairs that lasted until 19 July. The remains of 'Q' turret were removed during this period and not replaced until a visit to Armstrong Whitworth at Elswick that lasted from 6 to 23 September. Princess Royal began repairs that lasted until 10 June. She sailed later that day for Devonport Royal Dockyard where more permanent repairs were made and was back at Rosyth by 21 July.[51]
Post-Jutland career
Lion rejoined the Battlecruiser Fleet, again as Beatty's flagship, on 19 July. On the evening of 18 August the Grand Fleet put to sea in response to a message deciphered by Room 40 which indicated that the High Seas Fleet, less the II Squadron, would be leaving harbour that night. The German objective was to bombard Sunderland the following day, with extensive reconnaissance provided by airships and submarines. The Grand Fleet sailed with 29 dreadnoughts and 6 battlecruisers.[Note 3] Throughout the 19th, Jellicoe and Scheer received conflicting intelligence, with the result that having reached its rendezvous in the North Sea, the Grand Fleet steered north in the erroneous belief that it had entered a minefield before turning south again. Scheer steered south-eastward pursuing a lone British battle squadron reported by an airship, which was in fact the Harwich Force under Commodore Tyrwhitt. Having realised their mistake the Germans then turned for home. The only contact came in the evening when Tyrwhitt sighted the High Seas Fleet but was unable to achieve an advantageous attack position before dark, and broke off contact. Both the British and the German fleets returned home, the British having lost two cruisers to submarine attacks and the Germans having a dreadnought battleship damaged by a torpedo.[53]

Lion became the flagship of Vice-Admiral W. C. Pakenham in December 1916 when he assumed command of the Battlecruiser Fleet upon Beatty's promotion to command of the Grand Fleet.[29] Lion had an uneventful time for the rest of the war conducting patrols of the North Sea as the High Seas Fleet was forbidden to risk any more losses. She provided support for British light forces involved in the Second Battle of Heligoland Bight on 17 November 1917, but did not come within range of any German forces. Lion and Princess Royal, along with the rest of the Grand Fleet, sortied on the afternoon of 23 March 1918 after radio transmissions had revealed that the High Seas Fleet was at sea after a failed attempt to intercept the regular British convoy to Norway. The Germans were too far ahead of the British and escaped without firing a shot.[54] When the High Seas Fleet sailed for Scapa Flow on 21 November 1918 to be interned, Lion was among the escorting ships. Along with the rest of the 1st BCS, Lion and Princess Royal guarded the interned ships[55] until both ships were assigned to the Atlantic Fleet in April 1919.[29]
Lion was placed in reserve in March 1920, paid off on 30 March 1922, and sold for scrap on 31 January 1924 for £77,000.[39] Princess Royal was placed in reserve in 1920 and an attempt to sell her to Chile in mid-1920 was unsuccessful. She became the flagship of the Commander-in-Chief Scottish Coast on 22 February 1922, but was sold for scrap in December 1922.[2] Both ships were scrapped to meet the tonnage limitations of the Washington Naval Treaty.[1]
Notes
- Cwt is the abbreviation for hundredweight, 20 cwt referring to the weight of the gun.
- The times used in this article are in UTC, which is one hour behind CET, which is often used in German works.
- While no sources explicitly state that Lion and Princess Royal were part of the fleet at this time, of the seven Royal Navy battlecruisers then in commission, Indomitable was under refit through August and the only one unavailable for action.[52]
Footnotes
- Preston, p. 29
- Campbell, p. 29
- Roberts, pp. 31–32
- Burt, p. 180
- Burt, p. 176
- Roberts, p. 33
- Roberts, pp. 43–44
- Burt, p. 178
- Roberts, pp. 70–76, 80
- The Sight Manual ADM 186/216. Admiralty, Gunnery Branch. 1916. pp. 4, 29–31, 106, 109.
- Friedman, pp. 49–52
- Roberts, p. 83
- Campbell, p. 27
- Roberts, pp. 91–92
- Roberts, pp. 92–93
- Burt, p. 179
- Roberts, pp. 102–103
- Campbell, p. 28
- Roberts, pp. 109, 112–113
- Roberts, p. 34
- Roberts, p. 35
- Parkes, pp. 531–536
- Friedman, pp. 116–117
- Friedman, pp. 108–109
- Friedman, p. 119
- Burt, p. 161
- Massie, pp. 109–113
- Roberts, p. 123
- Massie, pp. 333–334
- Massie, pp. 342–343
- Tarrant, p. 34
- Massie, pp. 376–384
- Tarrant, pp. 35–36
- Massie, pp. 398–402
- Campbell, p. 32
- Tarrant, p. 38
- Massie, pp. 409–412
- Burt, p. 162
- Tarrant, pp. 69, 71, 75, 80–83
- Massie, p. 592
- Roberts, p. 116
- Massie, pp. 598–600
- Tarrant, p. 97
- Massie, p. 601
- Tarrant, pp. 130–138, 145
- Tarrant, p. 175
- Tarrant, pp. 177–178
- Tarrant, pp. 178, 224
- Massie, p. 657
- Campbell, pp. 30, 32
- Roberts, p. 122
- Marder, III, pp. 287–296
- Massie, p. 748
- Marder, V, p. 273
Bibliography
- Burt, R. A. (2012). British Battleships of World War One (2nd ed.). Annapolis, Maryland: Naval Institute Press. ISBN 978-1-59114-053-5.
- Campbell, N. J. M. (1978). Battle Cruisers. Warship Special. Vol. 1. Greenwich: Conway Maritime Press. ISBN 978-0-85177-130-4.
- Friedman, Norman (2011). Naval Weapons of World War One: Guns, Torpedoes, Mines and ASW Weapons of All Nations; An Illustrated Directory. Barnsley, UK: Seaforth Publishing. ISBN 978-1-84832-100-7.
- Marder, Arthur J. (1978). From the Dreadnought to Scapa Flow, The Royal Navy in the Fisher Era, 1904–1919. Vol. III: Jutland and After, May 1916 – December 1916 (Second ed.). London: Oxford University Press. ISBN 978-0-19-215841-3.
- Marder, Arthur J. (1970). From Dreadnought to Scapa Flow: The Royal Navy in the Fisher Era, 1904–1919. Vol. V: Victory and Aftermath (January 1918 – June 1919). London: Oxford University Press. ISBN 978-0-19-215187-2.
- Massie, Robert K. (2003). Castles of Steel: Britain, Germany, and the Winning of the Great War at Sea. New York: Random House. ISBN 0-679-45671-6.
- Parkes, Oscar (1990) [1966]. British Battleships, Warrior 1860 to Vanguard 1950: A History of Design, Construction, and Armament (New & rev. ed.). Annapolis, Maryland: Naval Institute Press. ISBN 1-55750-075-4.
- Preston, Antony (1985). "Great Britain and Empire Forces". In Gray, Randal (ed.). Conway's All the World's Fighting Ships 1906–1921. Annapolis, Maryland: Naval Institute Press. pp. 1–104. ISBN 0-85177-245-5.
- Roberts, John (1997). Battlecruisers. Annapolis, Maryland: Naval Institute Press. ISBN 978-1-55750-068-7.
- Tarrant, V. E. (1999) [1995]. Jutland: The German Perspective: A New View of the Great Battle, 31 May 1916. London: Brockhampton Press. ISBN 978-1-86019-917-2.
External links
- Dreadnought Project Technical material on the weaponry and fire control for the ships