X
wikiHow is a “wiki,” similar to Wikipedia, which means that many of our articles are co-written by multiple authors. To create this article, 11 people, some anonymous, worked to edit and improve it over time.
This article has been viewed 63,453 times.
Learn more...
Working with gum paste is like modeling clay for adults. Perfecting gum paste figures is an art form that may take persistent practice. One of the precursory steps of using the decorative dessert covering is coloring gum paste.
Steps
-
1Choose your desired colors. One of the benefits of gum paste is that it shows colors vibrantly. Determine the colors of gum paste you will be needing based on the decorations you are making. Gather the necessary colors of food coloring paste or gel, which carry color better and more vibrantly than liquid since they are more concentrated.[1]
-
2Choose this procedure if you want to color the entire batch of gum paste the same color.Advertisement
-
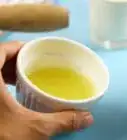
3Add the desired amount of coloring in with the liquids of the recipe. Dip a toothpick in the food coloring and stir it into the measured water or other liquid.


Advertisement
Method 1
Method 1 of 2:
Coloring Premade Gum Paste
-
1Select this procedure when you need small amounts of several different colors.
-
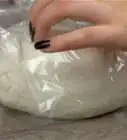
2Work with a little bit at a time. Gum paste will begin to harden if exposed to air. Keep unused portions in a sealable bag or air-tight container to retain moisture.[2]
-
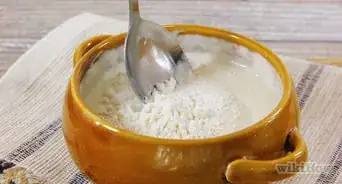
3Refresh the gum paste. After you take it from the container, the gum paste may be stiff. Knead it in your hands a few times to make it soft again.[3]
-
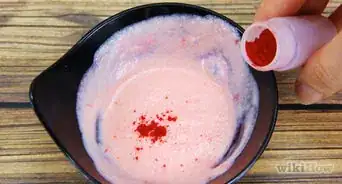
4Use a toothpick to get the coloring from the container. Dip 1 end of the toothpick into the food coloring. This covers the tip of the pick and allows you to apply little bits of color at a time.
-
5Apply food coloring to the gum paste. Wipe the toothpick against the paste, transferring the color. Roll the toothpick to get the coloring off all its sides.
-
6Don a pair of gloves. A pair of kitchen or latex gloves will prevent the color from staining your hands.[4]
-
7Knead the color into the paste. Use your palms and fingers to work the color into the gum paste. Continue kneading until the color is uniform throughout. This will take some time to achieve a solid color.
-
8Get the right color. If the color is too dark, you can knead in more untinted gum paste to lighten the shade. Add more food coloring as needed to darken the color of the gum paste. Add color a little at a time to make sure you get the color you want. Since gum paste decorations are mainly intended to be looked at and not eaten, as much coloring as is desired for even the deepest colors can be used. Use a new toothpick each time you need to get more coloring from the jar.


Advertisement
Method 2
Method 2 of 2:
Coloring the Gum Paste after Making Your Decorations
-
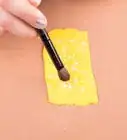
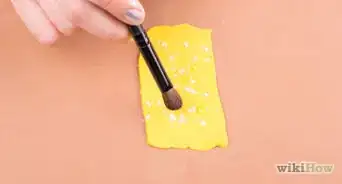
1Make paint to color your gum paste. Pour water, vodka or gin onto a small plate or rimmed lid totaling the amount of paint you think you will need. Alcohols that do not contain sugar may be chosen because they evaporate more quickly than water. Sugary liquors like rum should not be used because the sugar content makes the gum paste soft and gooey. Using a fresh toothpick, withdraw the desired amount of food coloring paste from the jar and stir it into the liquid. The thicker you mix the "paint," the darker the paint will be. Lighter colors come from thinner paint, but thinner paint can bleed over into undesired areas.[5]
-
2Use a small brush to paint the color on selected areas. For better success using colors right next to each other or layering colors, wait for the previous color to dry somewhat before applying the next one.


Advertisement
Things You'll Need
- Toothpick
- Food coloring paste
- Gum paste
- Gloves
- Small plate
- Small paint brush
References
- ↑ https://www.youtube.com/watch?time_continue=19&v=femCg70LMoc&feature=emb_logo
- ↑ https://veenaazmanov.com/homemade-gumpaste-recipe-sugar-flowers/
- ↑ https://www.youtube.com/watch?time_continue=19&v=femCg70LMoc&feature=emb_logo
- ↑ https://www.youtube.com/watch?time_continue=19&v=femCg70LMoc&feature=emb_logo
- ↑ https://www.cakesandsugarcraft.com/cake-chat/view/guide-to-food-colourings
About This Article
Advertisement