wikiHow is a “wiki,” similar to Wikipedia, which means that many of our articles are co-written by multiple authors. To create this article, volunteer authors worked to edit and improve it over time.
This article has been viewed 142,008 times.
Learn more...
In March 2016, Clip Studio Paint(Same as Manga Studio 5) version 1.5.4 released animation functions within the drawing program. This tutorial’s focus is on utilizing those functions to create an animation, not on how to make your own animations. This tutorial will be most useful for those who have some experience with digital art programs.There are two main parts in animating in CSP, cels and the timeline. Cels are special layers used for animation and the timeline is where you piece together the cels for the animation. If you'd like to know more specific functionalities for animation in CSP, please check out the official guide linked below. Note: CSP Pro and Debut only allow up to 24 frames, while Paint Ex gives unlimited frames.
Steps
-
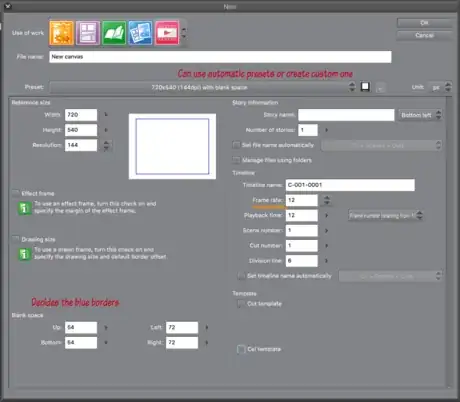
1Go to File > New and click on the red icon that has a play button in the use of work section.
- Choose the settings. The only ones that really matter are the size, resolution, frame rate, and size of the blue borders. Anything outside of the blue borders does not get exported.
-
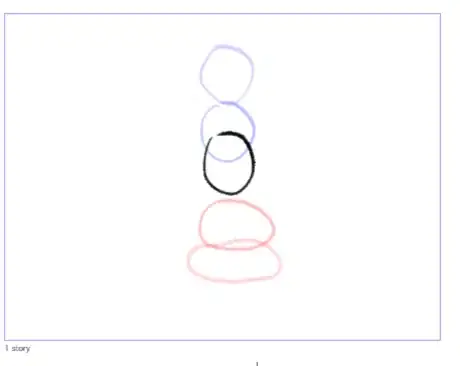
2Go to "Animation > Show Animation cells > enable Onion Skin". Alternatively, click the "Enable onion skin" icon on the timeline. This will show a translucent version of the frames before and after the one you're working on which makes it much easier to animate.
- You can change onion skin colors as well as the amount of frames seen by going to "Animation > Show Animation cells > Onion Skin settings..."
Advertisement -
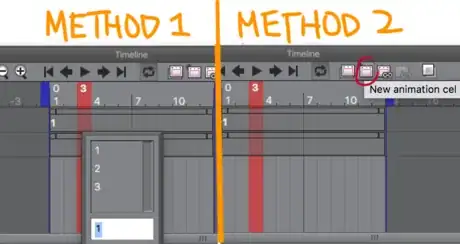
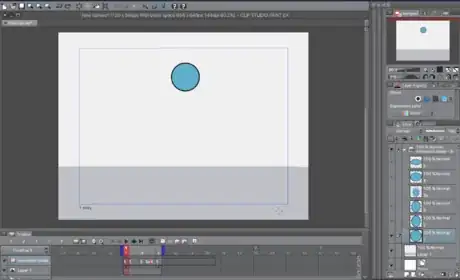
3Draw a ball falling over the sequence of several cels like the picture in step 2. Make a new cel by creating a new layer for the next drawing. You must assign each animation cel or folder to a frame before you can draw on it. You can do this by right clicking and selecting the cel or clicking on specify cels and selecting the cel. Alternatively, you can select the frame you want the animation cel to be on and click “new animation cel” and it will create a cel on that frame for you.
-
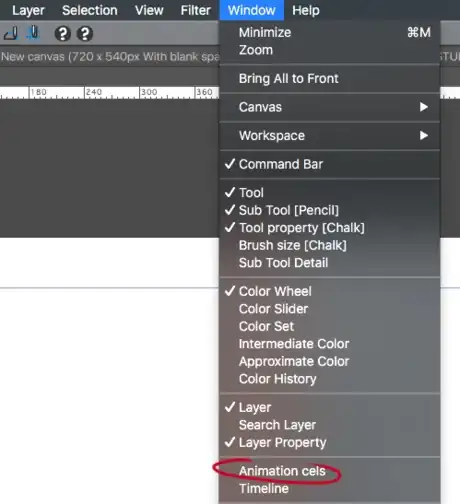
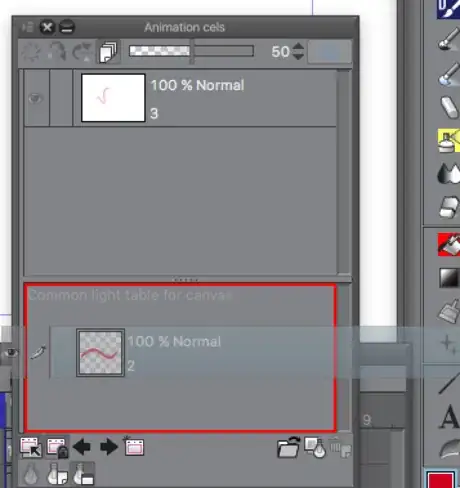
4(Optional) Go to "Window > Animation Cels" to get the animation cels palette. Click on “Enable Light Table” and then choose between common light table(shows for all the cels) and light table specific (only shows up when editing that specific cel). While this isn't needed for a simple animation of a ball falling, it is useful for referring to key frames and references to keep animations consistent
- Drag layers into the light table sections or import images to register that cel. This allows you to flip between specific frames.
-
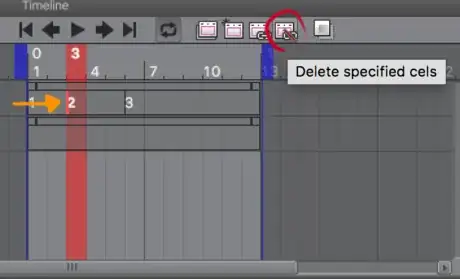
5Delete cels from the animation by clicking delete specified cels icon. This doesn’t actually delete the cel from the file, just removes it from the animation. You have to click at the beginning of the cel in the timeline in order to delete it or else the icon will be greyed out and unclickable.
-
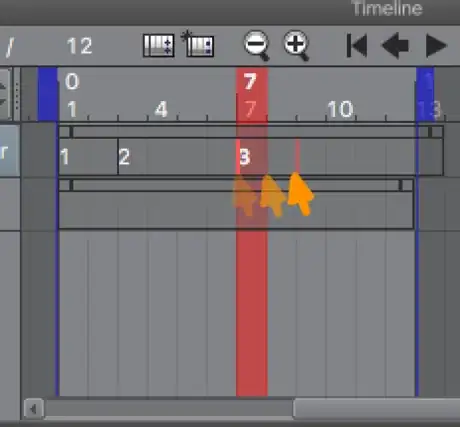
6Click on the side of the frame and drag to change the duration of frame. Make sure to do this for the paper and background layers when extending the duration or else they will be transparent later on.
- Adjust the blue lines which show the end and beginning of where you want to play. You can click loop play if you want to watch it over and over.
- Select specific cels by holding command. You can extend or shorten all at the same time.
-
7Create a new animation folder for the final lines and colors above your rough animation layer or go to "Layer > Create folder and insert layer" for each rough cel (You might want to make a shortcut or auto action to make this much quicker). If you choose the first method, you have to re-assign cels in the timeline to match that of your rough animation. If you choose the second method, make sure to hide or delete the rough animation cel.
-
8Export your animations as a .avi if you’re using Windows and .mov if you’re using Mac by going to "File > Export Animation >Movie... " Note that only the parts between the blue markers will be exported.
- You can export it as a gif as well, but keep in mind that the colors will be limited to 256 colors per frame. You can check the dithering option for a smoother blending, but it will increase the file size of your gif.
- You can export your animation cels by going to "File > Export Animation > Export animation cels…" All visible cels within the animation folders will be exported and separated into different folders depending on what animation folder it is.
Community Q&A
-
QuestionI use Manga Studio 5 and don't have the option to make an animation file. Where do I find it?
 Community AnswerEven though Manga Studio 5 and Clip Studio Paint are the same program, Manga Studio 5 wasn't updated to support animation. Therefore, you can't create animations in Manga Studio. However, you can download Clip Studio Paint for free and validate it with your old Manga Studio serial code, which will give you access to the animation features.
 -
QuestionWhy can I only make short animations?
 Community AnswerYou likely have Clip Studio Paint Pro or Debut. Unfortunately, these two editions of Clip Studio Paint will cap your animations at 24 frames. Clip Studio Paint EX removes this limit, but it's significantly more expensive than Pro or Debut.
