This article was co-authored by David Bitan. David Bitan is a roofing professional, licensed contractor, and the owner and founder of Bumble Roofing based in Southern California. With over 12 years of construction industry experience, David specializes in restoring, repairing, and maintaining residential, commercial, and industrial roofs. With over 60 years of combined experience, Bumble Roofing provides easy, friendly services to structures including residential, commercial, industrial, multi-family, and government buildings along with hospitals, hotels, and churches.
There are 15 references cited in this article, which can be found at the bottom of the page.
This article has been viewed 35,858 times.
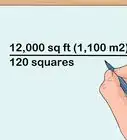
Aluminum roof coatings are a great way to protect flat asphalt and rolled roofs from deterioration and costly overheating. Despite their high-efficiency performance, most of these products are a cinch to apply. Start by sweeping the roof to remove accumulated dust and debris, using a pressure washer to eliminate stubborn messes if needed. Mix the liquid coating thoroughly and pour a small amount over 1 section of roofing, then use a roller to spread it into a thin, even coat. When you’re done, allow the coating to dry for up to 24 hours before venturing onto the roof.
Steps
Cleaning the Roof
-
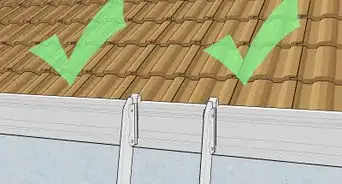
1Find your way onto the roof safely. If you're working on a multi-story commercial building, the safest way to get onto the roof is to use the roof access stairwell or ladder located on the side or rear of the building. For workshops, warehouses, and similar structures, it will be necessary to set up a portable ladder tall enough to clear the roof by a few feet. Once you're on top, tread carefully and stay a safe distance away from the edge of the building at all times.
- Have an assistant steady the ladder for you as you climb, and consider using a safety harness to avoid potential mishaps.[1]
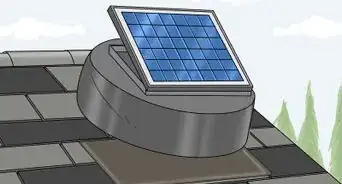
- Make sure you steer clear of air vents, skylights, and rotten or damaged patches.
- If you don't feel comfortable getting on your roof, hire a professional service to do it for you.[2]
-
2Gather up large pieces of debris by hand. Collect any leaves, twigs, or rocks you come across and place them in a garbage bag to dispose of later. That way, you can avoid littering the surrounding area. Anything too small to pick up can simply be swept off the roof during the next phase of cleaning.Advertisement
-
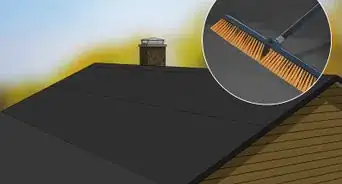
3Sweep the roof to remove dust and dirt. Make a few passes with a stiff-bristled push broom, working your way from 1 edge of the roof to the other. Try to remove as much loose debris as you can. Any lingering materials left behind may be visible in the new finish once it dries.
- If possible, sweep smaller debris off the rear or side of the roof where it will be less noticeable, rather than over an entrance or parking lot.
- Another option is to use a portable shop vacuum to suction up the dirt you come across.
-
4Use a pressure washer to clear away heavier buildup. If the surface of the roof is particularly dirty, you may need to try a more intensive cleaning method. Sweep the nozzle of a pressure washer over areas with stuck-on mud, mold, oil stains, or similar residue. When you’re done, switch to a lower setting (around 20 psi) and rinse off the loose mess.[3]
- A modest pressure setting of around 30-50 psi should be enough to get most smooth roofing materials spotless.[4]
- Specialty roof cleaning solutions may help cut through stubborn grit and grime.
-
5Let the roof dry. Following a pressure washing, you’ll want to give the remaining moisture time to evaporate. On a warm, clear day, this may only take 1-2 hours. However, you should be prepared to wait up to 24 hours, depending on weather conditions.
- If you’re getting started late in the day, take care of all the necessary cleaning and come back the following morning to finish applying the aluminum coating.


Repairing Damaged Areas
-
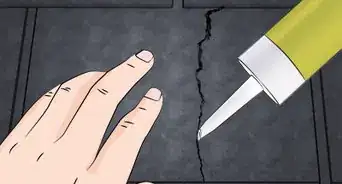
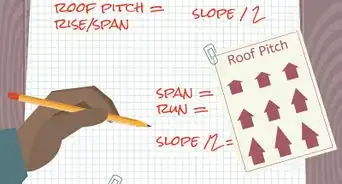
1Inspect the roof for damage. Walk the perimeter of the roof and look for holes, cracks, leaks, and heavily weathered spots along the surface.[5] These will need to be addressed before you begin applying the new roof coating. Most minor defects can be repaired with a quick-drying roofing cement or epoxy.[6]
-
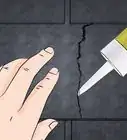
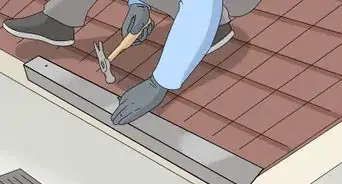
2Patch cracks and holes with roofing cement or a similar compound. Heap on as much compound as needed to fill each problem area, then use a putty knife or hand towel to spread it until it's smooth. When you're done, leave the compound to harden.[7]
- Some epoxies may require you to use special applicators.
- When repairing areas larger than 3–4 inches (7.6–10.2 cm) inches across, high-strength roofing mesh can be pressed into the fresh patching compound for added durability.[8]
-
3Allow the patching compound to dry. Most roofing cements begin to set up within 90 minutes, and fully harden in about 3 days. Warm, dry weather will help speed things along. To make the most efficient use of your time, let 1 spot begin drying while you patch the next.[9]
- To prevent blemishes that might affect the appearance of the finished roof, avoid handling the cement or epoxy while it's still wet.
- Refer to the label on the product you’re using for more specific drying instructions.
-
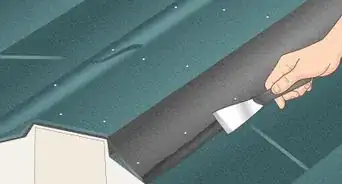
4Sand the patched section flat. Run a square of high-grit sandpaper (between 100- and 120-grit) over the dried compound using a smooth, circular motion. This will help wear down lumps and ridges and create a more uniform surface. Continue sanding until each of the areas you repaired matches the look of the surrounding roof.
- A power sander can save you some time when you've got a lot of ground to cover.
-
5Sweep the roof again. Another quick once-over will be necessary to clear away the dust generated by sanding. Once you're done, the roof will be ready for its new finish.
- If you'd prefer, you can can also rinse off the entire roof with a hose. Just make sure you give it as much time as needed to dry completely afterwards.


Mixing the Aluminum Roof Coating
-
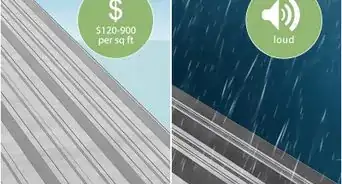
1Wait until exterior conditions are optimal to begin applying the coating. Plan your project for a stretch where there’s no rainfall expected for 24-36 hours. Fibered aluminum roof coatings provide the best coverage and dry fastest when outdoor temperatures are between 60–100 °F (16–38 °C) with low humidity.[10]
- Exposing the coating to excess moisture can result in a splotchy, inconsistent finish.
- Intense heat can also interfere with the coating’s ability to dry correctly.
-
2Equip yourself with protective clothing and accessories. Before you crack open the liquid aluminum coating, make sure you put on close-toed shoes, a pair of thick work gloves, and some protective eyewear. It may also be a good idea to change into a set of old clothes that you don’t mind ruining in case you get any of the coating on you.[11]
- If you have sensitive airways, consider strapping on a ventilator or breathing mask to filter out irritating fumes.
-
3Open the bucket of aluminum roof coating. Remove the lid from the bucket and set it aside. When you first look inside, you’ll likely notice a thin, black liquid resting at the top of the bucket. This is normal—separation occurs when the heavier aluminum particles sink to the bottom of the watery asphalt binder.
-
4Mix the roof coating thoroughly. Attach a mixing paddle head to your electric drill and insert it all the way to the bottom of the bucket. Run the drill on the lowest speed to gently stir the liquid coating. When properly blended, it will take on a shiny, uniform metallic color.[12]
- Be careful not to set the drill to too high a speed. This will just send aluminum splatters flying all over you and your work area.
- A paint stirrer, plunger, or similar device will also get the job done if you don't have access to a drill, though it may take more time to bring the coating to the right consistency.[13]


Rolling on the Coating
-
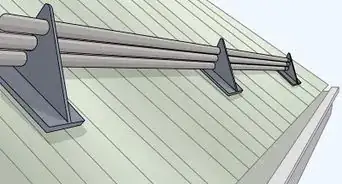
1Start in a far corner of the roof. From there, you can proceed across and down for total coverage. Work your way backwards toward your access point to avoid trapping yourself by accident.
- Make sure the rest of the rooftop is clear of any unneeded tools and materials.
-
2Pour the aluminum coating over a small section of the roof. Tip the bucket to drizzle about 1 quart (.95 L) over a strip 5–6 feet (1.5–1.8 m) in length. The creamy liquid coating spreads evenly, so avoid using too much at once. In order to work more efficiently, it’s best to pour and smooth a little at a time.[14]
- Try not to make a mess with the aluminum coating. It can be next to impossible to get out of clothing!
-
3Roll the coating into a thin, even layer. The most effective way to do this is by using a 3⁄4 inch (1.9 cm) nap roller. Glide the roller back and forth over the fresh coating, making all of your strokes in the same direction to keep the texture consistent. Cover 1 section of the roof completely before moving on to a neighboring section.
- Check to make sure there are no gaps or lines in the new finish.
- A long-handled roller will enable you to apply the coating over broader areas without the strain of bending and stooping.[15]
-
4Continue pouring and rolling until you’ve coated the entire roof. Proceed towards the roof’s opposite corner, blending the edges of each section so that they run together seamlessly. Afterwards, all that’s left to do is wait for the coating to dry.
- Remove all unneeded tools and equipment off the roof before you finish up the final section.
-
5Let the finish dry to the touch. Before you can turn your attention to fine detailing, the aluminum coating needs to be stable enough to walk on. It will usually reach this state within 5-8 hours, but it may take slightly longer if the weather outside is particularly cool or damp. In the meantime, avoid going onto the roof for any reason.[16]
- Any mistakes made while the finish is still fresh will be much harder to correct.
-
6Go over out-of-the-way areas by hand. To touch up less accessible surfaces, it may help to swap your roller out for a handheld brush. Dip the brush into the aluminum coating and use the tip to fill in corners, crevices, and recesses. A paintbrush can also be useful for working around antennas, skylights, brackets, air conditioning units, and other tricky rooftop fixtures.[17]
- Brush with long, linear strokes to prevent leaving drips in the dried finish.[18]
-
7Allow the new coating to cure completely. It may take up to 24 hours to harden to the point where it can successfully protect against moisture, pressure, and heat. Once the coating has had ample time to dry, it will seal, protect, and extend the lifespan of your roof.[19]


Expert Q&A
-
QuestionHow do you know if your roof is damaged?
 David BitanDavid Bitan is a roofing professional, licensed contractor, and the owner and founder of Bumble Roofing based in Southern California. With over 12 years of construction industry experience, David specializes in restoring, repairing, and maintaining residential, commercial, and industrial roofs. With over 60 years of combined experience, Bumble Roofing provides easy, friendly services to structures including residential, commercial, industrial, multi-family, and government buildings along with hospitals, hotels, and churches.
Roofing Contractor & Maintenance ProfessionalWalk the perimeter of your roof to check for damage. Look for holes, cracks, weathered spots, or leaks in the surface of your roof.
Warnings
- Fibered aluminum roof coating products are highly flammable, and should not be applied or stored near an open flame.⧼thumbs_response⧽
Things You'll Need
- Fibered aluminum roof coating
- Long-handled 3⁄4 inch (1.9 cm) nap roller
- Handheld roof brush
- Electric drill w/ mixing paddle attachment
- Stiff-bristled broom
- Pressure washer
- Roofing cement or epoxy (optional)


References
- ↑ https://www.bhg.com.au/roof-work-safety
- ↑ David Bitan. Roofing Contractor & Maintenance Professional. Expert Interview. 14 July 2020.
- ↑ https://www.youtube.com/watch?v=6E1xWEpHVWg&feature=youtu.be&t=34
- ↑ https://www.homeadvisor.com/cost/cleaning-services/clean-a-roof/
- ↑ David Bitan. Roofing Contractor & Maintenance Professional. Expert Interview. 14 July 2020.
- ↑ http://pdf.lowes.com/howtoguides/027134517556_how.pdf
- ↑ https://www.bobvila.com/articles/roof-leaking-repair/
- ↑ https://www.youtube.com/watch?v=Qp4LyydLIxM&feature=youtu.be&t=207
- ↑ https://www.paintdocs.com/docs/webPDF.jsp?SITEID=UNIFLEX&prodno=KST058600&doctype=PDS&lang=E
- ↑ http://pdf.lowes.com/howtoguides/027134517556_how.pdf
- ↑ https://www.homedepot.com/catalog/pdfImages/be/be7e4b17-1c1f-4a2c-a667-9f416d0bc712.pdf
- ↑ https://www.youtube.com/watch?v=6E1xWEpHVWg&feature=youtu.be&t=58
- ↑ http://www.nytimes.com/1991/08/25/nyregion/home-clinic-preserving-a-flat-roof.html
- ↑ https://www.youtube.com/watch?v=6E1xWEpHVWg&feature=youtu.be&t=71
- ↑ https://www.youtube.com/watch?v=6E1xWEpHVWg&feature=youtu.be&t=77
- ↑ https://www.nationalcoatings.com/roof-coating-questions
- ↑ http://pdf.lowes.com/howtoguides/027134517556_how.pdf
- ↑ https://www.homedepot.com/catalog/pdfImages/13/13ed4f70-6e41-4e53-bd62-c422eced202b.pdf
- ↑ https://www.nationalcoatings.com/roof-coating-questions
About This Article