This article was co-authored by wikiHow Staff. Our trained team of editors and researchers validate articles for accuracy and comprehensiveness. wikiHow's Content Management Team carefully monitors the work from our editorial staff to ensure that each article is backed by trusted research and meets our high quality standards.
The wikiHow Video Team also followed the article's instructions and verified that they work.
This article has been viewed 64,712 times.
Learn more...
You can apply glitter to just about anything, from wooden boxes to glass mason jars. It is an easy project that even beginner crafters can do. Getting glitter to stick to smooth, glossy surfaces, such as plastic, can be tricky. With the right technique and materials, however, you can get a durable finish. If you take good care of the item, the glitter can last a long time.
Steps
Using Decoupage Glue
-
1Clean the item with soap and water, if possible. Wash the item in the sink using soap and warm water. If the item can't get wet (i.e. headphones), wipe it down with a damp cloth instead. If you are going to apply glitter to a phone case, pop the case off of the phone first.
-
2Mask off the areas that you do not want glittered. Use painter's tape if you want straight lines, or stencils/stickers if you want silhouettes. You can also cut painter's tape into waves or zigzags for a unique twist.
- Smooth down the edges of your tape/stencil/sticker with your fingernail.
Advertisement -
3Buff glossy items with sandpaper. You don't have to do this if the plastic is matte or textured. If the item is glossy or shiny, however, you should sand it with fine-grit sandpaper. This will take away the smooth finish and give the glue something to stick to.[1]
- Be careful not to sand over any areas that you masked off, otherwise you might end up with a fuzzy line.
-
4Wipe the item down with rubbing alcohol. Soak a paper towel, tissue, or cotton ball in rubbing alcohol. Use this to wipe down the entire surface of your item. This will remove any oils and residues that might prevent the decoupage from sticking. It will also remove any sanding dust, if you sanded the item.
- You should do this even if you cannot wash the item. There is not enough rubbing alcohol to damage the item.
-
5Apply a thick coat of glossy decoupage glue, then brush it smooth. Use a paintbrush or a foam brush to apply a thick coat of glossy-finish decoupage glue (i.e. Mod Podge) to the item. Run your brush over the surface again to remove any brushstrokes.
- If you are covering the entire item with glitter, consider coating just half of it with glue for now. This way, you'll have something dry to hold on to.
- If you are covering a plastic cup, stick your hand into the cup. This way, you can coat all of the sides without getting your hands dirty.
- You can also try using regular white school glue or even acrylic craft paint. Keep in mind that you won't be able to apply a second layer with paint, or you will dull the glitter.
-
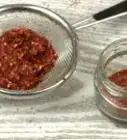
6Shake a generous amount of glitter onto the item. Rotate the item to make sure that you are coating all of the edges. To make cleaning up easier, work over a sheet of paper that's been creased down the middle. This way, once you are done, you can funnel the glitter back into its jar.
- Extra-fine glitter will look more professional, but you can use the standard chunky kind too.
-
7Wait 1 to 2 hours, then add a second coat, if needed. Sometimes, the first coat of glitter is not enough. If the item's original surface is showing through the glitter, you might want to add a second coat. Wait 1 to 2 hours for the first coat to dry, then apply more decoupage glue and glitter over the entire item.
- You can use a different type of glitter to create an interesting texture. For example, if you used chunky glitter at first, you can use extra-fine glitter this time.
- Do not add a second layer if you used paint, or you will dull the glitter down.
-
8Let the glitter dry, then repeat the process for the other sides. You only need to do this if you are glittering a multi-sided object. Apply the decoupage glue to the item first, then shake glitter onto it. Let it dry for 1 to 2 hours, then add a second coat of glue and glitter, if needed. Let the item dry completely before proceeding.
- If your are applying glitter to just 1 side, you can skip this step and move onto the next one.
-
9Remove any painter's tape, stencils, or stickers. Peel the tape straight up, and avoid dragging it across the surface. If you drag it across the surface, you risk peeling the glitter off. If you do get a chip, fill it in using a thin, pointed brush and decoupage glue, then sprinkle glitter over it.
- Use a dry paintbrush to brush any stray bits of glitter from the un-glittered parts of your item.
-
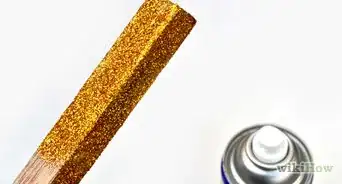
10Apply 2 coats of clear, glossy sealer. You can use glossy decoupage glue for this step, or you can use another type of glossy sealer. Apply the first coat, let it dry, then add a second coat.
- If you masked off any areas previously, extend the sealer just past the glittered edges. This will seal the glitter onto the item and prevent flaking.
-
11Let the item dry and cure completely before using it. Most decoupage glues will dry to the touch after several hours. Some of them need to cure for several days before they are ready to use. This can be as little as 3 to 7 days, or as long as 28 days. Check the label on your decoupage glue to find out the exact drying and curing times.
- Do not use the item before it has finished curing. It may turn sticky, or the glitter may peel off.


Using Double-Sided Tape
-
1Find an item with straight, smooth sides. Items such as cups, phone cases, jars, and plastic Easter eggs work great for this. Items with lots of details, bumps, or ridges, such as toys and figurines, are not recommended. Keep in mind that the glitter coverage tends to be sheer with this method.
- If you don't want the coverage to be sheer, match the item color to the glitter color.[2]
-
2Wipe the item down with rubbing alcohol. Soak a tissue, paper towel, or cotton ball with rubbing alcohol. Wipe it over the surface of your item to remove any surface dirt or oils. This will help the tape stick better.
-
3Find some double-sided tape. You can use the double-sided tape that is sold alongside other types of scotch tape. You can also use scrapbooking double-sided tape, which comes in different widths and has a protective covering on the front. This will allow you to make strips that are different widths.
- Do not use foam mounting tape or foam tape. It is too thick.
- You can also use other types of double-sided adhesives, such as sheets, scrolls, or dots.[3]
-
4Wrap the tape around your item, then cut off the excess with scissors. You can wrap the tape anywhere around the item you want: top, bottom, middle, etc. You can even create patterns, such as horizontal, vertical, or diagonal stripes.[4]
- If your double-sided tape has a protective covering, smooth the tape down first, then peel the covering off.
- If you want to use more than 1 color of glitter, lay down the strip for the first color for now.
-
5Shake extra-fine glitter onto the item. Rotate the item as you are shaking glitter onto it so that the taped parts are all covered. The extra glitter will collect under the item. If you want to, you can even roll the item across this excess glitter.[5]
- Work on top of a piece of paper that's been creased down the middle. When you are done, use the paper to funnel the glitter back into its jar.
- You can use the regular chunky glitter, but extra-fine glitter will stick to the tape much better.
-
6Tap your finger against the glittered parts to secure it. If you see any bare spots, you can simply sprinkle more glitter over them. If you got any glitter outside of the tape, use a dry paintbrush to gently brush it off. Use a large brush for large areas, and a small brush for tight corners and curves.[6]
-
7Apply more strips for other colors, if desired. You can stop here, or you can lay down additional strips of tape to add more colors of glitter to your item. Remember to use your folded paper to funnel the glitter back into its jar before you move onto a different color. This way, you won't mix colors.
-
8Seal the glitter, if desired. This method is not as durable as using decoupage glue, so expect there to be some shedding. You can try sealing the glitter in with a glossy-finish sealer, but avoid using too much, or you risk diluting the adhesive on the tape.
- Brush or spray on 1 to 2 thin coats of sealer. Let each coat dry before adding a second coat.


Community Q&A
-
QuestionCan I use hairspray to apply the glitter?
 Community AnswerAfter gluing glitter to the paper, you can use hairspray to stop it from shedding. Keep in mind that the hairspray layer can yellow over time. Hair spray alone does not have enough body to hold glitter on paper.
Warnings
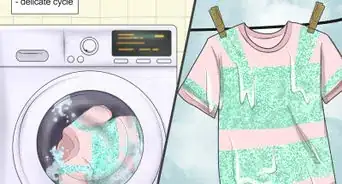
- Do not wash items if you used tape to adhere the glitter. The tape will come off.⧼thumbs_response⧽
- Do not place glittered items into the dishwasher. The glitter will fall off.⧼thumbs_response⧽
- Do not soak decoupaged items. You can wipe the surfaces down with a damp cloth, but don't leave them standing in water.⧼thumbs_response⧽
Things You'll Need
Using Decoupage Glue
- Plastic item
- Rubbing alcohol
- Fine-grit sandpaper
- Painter's tape
- Paintbrushes
- Extra-fine glitter
- Decoupage glue (glossy)
- Acrylic sealer (optional, glossy)
Using Double-Sided Tape
- Plastic item
- Double-sided tape
- Extra-fine glitter
- Paintbrush
- Acrylic sealer (optional)

References
- ↑ https://abeautifulmess.com/2015/04/make-your-own-glitter-sunglasses.html
- ↑ http://www.theinspiredhostess.com/create/diy-glitter-easter-eggs
- ↑ http://www.theinspiredhostess.com/create/diy-glitter-easter-eggs
- ↑ https://somethingturquoise.com/2013/02/01/diy-martha-stewart-glittered-glass-jars/
- ↑ https://somethingturquoise.com/2013/02/01/diy-martha-stewart-glittered-glass-jars/
- ↑ https://somethingturquoise.com/2013/02/01/diy-martha-stewart-glittered-glass-jars/
- ↑ http://rosyscription.com/2014/02/my-essential-tips-for-crafting-with.html
- ↑ http://rosyscription.com/2014/02/my-essential-tips-for-crafting-with.html
- ↑ http://rosyscription.com/2014/02/my-essential-tips-for-crafting-with.html
About This Article