This article was co-authored by wikiHow Staff. Our trained team of editors and researchers validate articles for accuracy and comprehensiveness. wikiHow's Content Management Team carefully monitors the work from our editorial staff to ensure that each article is backed by trusted research and meets our high quality standards.
There are 7 references cited in this article, which can be found at the bottom of the page.
wikiHow marks an article as reader-approved once it receives enough positive feedback. In this case, 90% of readers who voted found the article helpful, earning it our reader-approved status.
This article has been viewed 159,532 times.
Learn more...
Glitter is a quick, cheap, and easy way to add sparkle, color, and texture to your craft projects. When applying glitter to wood, you want to seal in the glitter so it won’t fall off and you want an adhesive that is durable. You can use either paint, glue, or a spray on adhesive with your project and then add glitter before the adhesive dries. You can make your project as glittery as you like with these methods.
Steps
Getting Started
-
1Gather your materials. There are a number of different adhesive products that you can use to apply glitter. You can either use glue, spray adhesive, paint, or decoupage. You can either use a foam wedge or an inexpensive paintbrush to apply the glitter.
- You can purchase these materials at a craft store or a large retailer.
- You can sprinkle the glitter on the wood using your hands or a shaker that has large holes.
-
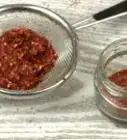
2Make a glitter station. Glitter has a reputation for making a mess so you’ll want to make a glitter station that is easy to clean. Ideally, you could work outside so you don’t have to worry about cleaning glitter from carpet or your furniture. For your glitter station, you’ll need to select the products that you want to use for your project. Use a cardboard box if you are working with larger pieces of wood. You can use a paper plate for smaller projects.[1]Advertisement
-
3Prepare the wood. The wooden item that you want to add glitter to can be in a variety of shapes in sizes. Sanded and smooth wood will allow the glitter to adhere evenly, though you can use non-sanded wood to create a more rugged design.
- You can sand the wood using a piece of fine-grained sand paper if you desire.
-
4Create your design area. You can section off areas of the wooden object to create glitter designs. If you intend to add glitter to the entirety of the wooden object, there is no need to do this. You will use clear tape to section off areas of the object that you do not want to glitter.
- You can use adhesive stencils to create designs with the glitter.
- You could use stickers to leave certain shapes un-glittered, like a heart or a star.


Using a Spray Adhesive
-
1Purchase spray adhesive. For this method, you will need to purchase a spray adhesive. Make sure to find a spray adhesive that dries clear. You will want to work with spray adhesive outdoors, since it can contain chemicals that are harmful to breathe.
- You can find spray adhesive at any craft store or major retailer.
- If you are unable to work outside, work in a well-ventilated area.
-
2Spray the surface of the wooden object. Be sure to follow any special directions from the manufacturer, if applicable. Hold the spray adhesive can a few inches away from the wood and press down on the top of the can to spray the wood.
-
3Apply glitter to the wet adhesive. While the adhesive spray is still wet on the wood, sprinkle your glitter over the area. The amount of glitter that you use will determine how sparkly the wood is.
- You can either sprinkle the glitter onto the area with your hands, or use a foam wedge or paintbrush to apply the glitter.
-
4Wait for the adhesive to dry. The drying time will depend upon the specific adhesive spray that you use, but it should only take a few minutes for the area to completely dry.
-
5Seal the glitter in. If you’d like, you can apply a sealant, like decoupage, to the area. The sealant will add smoothness and will help to prevent the glitter from falling off. Choose a sealant that has a glossy finish, not matte, so your glitter doesn’t lose any of its sparkle.[2]
- Once the adhesive spray is dry, you can shake off any excess glitter into your cardboard box.


Using Glue to Adhere Glitter
-
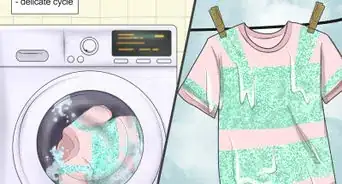
1Use white glue to attach glitter. You can also use basic white glue to apply glitter. You can use either a glue stick or a glue bottle. White glue is typically washable, meaning that it is water-soluble. Do not use white glue if you think that the wooden object will get wet, like if you intend to leave it outdoors.
-
2Apply a thin layer of glue. You can either use the squeeze bottle to directly apply the glue to the wood, or you can paint it on using a foam wedge or paintbrush. With a glue stick, you can apply the glue directly to the wood.
- Thicker layers of glue will appear raised when they dry. This might look best for your project, or you might prefer a flatter glittered area.
-
3Dust glitter onto the glue. You can dust the wet glue with glitter, covering as much or as little of the wood as you'd like.
-
4Let dry. The glue will dry clear so only the glitter will remain. The actual time it takes for the glue to dry will depend upon how thick of a glue layer you’ve applied.
- Apply a sealant, if desired. Like with the spray adhesive method, you can use a spray sealant to smooth your dried glitter. This will help to prevent glitter from falling off, and eliminates some of the rough texture.


Painting on Decoupage to Apply Glitter
-
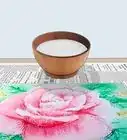
1Use decoupage gloss sealer. Decoupage gloss sealer is a crafting product that is used to seal small pieces, like glitter or a piece of fabric, under a clear and durable gloss. You can find decoupage gloss sealer, which you may find packaged as ‘gloss sealer’, at craft stores.[3]
- Choose a decoupage gloss sealer that is acrylic if you need a more heavy-duty seal.
- Be sure to purchase a glossy finish sealer; matte sealers will dull your glitter’s shine on the finished product.[4]
-
2Paint a layer of decoupage gloss sealer. While working in your glitter station, use an inexpensive paintbrush to paint a layer of decoupage gloss sealer to the wood. Be sure to only paint the areas that you want glitter to adhere to.
- Make sure that the paintbrush doesn’t leave streaks while you are painting. You want the layer of gloss sealer to be evenly applied on the wood.[5]
-
3Sprinkle glitter over the wet gloss. While the gloss is still wet, sprinkle glitter onto the wood. You can use as much, or as little, glitter as you’d like.
- Feel free to add a second layer of gloss over the glitter. This acts as a sealant and helps to prevent prevents glitter from falling off.
-
4Let dry. Let your newly glittered piece dry. Depending on how many layers of decoupage gloss sealer you’ve added, drying times will vary.


Applying Mod Podge to Your Project
-
1Use Mod Podge. Mod Podge is one of the most recognizable crafting supplies on the market. It is similar to glue, but it also seals and adds a finish. There are a number of different finishes that you can choose. For a glitter project, you should use either the Classic Gloss or the Hard Coat finish.[6]
- Hard Coat finish is best for objects that are going to be handled frequently and is the most durable.[7]
-
2Paint on a thin layer of Mod Podge. Using a cheap paintbrush or a foam wedge, apply a thin coat of Mod Podge to the area of the wood that you want to glitter.[8]
-
3Add glitter. While the Mod Podge is still wet, either sprinkle or use a foam wedge to add glitter. You can add as much or as little glitter as you’d like.
-
4Let dry. Mod Podge has to ‘cure’ to dry. This means that while it might feel dry to the touch after an hour, it still needs several more hours before you should handle the wood. Hard Coat Mod Podge takes 72 hours to cure, so leave your newly glittered item in a safe place while it is curing.


Using Paint to Adhere Glitter
-
1Use a craft paint. Acrylic paint is a good choice but many paints will work, just as long as they have a thicker consistency. Thin paints like watercolors should not be used, since they are not thick enough to adhere glitter.
-
2Paint the wood. Using a paintbrush, add a layer of paint to the area of wood you want to glitter.
- If the wooden item is large, it's a good idea to paint it in sections and then apply glitter to each section. This helps to avoid the possibility that the paint dries before you have a chance to add glitter.
- Sprinkle the glitter onto the wet paint.
-
3Let the paint dry. The glitter will set in place with the paint. You can either leave the project as is or add another coat of paint and glitter.
- This method can either add a subtle sparkle, or you can apply a thick layer of glitter for a more striking effect.


Spraying on Glitter
-
1Use spray-on glitter. You can also use a can of spray-on glitter to add shine and sparkle to your wooden projects. Spray-on glitter cans can be found at craft stores and some major retailers.
- Do not use spray-on glitter indoors, especially in an area that is not well ventilated. If possible, work outdoors.
-
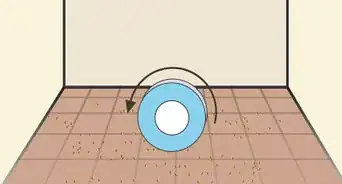
2Spray the glitter onto wood. This will directly apply the glitter to the wood and use a sealant to attach it. You can sprinkle additional glitter onto the wood while the spray is drying, or leave it as is.[9]
-
3Spray on another layer of glitter. Once the first layer of glitter has dried, you can spray on additional layers of glitter. You can add as many layers as you'd like, but let the adhesive dry in between applications. The more layers you apply, the thicker the application will be and your project will be more glittery.


Community Q&A
-
QuestionCan I mix glitter with latex paint for a wall?
 Community AnswerThe paint will coat the glitter and you will end up with paint that has grit but no glitter.
 -
QuestionDoes adding glitter to a painted wall damage it?
 Community AnswerYou can add glitter into paint without damaging the wall. Thoroughly mix the glitter into the paint so it will be evenly spread across the surface. Glitter will not damage existing paint on the wall, and it won't damage the underlying structures of the wall.
 -
QuestionDo I need to seal the wood if I use Mod Podge to glitter it?
 Deepa AnandCommunity AnswerMod Podge works as a sealer, so you need not separately seal the wood if you are using Mod Podge and glitter. Just apply a thin layer of Mod Podge over the glittered wood once it is dry to seal it and provide a glossy look.
Warnings
- Avoid using hairspray to attach glitter to your wooden product. When hairspray is used as a fixative, it will yellow over time.⧼thumbs_response⧽


References
- ↑ http://somethingturquoise.com/2013/07/26/diy-glittered-wooden-spoon-favors/
- ↑ http://rosyscription.com/2014/02/my-essential-tips-for-crafting-with.html
- ↑ http://www.prettyprudent.com/2010/08/hot-mess/tips/confessions-of-an-adhesive-sealant-junkie-2/
- ↑ https://www.createforless.com/buying-guides/crafts/decoupage.aspx
- ↑ http://somethingturquoise.com/2013/07/26/diy-glittered-wooden-spoon-favors/
- ↑ http://modpodgerocksblog.com/learn-how-to-mod-podge
- ↑ http://modpodgerocksblog.com/2009/07/mod-podge-formula-guide-youve-been.html
- ↑ http://rosyscription.com/2014/02/my-essential-tips-for-crafting-with.html
- ↑ https://www.loveandlavender.com/2014/09/how-to-diy-glitter-letters-wedding/
About This Article

Applying glitter to wood is an easy way to give it some sparkle. To apply the glitter, you’ll need a spray adhesive, school glue, Decoupage, Mod Podge, or acrylic paint. All you need to do is paint or spray your wood with your adhesive to help the glitter stick, then, sprinkle your glitter on top. It's best to sand your wood first to help the glitter stick evenly, but you don't need to. You can also use stencils to make shapes out of glitter. Alternatively, place a sticker on the wood, glue glitter all around it, then remove the sticker to leave the shape inside the glitter. Don’t forget to lay down some newspaper before you start so you don’t get glitter everywhere. For more tips, including how to use spray-on glitter, read on!