This article was co-authored by wikiHow Staff. Our trained team of editors and researchers validate articles for accuracy and comprehensiveness. wikiHow's Content Management Team carefully monitors the work from our editorial staff to ensure that each article is backed by trusted research and meets our high quality standards.
This article has been viewed 63,800 times.
Learn more...
Plumbers putty is a commonly used supply in plumbing projects. It is probably most often used to put together sinks and seal them to prevent water leaks. By cleaning properly, warming up the putty, and pressing it into place, you can apply putty like a pro!
Steps
Molding the Putty into Shape
-
1Purchase plumbers putty at a home supply or hardware store. Most local or chain stores, like Home Depot, should carry plumbers putty. Different brands use slightly different ingredients. Putty marked as stain-free should be safe to use on any material. Ask someone in the store if you have specific questions about your project.[1]
-
2Warm the putty in your hands until it is soft and malleable. When first out of the can, putty is usually cold and hard. Take a handful of it and roll it into a ball. Rub it between your palms quickly and firmly. Stop once you’re able to pull and stretch the putty easily.[2]Advertisement
-
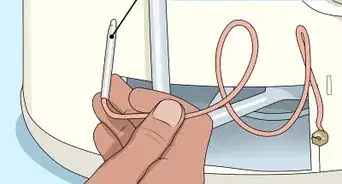
3Stretch putty into a long, skinny shape. Now that your putty is warm, stretch it until it is long enough to cover the area you need to apply it to. If long and skinny putty won’t fit over your surface, mold it into a shape that will.[3]


Applying the Putty
-
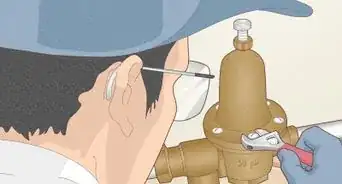
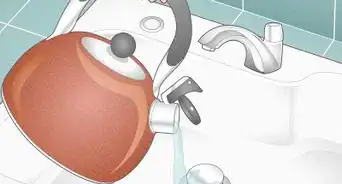
1Clean the surface you’ll put the putty on. Plumbers putty needs to be applied to a clean area. Wash the surface you’ll be applying the putty to with soap and water. If you’re applying the putty to an old fixture, go over it several times until it is free of any dirt.[4]
-
2Dry the surface with a rag or towel. Plumbers putty will not stick well to a wet area. Make sure the towel or rag you use is clean so you don’t get your surface dirty again while drying it.[5]
-
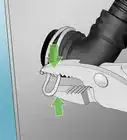
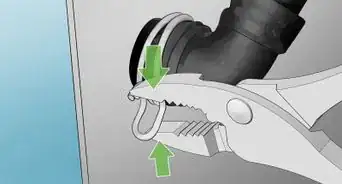
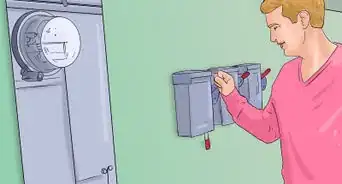
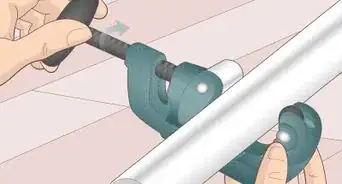
3Disassemble parts if necessary. If you're using putty to fix a leak, you will need to take apart some parts to access the area where putty is needed. Usually, putty is used on toilets and drains. For toilets, loosen the bolts at the base and gently remove the bowl from the floor.[6] For drains, undo the nuts under the sink and push up on the drain to remove it from the base of the sink.[7]
- You can often find step-by-step disassembly guides online for different types and models of fixtures.
-
4Spread putty around the surface you need it on. In many cases, putty is put on a circular area, like the drain of a sink. Wrap the putty around the circle and make sure you don't leave any gaps. Do not wrap the putty into multiple layers. If you are not applying putty to a circular surface, still use just one layer and leave no gaps.[8]
-
5Press the putty firmly into place. Use your fingertips to apply pressure and stop when the putty seems secure. It will be tightened into place even further later, but now you’re making sure it will hold its position while you press into a drain fixture or anything else you need it for.[9]
-
6Set fixture where it belongs and tighten into place. For sink drains, for instance, you will press the drain into the base of the sink and tighten it underneath using a bolt and channel locks.[10] For toilet bowls, spread the putty around the base of the toilet, where it will touch the floor. Touch your fixture to make sure it isn’t loose at all.[11]


Cleaning and Maintaining Putty
-
1Clean away excess putty. When setting a plumbing fixture in place, excess plumbers putty usually seeps out from the sides. Use any rag or towel you’d like to wipe up this excess putty and discard it.[12]
-
2Wash area with soap and water. Now that you’re done using the putty, you will want to make sure you leave a clean area behind. Scrub your work area with a soapy sponge to make sure there are no residual traces of the putty.[13]
-
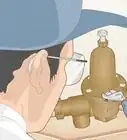
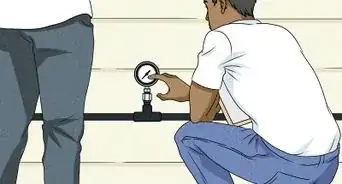
3Disassemble parts and apply new putty if you notice leaks. If you notice water seeping out from under your toilet or your drain, you may need new plumber’s putty. If so, take apart your fixture, remove the existing putty thoroughly, and reapply new putty.[14]
- If new plumber’s putty does not fix the problem, investigate other sources for the leak, such as broken gaskets or seals.


References
- ↑ https://www.youtube.com/watch?v=z_ivmNSNn0Q
- ↑ https://homesteady.com/how-5585002-apply-plumber-s-putty-kitchen-faucet.html
- ↑ https://homesteady.com/how-5585002-apply-plumber-s-putty-kitchen-faucet.html
- ↑ https://homesteady.com/how-5585002-apply-plumber-s-putty-kitchen-faucet.html
- ↑ https://homesteady.com/how-5585002-apply-plumber-s-putty-kitchen-faucet.html
- ↑ https://www.youtube.com/watch?v=SlxzltjozDs
- ↑ https://www.youtube.com/watch?v=uEDzclejkLY
- ↑ https://homesteady.com/how-5585002-apply-plumber-s-putty-kitchen-faucet.html
- ↑ https://homesteady.com/how-5585002-apply-plumber-s-putty-kitchen-faucet.html
- ↑ https://homesteady.com/how-5585002-apply-plumber-s-putty-kitchen-faucet.html
- ↑ https://www.youtube.com/watch?v=SlxzltjozDs
- ↑ https://homesteady.com/how-5585002-apply-plumber-s-putty-kitchen-faucet.html
- ↑ https://homesteady.com/how-5585002-apply-plumber-s-putty-kitchen-faucet.html
- ↑ https://www.youtube.com/watch?v=SlxzltjozDs
About This Article

Plumber’s putty is a great product for sealing projects and preventing water leaks. Before you use plumber's putty, clean the area with soapy water and dry it with a clean rag. Take out your putty and roll it in your palms to warm it up and make it more malleable. Then, stretch it into a skinny shape until it’s long enough to cover the area you want to seal. Apply the putty in one layer, pressing down firmly, and don’t leave any gaps. If you’re sealing a sink drain, push the drain into its base on top of the putty and tighten the drain. Clean any excess putty off with a rag and throw it away. For more tips, including what to do if your putty leaks, read on!