This article was co-authored by Melanie Garcia. Melanie Garcia is the Co-Owner of Oranges & Lemons, a small, family cleaning business based in Downtown Los Angeles, California (DTLA) in operation for over 40 years. Oranges & Lemons operates while partnering with the National Domestic Workers Alliance and Hand in Hand: Domestic Employers Network.
There are 8 references cited in this article, which can be found at the bottom of the page.
This article has been viewed 34,740 times.
If you've noticed a chip or crack in your ceramic sink, don't worry! You can use epoxy for a quick and easy way to repair the surface. In this article, we'll walk you through the entire process, starting with how to clean and prep the ceramic surface. Then, we'll explain how to mix and apply epoxy to fill in any minor cracks and chips. If you're ready to fully restore your ceramic sink so it looks brand new again, read on.
Steps
Cleaning the Sink
-
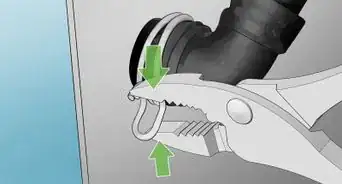
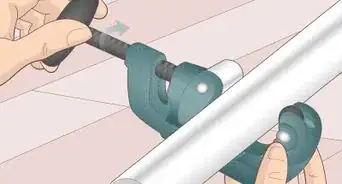
1Sand the edges of the chip or crack to smooth them out. Use a very fine-grit sandpaper, such as 400-grit sandpaper. Lightly rub a piece of sandpaper back and forth over the damaged area, feeling it with your fingertips as you go, until you don’t feel any sharp edges.[1]
- You can skip this if the damage is very minor, such as a hairline crack that doesn’t have sharp edges.
-
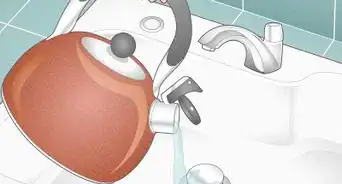
2Clean the area to remove any loose debris from the chip or crack. Scrub the damaged area with an abrasive cleaner like Ajax and a scrubbing pad or the scrubbing side of a sponge. Rinse the sink thoroughly with water from the tap.[2]
- This will ensure a clean surface for the chip and crack filler to adhere to and form a strong bond.
Tip: You can use the sharp tip of a pin or needle to scrape out hairline cracks or brush very small chips out with an old stiff-bristled toothbrush to remove any pieces of ceramic or dirt that are stuck in them.
Advertisement -
3Wipe the sink down with a towel and let it dry for at least 1 hour. Use a paper towel or a clean absorbent cloth to wipe away all the excess moisture in the sink after rinsing it. Leave the sink to air dry for at least 1 hour before you apply the repair epoxy.[3]
- Don’t ever apply chip repair epoxy to a wet surface or it will not cure correctly.


Mixing the Epoxy Repair Kit
-
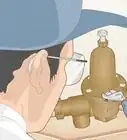
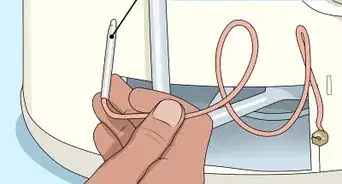
1Purchase a porcelain and ceramic epoxy chip repair kit. Buy a generic white repair kit if your ceramic sink is a standard white color. Get a kit that allows you to mix pigments to create custom colors if your sink is an off-white color.[4]
- Porcelain and ceramic chip repair kits come with 2 vials containing liquids that you mix together to create the epoxy filler, as well as a brush you can use to mix and apply the product.
- You can buy these repair kits at a home improvement center, hardware store, or online.
-
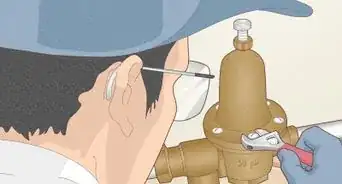
2Mix together the 2 parts of the epoxy chip repair kit. Open up the package and set the rigid plastic front piece on a flat work surface to use as a mixing tray. Empty the contents of both vials into the tray, using the provided brush to scrape out any liquid that sticks in the vials. Use the brush to mix the liquids thoroughly in the tray for at least 1 minute.[5]
- Read the instructions on the packaging and defer to the manufacturer’s instructions for any specific directions about how to mix the epoxy.
Tip: If you purchased a kit that has pigments you can use to alter the color of the epoxy, mix in the appropriate color of pigment 1 drop at a time until you get a match. For example, if your sink is light green, mix in a drop of green pigment until the epoxy looks like the right color.
-
3Let the epoxy sit at room temperature for 30 minutes. Leave the tray with the mixed epoxy sitting on your work surface for half an hour so the epoxy starts to cure. This will make it thicker and easier to apply to fill in chips and cracks.[6]
- Again, defer to the manufacturer’s instructions for the specific repair product you purchased for directions about exactly how long to wait before applying the epoxy.


Filling in Chips and Cracks
-
1Use the kit’s brush to apply a thin coat of epoxy to hairline cracks. Dip the tip of the brush into the tray to cover it in epoxy. Carefully brush the epoxy into the crack or chip, spreading it to the edges and being careful not to get it onto the surrounding surface of the sink.[7]
- If you apply too much epoxy and get it on the area around the crack, wipe away the excess with a wet paper towel.
-
2Push epoxy into deeper gouges and chips. Use the tip of the repair kit’s brush or a toothpick to scoop up a dab of epoxy. Push the epoxy into the chip with the brush or toothpick without overfilling it.[8]
- Don’t worry about making the chip level with the sink with the first layer of epoxy. You can keep applying layers until you get it just right.
-
3Wait 45 minutes for the first coat of epoxy to set. Leave the sink alone for 45 minutes once you’re happy with how the first coat looks to let it cure. Make sure nobody uses the sink if there is anyone else around.[9]
- You could write a warning sign and tape it over the sink to ensure nobody uses it while the epoxy dries if this is a concern.
-
4Apply a second coat of epoxy using the kit’s brush. Dip the tip of the brush back into the tray with the epoxy. Gently brush another layer of epoxy onto the repaired crack or push it into the repaired chip to finish filling in the damage.[10]
- Most minor cracks and chips only need 2 layers of epoxy to fill them in. However, if you are repairing a deeper gouge, you can apply more coats as necessary.
Tip: You can use the edge of an old credit card to smooth out the epoxy and cover the edges of the crack or chip to blend it in with the surrounding surface.
-
5Let the epoxy dry for 24 hours. Don’t use the sink for a full 24 hours after you apply the last coat of epoxy. The epoxy needs time to cure without getting wet in order to bond permanently to the repaired area.[11]
-
6Sand the repaired area with fine-grit sandpaper. Use 400-grit or finer sandpaper to smooth out the repaired area until it is blended in and even with the rest of the sink. Rub the sandpaper lightly back and forth over the chip or crack and run your fingertips over it as you go until it feels completely smooth.[12]
- After you level out the repaired area, you can moisten your sandpaper or get the area wet and finish sanding it to shine it up and help blend it in with the rest of the surface.


References
- ↑ https://www.youtube.com/watch?v=21h7lrUgvy8&feature=youtu.be&t=30
- ↑ https://www.thisoldhouse.com/bathrooms/21015743/fix-a-chipped-sink
- ↑ https://www.youtube.com/watch?v=21h7lrUgvy8&feature=youtu.be&t=40
- ↑ https://www.thisoldhouse.com/bathrooms/21015743/fix-a-chipped-sink
- ↑ https://www.youtube.com/watch?v=21h7lrUgvy8&feature=youtu.be&t=50
- ↑ https://www.youtube.com/watch?v=21h7lrUgvy8&feature=youtu.be&t=60
- ↑ https://www.thisoldhouse.com/bathrooms/21015743/fix-a-chipped-sink
- ↑ https://www.thisoldhouse.com/bathrooms/21015743/fix-a-chipped-sink
- ↑ https://www.youtube.com/watch?v=21h7lrUgvy8&feature=youtu.be&t=75
Expert Q&A
Did you know you can get expert answers for this article?
Unlock expert answers by supporting wikiHow
-
QuestionWhat's the best way to clean a ceramic sink?
 Melanie GarciaMelanie Garcia is the Co-Owner of Oranges & Lemons, a small, family cleaning business based in Downtown Los Angeles, California (DTLA) in operation for over 40 years. Oranges & Lemons operates while partnering with the National Domestic Workers Alliance and Hand in Hand: Domestic Employers Network.
Professional House CleanerGet a mild cleanser, like Bar Keeper's Friend. Rub the cleanser over the ceramic and use a sponge to scrub any stains or dirt away. Then, just rinse the area off. You can repeat this process any number of times until you sink is blemish-free.
Support wikiHow by unlocking this expert answer.
Things You’ll Need
- 400-grit sandpaper
- Paper towels
- Scrubbing pad or sponge
- Abrasive cleaner
- Porcelain and ceramic epoxy repair kit
- Toothpick (optional)


About This Article