X
wikiHow is a “wiki,” similar to Wikipedia, which means that many of our articles are co-written by multiple authors. To create this article, 12 people, some anonymous, worked to edit and improve it over time.
This article has been viewed 83,581 times.
Learn more...
The accuracy of your rifle is dependent upon the fit and stability of the metal work in relation to the stock of your firearm. This fit is improved through the process of bedding your rifle—coating the stock’s interior with an epoxy resin. When you apply additional bedding, or glass bedding, material to your rifle’s stock, you will stabilize the barreled action within the stock and increase the accuracy of your rifle.
Steps
Part 1
Part 1 of 4:
Purchasing the Parts and Dry Fitting the Stock
-
1Order the correct action for your rifle. Contact the manufacturer of your rifle. Work with a company representative to determine the type of action you require. Place an order for your rifle’s action and wait for it to arrive.[1]
- The action is the part of the rifle that loads, fires, and ejects the cartridge.[2]
-
2Dry fit the stock to ensure the parts fit. Before bedding your rifle—coating the stock’s interior with an epoxy resin—complete a dry run. Make sure all of the pieces fit together properly before applying the bedding material. Insert the action, followed by the trigger, magazine box, bolt, and bolt release. To ensure that the action feeds correctly, place dummy shells into the magazine.[3]
- Do not force the pieces to fit together properly. If the action or another piece does not sit correctly in the gun, contact the manufacturer and order a new part.
Advertisement -
3Photograph the gun to use as a guide. If you are unfamiliar with the rifle, consider documenting the assembled firearm. Use a camera or your phone to take pictures of the assembled rifle. Documenting the assembled gun will provide you with a reference source.[4]


Advertisement
Part 2
Part 2 of 4:
Preparing the Rifle for Bedding
-
1Disassemble the gun and examine the previous bedding job. Take the action out of the stock. Remove the rifle’s small parts. These include the magazine and trigger. Examine the existing bedding job. Note where the epoxy was placed and how the stock was bedded.[5]
- If the bedding is still in good condition, you can use the same method.
- If the bedding is cracked, excessively worn, or softened, look into alternative bedding methods.
-
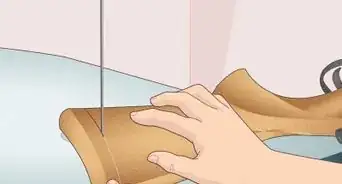
2Cover your work area with newspapers and elevate the stock with vise grips. Place newspapers on top of your flat work space. Retrieve your vise grips and set them on your work space. Insert the stock between the loosened vise grips and tighten.[6]
- Vise grips will secure the stock in place and prevent the stock from rotating.
- If you do not have vise grips, use a gun holder instead.
-
3Degrease the action. Degreasing the action will allow other materials to adhere to the gun. Put on a pair of latex gloves. Dip a cotton ball or swab into denatured alcohol. Use the saturated cotton ball to wipe down the action and recoil lug.
-
4Place masking tape over the recoil lug. Placing tape over and around the recoil lug creates a small gap, which ensures the easy release of the action from the stock. Wrap the top, bottom, and sides of the recoil lug with two layers of masking tape. Cover the front and back of the recoil lug with two layers of masking tape.[7]
-
5Apply release agent to the rifle’s metal parts. Put on rubber gloves before coating the action and barrel with a release agent. Be sure to coat the action screws, foot plate, and every part that will be reinserted into the stock. Allow the release agent to dry. There are several release agents on the market.
- Use an aerosol spray to liberally cover the barrel and action.
- When using a wax, dip your fingertips into the wax. Spread the wax over the action and barrel with your fingers.
- Err on the side of caution—cover everything with release agent.
-
6Insert clay into the nooks and crannies and reapply the release agent. To prevent the epoxy from seeping into places it shouldn’t cover, fill the action’s nooks and crannies with modeling clay. Use a popsicle stick or your fingers to fill the holes and a razor blade to remove excess clay. Don’t forget the screw holes![8]
-
7Reapply the release agent and degrease the inside of the stock. Apply a second coat of the release agent to the rifle’s metal parts. Dip a cotton ball or swab into denatured alcohol. Use the saturated cotton ball to wipe down the inside of the stock.


Advertisement
Part 3
Part 3 of 4:
Bedding the Rifle Stock
-
1Mix the bedding compound. Retrieve a non-waxed plastic cup and a popsicle stick. Use the popsicle stick to place equal parts resin and hardener into the plastic cup. Add dye to the mixture so that it matches the color of the stock. Use the stick to stir the mixture until it is a peanut-butter like consistency.[9]
- To avoid air bubbles, do not whip the mixture.
- Always follow the instructions on the product!
- Apply the mixture with a popsicle stick. Put on disposable rubber gloves. Place a dime sized amount of the mixture onto the end of a popsicle stick. Use the stick to coat the recoil lug area and the rear screw area with a thin, even layer of the mixture.[10]
- Use the previous bedding job as a guide. Apply the mixture on top of the previous bedding.
-
2Insert the action and tighten the screws. Place the action into the stock. Retrieve a screwdriver. Insert the action screws into the action.
- If the action has two screws, tighten the rear screw first.
- If the action has three screws, tighten the screw directly behind the magazine first.[11]
-
3Place the vise around the barrel and allow the epoxy to cure. Remove the vise from the stock. Insert the rifle’s barrel into the vise. This will reduce the stress on the stock.
-
4Remove excess epoxy with a cotton swab and razor blade. Once the action is screwed into the stock, epoxy seep through the seams. Wipe off any excess epoxy with a cotton swab. Go over the surface with a razor blade to scrape off any remaining residue.


Advertisement
Part 4
Part 4 of 4:
Curing the epoxy and Cleaning the Rifle
-
1Allow the epoxy to cure. The mixture must properly set before you can clean the stock and action. On average, you should allow the epoxy to cure for 24 to 48 hours.[12]
- Always follow the curing instructions for a product.
-
2Disassemble the rifle. After allowing the compound to cure, you must take the rifle apart. Unscrew the screws from the action. Tap the action with a mallet to “pop” the action out of the stock. Observe the stock—you should see an exact replica of the action.[13]
- To remove a stubborn screw, insert the screwdriver and tap on top of the handle with a rubber mallet.
- If you are struggling to remove the action, insert a ⅝ inch dowel into the back of the receiver. The dowel will function as a lever. Press down on the lever to evenly distribute pressure to remove the action.[14]
-
3Remove the compound from the stock’s pillar holes with a drill. It is essential that you remove dried compound from the stock’s pillar holes. Insert a 5/16 inch bit into your electric drill. Remove the compound by drilling into the sealed hole.[15]
- Since most screws used in rifles are ¼ inch, a 5/16 inch bit should work most of the time.
-
4Remove the modeling clay and rinse off the release agent. Use a razor or knife blade to loosen and remove the modeling clay. Check to make sure all of the clay is removed from all pin and screw holes.[16] Run a rag saturated in hot water over the parts to remove the release agent—the release agent should peel off.[17]
-
5Reassemble the rifle. Retrieve the pictures of the assembled rifle. Reassemble the rifle so that it matches the pictures and tighten the screws. Wait one week to use the firearm to allow the compound to finish curing.
- At this point you may torque the screws.


Advertisement
Things You’ll Need
- Screwdriver
- Modeling clay
- Masking tape
- Release agent
- Vise or gun holder
- Epoxy
- Cotton balls
- Popsicle sticks
- Soft cloth
- Wooden mallet
- Drill and drill bit


References
- ↑ http://1source.basspro.com/index.php/component/k2/91-firearms/793-glass-bedding-a-rifle
- ↑ http://library.med.utah.edu/WebPath/TUTORIAL/GUNS/GUNTERM.html
- ↑ http://1source.basspro.com/index.php/component/k2/91-firearms/793-glass-bedding-a-rifle
- ↑ http://1source.basspro.com/index.php/component/k2/91-firearms/793-glass-bedding-a-rifle
- ↑ http://1source.basspro.com/index.php/component/k2/91-firearms/793-glass-bedding-a-rifle
- ↑ http://www.varminthunters.com/tech/bedding.html
- ↑ http://1source.basspro.com/index.php/component/k2/91-firearms/793-glass-bedding-a-rifle
- ↑ http://1source.basspro.com/index.php/component/k2/91-firearms/793-glass-bedding-a-rifle
- ↑ http://1source.basspro.com/index.php/component/k2/91-firearms/793-glass-bedding-a-rifle
- ↑ http://1source.basspro.com/index.php/component/k2/91-firearms/793-glass-bedding-a-rifle
- ↑ http://1source.basspro.com/index.php/component/k2/91-firearms/793-glass-bedding-a-rifle
- ↑ http://www.varminthunters.com/tech/bedding.html
- ↑ http://1source.basspro.com/index.php/component/k2/91-firearms/793-glass-bedding-a-rifle
- ↑ http://1source.basspro.com/index.php/component/k2/91-firearms/793-glass-bedding-a-rifle
- ↑ http://1source.basspro.com/index.php/component/k2/91-firearms/793-glass-bedding-a-rifle
- ↑ http://1source.basspro.com/index.php/component/k2/91-firearms/793-glass-bedding-a-rifle
- ↑ https://www.stockysstocks.com/epoxy-instructions/
About This Article
Advertisement