This article was co-authored by Ashley Adams. Ashley Adams is a Licensed Cosmetologist and Hair Stylist in Illinois. She completed her Cosmetology education at John Amico School of Hair Design in 2016.
There are 23 references cited in this article, which can be found at the bottom of the page.
This article has been viewed 134,258 times.
Bleaching your hair is a great way to take your style to the next level. It is an important part of dyeing your hair another color, especially if you want to go pastel. If you're going for a silver or platinum shade, then be prepared for several bleaching sessions and a toning session as well. This process is not recommended for hair that has been chemically relaxed or textured.[1]
Steps
Preparing Your Hair and Bleach
-
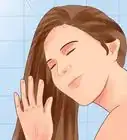
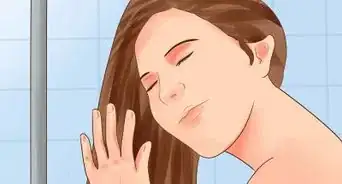
1Start with dry, unprocessed hair. Do not bleach your hair if it has been relaxed, chemically straightened, or texturized, as this can damage your hair beyond repair. You can work on freshly-washed hair, but make sure that it is completely dry before you begin.
- Bleaching is easier on shorter hair than longer hair. If you have never done this before, or feel uncomfortable, consider going to a stylist.
-
2Twist your hair into multiple rope braids if it's long. Divide your hair into at least 8 sections first, then twist each section into a 2-strand rope braid. This will help stretch your hair out and make it easier to work with. The exact number of twists does not really matter.[2]
- If you have short hair (i.e. TWA or Teeny Weeny Afro), you don’t need to twist it. Just comb it out to ensure that there are no knots or tangles.[3]
Advertisement -
3Apply oil or petroleum jelly to your hairline. Be sure to apply it all along your hairline, including the sides and back of your head. You could also apply some to the tips and edges of your ears as well. This will help protect your skin against the bleach.[4]
- The type of oil that you use does not matter. It can be olive oil, coconut oil, etc.
-
4Pull on a pair of plastic gloves and a shirt that you don't care about. A button-up shirt would work the best because it is easier to get in and out of. If you don't have any shirts to spare, then drape an old towel or plastic dyeing cape over your shoulders instead.[5]
- If you're worried about damaging your floor and/or counter, cover it with paper or plastic bags. Newspaper or plastic tablecloths will also work.
-
5Measure your lightening powder and developer into a non-metal bowl. You can buy these separately or as a kit, but make sure that they both come from the same brand. Since each brand is a little different read the instructions on the package to find out exactly what proportions you should use. In most cases, however, expect to use a 1-to-1 ratio of powder to developer.[6]
- If possible, choose a powder and developer that are safe to use on your scalp.
- Measure out enough developer to saturate your hair, like a hair mask. About 4 ounces (120 mL) of developer should be enough for shoulder-length hair.
- 20 volume developer is the safest and least damaging, but you can try a 30 volume developer instead if you feel confident bleaching your hair. Just be aware that a 30 volume developer will lighten your hair 3 levels and do so much more quickly than a 20 volume developer, which will lighten your hair 2 levels at a slower rate.
-
6Mix the powder and developer until they have a batter-like consistency. You can do this with the handle of your tinting brush or with a plastic (not metal) spoon. Be sure to scrape the bottom and sides of the bowl often so that everything mixes evenly. The color should be consistent with no streaks or swirls.
- When mixed, bleach will range from white to blue to purple, depending on the brand you got.


Applying the Bleach
-
1Undo 1 of your twists and pin the rest out of the way, if needed. Choose a twist from your front hairline and unravel it. If your hair is very long, then the other twists might get in the way. It would be a good idea to clip or pin them back.[7]
- If you have a TWA, then you can skip this step.
-
2Set a timer to 30 minutes to keep track of how long the bleach is in your hair. If you apply the bleach to all your hair first, then start the timer, your hair may turn out uneven. This is because the bleach would have sat in some areas longer than others.[8]
- Double-check the recommended time on your packaging. If it tells you not to go over 25 minutes, then set your timer to 25 minutes.
- If the timer goes off before you finish applying the bleach, you'll have to stop, wash the bleach off, dry your hair, then continue where you left off.
- To prevent the front of your head from being lighter than the back, try applying 20 volume developer to the front and 30 volume to the back. This way, the front hair will lighten more slowly, so you can apply the developer to the front of your head first. Then, switch to the 30 volume for the back, and this hair will lighten more quickly.
-
3Apply the bleach to your hair, starting 1⁄2 inch (1.3 cm) from your roots. If you never bleached your hair before, apply it with a tinting brush all the way down to the ends of your hair. If you lightened your hair in the past, then apply the bleach to wherever the lightened area starts.[9]
- If the hair that came out of the twist is wider than your tinting brush, split the twist in half, and work on 1 half at a time.
- If you have a TWA, you can just brush the bleach onto your hair, like painting a canvas.[10]
-
4Twist and clip your hair out of the way, then repeat the process. Work 1 twist at a time. If you need to, break them up into separate curls first. As you finish a second of hair, twist it, then clip it out of the way. Start at the front of your head and work towards your nape.[11]
- Remember to leave a 1⁄2 in (1.3 cm) gap between the bleach and your scalp. You'll go back and do the roots later.
- You don't need to twist the bleached hair into rope braids. You just need to make sure that it stays out of the way of the unbleached hair.
-
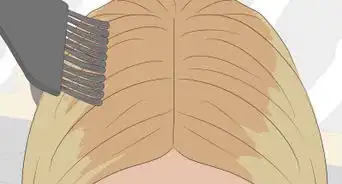
5Apply the bleach to your edges, roots, and any missed spots. You want to do these last because they are the closest to your scalp and will process the fastest. Apply the bleach to your roots first, then move on to your edges. Check for missed spots, then touch them up with more bleach, if needed.[12]
- For TWAs, you may have to part your hair with the handle of your tinting brush, then apply the bleach to your roots.
-
6Wait for your timer to go off. In most cases, this will be around 30 minutes. Never leave bleach on longer than what is stated on the package, even if it is not light enough. If you leave it on too long, your hair may fall out.[13]
- Check your hair's progress every 5 minutes or so. It may actually lighten faster than what's on the packaging.
-
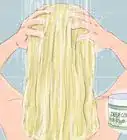
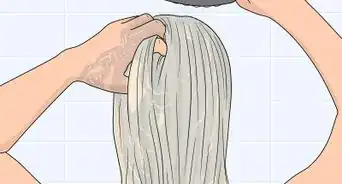
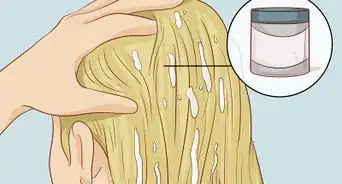
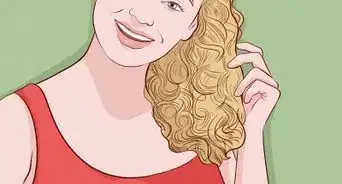
7Wash the bleach out with a neutralizing shampoo, then let it dry. This is very important as it will halt the bleaching process. Your hair may look brassy or downright orange. Don't worry; this is nothing that a quick toning process can't fix.[14]
- Be sure to rinse the bleach off with cool water. Even though warm water won't affect the color of your hair, it will make it frizzy.
-
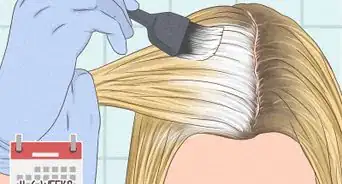
8Repeat the bleaching process, if needed. Most people with dark-colored hair will have to perform at least 2 bleaching sessions before they get the shade they want. Luckily, you don't need to leave the bleach on for as long during the second session. About 15 minutes will do.[15]
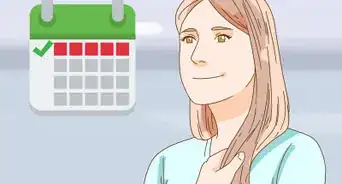
- It would be best to do this the next day, but if your hair still feels damaged, wait another 2 to 3 days before bleaching it again.
- It may take 3 to 4 bleaching sessions before your hair reaches the level of lightness you want.


Toning and Conditioning Your Hair
-
1Purchase a toner for your hair. You may be able to use a purple or blue toning shampoo to remove any orange or yellow tones from your hair, but if you want platinum-blonde hair, then you need to mix the toner with 20 or 30 volume developer.[16]
- Each brand of toner will be a little different, so read the instructions on the bottle to find out how to use it and mix it.
-
2Apply the toner to your hair with a clean tinting brush. You don’t need to section off your hair for this; just create horizontal or vertical parts using the handle of a tinting brush, then brush the toner on starting from the roots.[17]
- If you are using a toning shampoo, you'll have to get your hair wet, then apply it just like you would normal shampoo.
-
3Leave the toner on for the time recommended on the bottle. In most cases, this will be around 10 to 20 minutes. The toner will start to change color from white to purple. Do not be alarmed; this is perfectly normal.[18]
- If you are using a toning shampoo, then you'll probably only need to leave it on for about 5 to 10 minutes.
- Toner can stain, so it would be a good idea to cover your hair with a plastic shower cap.
-
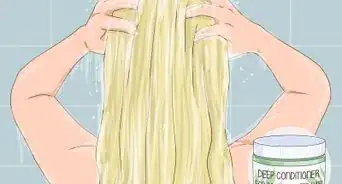
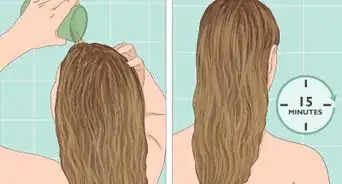
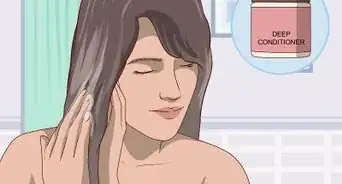
4Rinse the toner out, then follow up with a hydrating mask. Bleaching is a damaging process on its own, but when combined with African American hair, it is even more damaging. A hydrating mask will help repair some of that damage by hydrating and nourishing your hair.[19]
- Avoid anything that contains sulfates. They won't affect the color of your hair, but they can make your hair feel drier.
- You can use a natural mask too; it does not have to be store-bought.
-
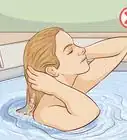
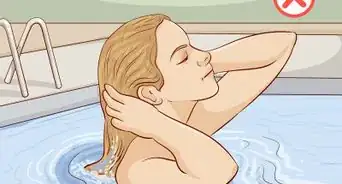
5Let your hair air dry and avoid heat styling it for 3 to 4 weeks. This is important. Bleaching and heat styling are damaging enough to hair already on their own, but if you combine them, you'll be damaging your tresses even more![20]
- When you do heat style your hair, make sure that it is completely dry first. Apply a heat protectant and use a lower heat setting.
- Blow drying counts as heat styling. Consider letting your hair air dry part-way first, then style it with the hairdryer. Remember to use a heat protectant!
-
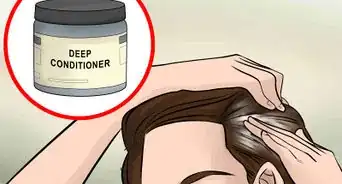
6Keep your hair moisturized with weekly deep conditioning masks. You are probably already in the habit of moisturizing your hair, but you need to be especially diligent about it after you bleach it.[21]
- A protein-free moisturizing mask is a great option, but you can use other types of hair masks too, including natural ones.
-
7Trim your hair every 5 to 6 weeks to remove split ends. Not only will this reduce frizz, but it will also help prevent further damage. If you leave split ends unchecked, they will continue to create further and further up the hair shaft, leading to even more damage.[22]
- Don't rely on products labeled for mending split ends. They only provide a temporary fix; they don't heal the damage permanently.


Community Q&A
-
QuestionI have hair locks and would like to dye some of them blue. How would I do that?
 Community AnswerThe first step would be to bleach the hair area, then dye them that color. You could also have a friend or someone experienced in bleaching and dying to help out with the experience.
 -
QuestionI have real dark hair and I wanna get the tips dark red. Will it work without all that bleach?
 Phonche TVCommunity AnswerYou can use a permanent hair color instead of bleach but those can be extremely damaging since you don't normally know what level of developer is in the kit. It is usually safest to get some powder lightener, some developer-30 is best for dark, virgin hair- and saturate the ends of the hair with the mixture then rinse it out. Then you can follow up with a semi-permanent red dye since semi permanent dyes are essentially conditioners with pigment in them (no ammonia, chemicals, or lightening agents).
Warnings
- Don't use metal bowls or stirring implements, or they will react with the bleach. Stick with glass, plastic, or ceramic.⧼thumbs_response⧽
- Do not leave bleach on for longer than the time recommended on the packaging.⧼thumbs_response⧽
- Never apply bleach to wet or chemically straightened hair.⧼thumbs_response⧽
Things You'll Need
- Lightening powder
- 20 volume developer
- Non-metal bowl
- Tinting brush
- Neutralizing shampoo
- Hair toner
- Plastic gloves
- Old shirt
- Hair clips

References
- ↑ https://www.racked.com/2017/6/14/15785910/hair-dye-woc
- ↑ https://www.youtube.com/watch?v=732Xw3T61Q4&feature=youtu.be&t=25s
- ↑ https://www.youtube.com/watch?v=O06_3weUDW0&feature=youtu.be&t=35s
- ↑ https://www.youtube.com/watch?v=732Xw3T61Q4&feature=youtu.be&t=30s
- ↑ https://www.youtube.com/watch?v=732Xw3T61Q4&feature=youtu.be&t=50s
- ↑ https://www.youtube.com/watch?v=732Xw3T61Q4&feature=youtu.be&t=1m4s
- ↑ https://www.youtube.com/watch?v=732Xw3T61Q4&feature=youtu.be&t=2m12s
- ↑ https://www.youtube.com/watch?v=732Xw3T61Q4&feature=youtu.be&t=2m30s
- ↑ https://www.youtube.com/watch?v=732Xw3T61Q4&feature=youtu.be&t=3m12s
- ↑ https://www.youtube.com/watch?v=O06_3weUDW0&feature=youtu.be&t=55s
- ↑ https://www.youtube.com/watch?v=732Xw3T61Q4&feature=youtu.be&t=4m7s
- ↑ https://www.youtube.com/watch?v=732Xw3T61Q4&feature=youtu.be&t=5m23s
- ↑ https://www.youtube.com/watch?v=O06_3weUDW0&feature=youtu.be&t=1m20s
- ↑ https://www.youtube.com/watch?v=jet-C42QicY&feature=youtu.be&t=4m24s
- ↑ https://www.youtube.com/watch?v=O06_3weUDW0&feature=youtu.be&t=1m30s
- ↑ https://www.youtube.com/watch?v=jet-C42QicY&feature=youtu.be&t=4m45s
- ↑ https://www.youtube.com/watch?v=jet-C42QicY&feature=youtu.be&t=5m22s
- ↑ https://www.youtube.com/watch?v=jet-C42QicY&feature=youtu.be&t=5m45s
- ↑ https://www.youtube.com/watch?v=O06_3weUDW0&feature=youtu.be&t=3m
- ↑ https://www.essence.com/hair/hair-color/how-to-dye-natural-hair-blonde
- ↑ http://www.curlynikki.com/2014/10/the-key-to-maintaining-bleached-and.html
- ↑ https://www.allure.com/story/how-to-care-for-a-blonde-afro
- ↑ https://www.cosmopolitan.com/style-beauty/beauty/news/a46646/natural-hair-dye-tips/
About This Article

If you’re an African-American and you’d like to bleach your natural hair, apply oil or petroleum jelly around your hairline to protect your skin from the dye. If your hair is long, twist it into several long sections to make it easier to saturate each section. Put on gloves and old clothes and mix the bleach according to the package directions, then apply it to your hair 1 section at a time. Leave the bleach in for the directed amount of time, then wash the bleach out thoroughly with a neutralizing shampoo. Do not bleach your hair if it has been relaxed or had another chemical treatment, as it will be severely damaged. Keep reading for advice from our Cosmetology co-author on how to tone and condition your hair after you bleach it!