wikiHow is a “wiki,” similar to Wikipedia, which means that many of our articles are co-written by multiple authors. To create this article, volunteer authors worked to edit and improve it over time.
The wikiHow Video Team also followed the article's instructions and verified that they work.
This article has been viewed 20,475 times.
Learn more...
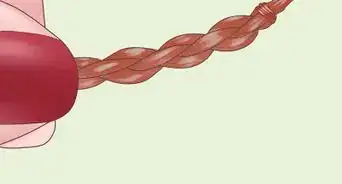
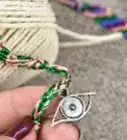
Braided bracelets are made with a variety knot combinations and colors, allowing for endless types of different bracelets. This beginner guide provides a fun way for you to learn how to braid bracelets using an easy and versatile technique.
Steps
Preparing
-
1Choose the amount of string. When determining the amount of strands to use for a bracelet, consider how many colors you are using. Aim to use at least 2-4 strands per color, to ensure that one color will not run out before the rest. As a general rule, each bracelet should use about 6 strands of floss. The more strands, the thicker the bracelet.
-
2Measure and cut the materials. After you have decided the color and amount of string to use, measure and cut each strand about 18 inches in length, or roughly the distance from your wrist to your shoulder. This will allow you to make a bracelet that is long enough to wrap around your wrist.
- To speed up this process, use the first strand that was measured and cut as a basis for the rest of the string. Rather than measuring out 18 inches of each string, hold the previously cut strand to the remaining strings and cut them to be the same length.
- The more complex the knotting system is, the longer the string should be due to extra knots at every row. Remember, it’s better to cut the string too long rather than too short.
Advertisement -
3Tie the strings together. After cutting the strands, gather one end of each piece of string and bundle them together in your hand. Tie a knot approximately three inches below the ends of the string. This will give you plenty to work with when tying the finished product around your wrist.
-
4Secure bracelet to a stable surface. There are several ways to secure the bracelet. The simplest way is to tape the bracelet (above the knot) to a table or counter. However, if not taped well enough, the bracelet might slide out. Nonetheless, there are other options to consider:
- Safety pinning the bracelet through the knot and to a pillow, blanket or the pants that you are wearing is the best way to ensure that the bracelet will stay in position.
- You can also try clipping the bracelet to a clipboard, as this too will provide sufficient and stable control.
-
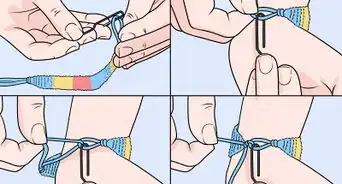
5Separate the strands. Before starting the knotting process, separate each thread and make sure that none are knotted together. For this spiral bracelet, choose one strand of the color that you would like to begin with and pull it to the left side. This will be your active color. Group the remaining strands together and place them on the right side. These will be your inactive colors.
- This step seems tedious and unnecessary when make a spiral bracelet, however, when making more advanced bracelets, this step will prove to be crucial in determining the color placement and string location.


Knotting
Before beginning the bracelet, it is important to know the basic knots that can be used for this bracelet - the left knot and the right knot.
-
1Make a left knot. Hold the bundle of strands with your left hand. Take the active color in your right hand and starting from the left and moving right, pass it over the bundle of strings and loop it under and back through the opening. Pull up and to the left to tighten the knot.
- To make this process easier, try using your left pointer finger as an aid. Stick out your left pointer finger and hook the active color on it, proceed to loop it under and through the center opening.
- Make sure you are knotting over the bundle of strings, because knotting beneath them will result in a different type of knot.
-
2Make a right knot. Switch the process above from the left knot above and use opposite hands. (Every time you see left, use your right hand and every time you are told to use right, use your left hand.)
Braiding a Spiral Bracelet
-
1Begin knotting the bracelet. To make this spiral bracelet, it is just continual left knots using various colors. Use the active color to create a chain of knots of a desired length. Typically, 15 knots will be done with each color, but this amount can be adjusted based on your preference for the desired length of that color block.
-
2As you are knotting, these knots will begin to spiral around the bundle of strings. This is as expected, so with each knot, pull the string in the direction that the spiral is moving in. Since this bracelet is composed of strictly left knots, tightly pull the active color up and to the left.
- If this bracelet is done with right knots instead, the spiral will be moving in the right direction instead.
-
3Switch colors when you're ready. After the desired length has been reached, switch colors by putting the now inactive color back in the bundle of strands, and removing a new active color to begin knotting with.
-
4Repeat this braiding process until your bracelet has reached the desired length.
- Once this length has been reached, tie a knot at the bottom of your completed bracelet pattern, to ensure that these knots will not unravel.
-
5Cut about 3 inches below the knot, so the strand lengths are all equivalent.
-
6Tie the result around your wrist and your bracelet is complete!


Things You'll Need
- Embroidery floss - this can be found at your local craft store
- Scissors
- Tape, clipboard or safety pin
- Ruler, measuring tape
- Tweezers (optional)