This article was co-authored by wikiHow Staff. Our trained team of editors and researchers validate articles for accuracy and comprehensiveness. wikiHow's Content Management Team carefully monitors the work from our editorial staff to ensure that each article is backed by trusted research and meets our high quality standards.
This article has been viewed 39,248 times.
Learn more...
When you travel with your dog in the car, keeping them secure in the back seat or trunk area helps you to concentrate on driving. If you own an SUV, minivan, station wagon, or crossover vehicle, you can easily build a barrier to place between the rearmost seating area and the trunk space where you keep your dog. With just a few materials from department and hardware stores, and a little sawing and assembly, you'll soon have a dependable barrier to help keep your dog out of your way in the front seats.
Steps
Finding the Right Materials
-
1Measure your vehicle's interior. The size of your dog barrier will depend on the floor-to-ceiling and wall-to-wall lengths of your vehicle’s trunk area. If your vehicle has collapsible back seats, you have the choice of placing the barrier just behind the front seats. In this case, run a tape measure from the floor just behind the front seats up to the ceiling. Otherwise, just measure the floor-to-ceiling height of the trunk area behind the back seats. Finally, take the longest measurement between the side windows in the trunk area, then write down these lengths.[1]
- If you have a sedan or other vehicle without open trunk space behind the back seats, and you don’t mind keeping your dog in the back seat, you can place the barrier just behind the front seats.
-
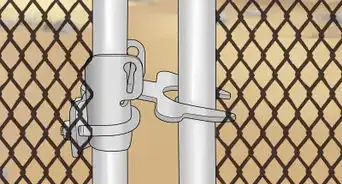
2Purchase spring-tension rods. These are used either to hang draperies in windows, or to support shower curtains. Their spring action allows them to be fitted between two surfaces without screws or adhesives.[2] You’ll need to find rods that can compress to just a little shorter than the floor-to-ceiling length of the trunk that you measured. Bring this measurement to the department or hardware store, and ask an employee to help you find the appropriate size.
- For example, if the floor-to-ceiling length is 3 feet, 6 inches (1.067 meters), buy rods that compress to at least 3 feet, 5 1/2 inches (1.054 meters).
- You can find these rods at large department stores or hardware stores.
- Select rods that have tapered rubber stoppers on their ends. These will help to secure the barrier in place against the floor and ceiling surfaces.
Advertisement -
3Choose crossbar material. For the horizontal bars, look for ¾-inch (at least 1.9 centimeters) PVC pipe or wooden rods at the hardware store.[3] Either one will be strong enough to keep the dog from getting through. PVC will be lighter, but also easier for the dog to chew through.
-
4Calculate the total crossbar length. These will need to be at least as wide as the wall-to-wall measurements of your trunk area. Calculate the total rod length to be purchased according to the size of your dog: If your dog weighs more than 25 pounds (11.3 kilograms), multiply your wall-to-wall length by four for four crossbars. If the dog weighs less than 25 pounds, multiply by five for five bars. Finally, multiply this figure by ⅘, and write down the result.
- For example, if your longest wall-to-wall measurement is four feet (1.22 meters), for a 40-pound (18.1-kilogram) dog, multiplying by four gives 16 feet (4.9 meters). Then multiplying this figure by ⅘ gives 12 feet, 7.2 inches (3.92 meters).
-
5Buy less material for certain vehicles. In some minivans and SUVs / SACs without collapsible rear seating, there won’t be a gap to block off between the rearmost seats. Or you might prefer not to collapse the rearmost seats. In these cases, get just enough material to cover the gap between the top of the rearmost seating and the ceiling—three bars should be enough, so multiply the longest wall-to-wall length in the gap above the rearmost seats by 3, then the result by ⅘.


Sizing and Assembling the Barrier
-
1Measure the crossbars.[4] Your crossbars will vary in length according to the gap they’ll be covering. If you’re using four bars, the bottom two only need to be long enough to cover the gap between the fronts seats just above the center console. Measure these at 2/5 of your wall-to-wall measurements, or long enough to span this gap. Measure the top two bars at ⅘ of the wall-to-wall length, or long enough to cover the gaps between the front seat headrests and the side windows.
- If you’ll use five bars, measure the bottom two at ⅖ the wall-to-wall length, the middle one at ⅗, and the top two at ⅘. Again, make sure these will be long enough to cover the gaps.
- If you’re only cutting three bars for a barrier behind the rearmost seating without a gap between the seats, measure the top bar at 7/10 the longest wall-to-wall length, the middle bar at ⅘, and the bottom bar at 9/10. Make sure all gaps will be covered by these lengths.
-
2Cut the crossbars.[5] Using a table saw or hand saw, cut the four or five crossbars to their various lengths. Use medium-grade sandpaper to sand off the sharp frayed edges of the PVC pipe or wooden rods.
-
3Position the vertical rods. Put in place the two spring-tension rods vertically, one just behind each front seat, or behind the rear seats.Their distance from each wall should generally be about ⅕ of the wall-to-wall measurement. Make sure they are perfectly vertical, not leaning to one side or the other.
-
4Mark off attachment points. One at a time, position your four or five crossbars horizontally and evenly spaced from one another, beginning with the two shorter bars three inches (7.62 centimeters) higher than the center console. The top bar can rest four inches (10.16 centimeters) below the ceiling. Using a thin felt-tip marker, indicate the attachment points by putting an x-mark on the horizontal PVC or wooden rods where they intersect with the vertical rods. Then, keeping the horizontal rods in place, put horizontal marks on the vertical rods above and below where they intersect with the horizontal bars.
-
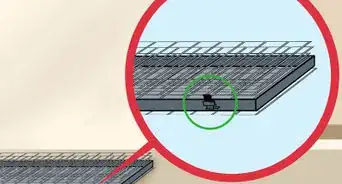
5Assemble the barrier. Using 20-gauge utility wire (0.0319 inches / 0.018 centimeters), bind the crossbars to the vertical bars at their marked intersection points. Run the wire in an x-shaped pattern diagonally around the intersection, changing the orientation of your winding every two passes. Wrap the wire tightly until the two bars are firmly secured. Check that the bars remain perpendicular to each other throughout the winding.
- If you’d prefer to hide the wire, cover it over with electrical tape of a color that most closely matches the color of the bars.
-
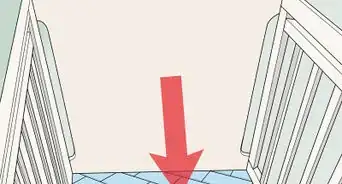
6Put the barrier in place. Make sure the bars are all securely attached at the intersection points. Position the barrier directly behind the front or back seats, dividing the rearmost seating area and the trunk. Use the spring-tension feature of the vertical rods, compressing them enough to allow the barrier to be slid into place and secured.


Things You'll Need
- spring-tension curtain rods
- PVC pipe or wooden rods
- tape measure
- hand or table saw to cut the horizontal rods to length
- 20-gauge utility wire
- electrical tape (optional)


References
About This Article

To build a dog barrier for your vehicle, measure your vehicle space before you begin so you can be certain the barrier will fit properly. If you have collapsible seats, you’ll also need to decide if you want the barrier behind either the back seats or the front seats. Depending on which space you choose, measure both floor-to-ceiling and wall-to-wall lengths in the trunk area or behind the front seats. Using these measurements, go shopping for spring-tension rods and suitable cross-bar material, either in PVC or wood, for attaching to the rods. Remember to buy stronger material for the cross-bars if your dog chews through things and make sure the bars will go across wide enough to prevent your dog from pushing its weight through into the seats ahead. For more advice on putting the barrier together and making sure it’s sturdy, keep reading!