This article was co-authored by wikiHow Staff. Our trained team of editors and researchers validate articles for accuracy and comprehensiveness. wikiHow's Content Management Team carefully monitors the work from our editorial staff to ensure that each article is backed by trusted research and meets our high quality standards.
There are 9 references cited in this article, which can be found at the bottom of the page.
This article has been viewed 39,903 times.
Learn more...
Hiding dog crates within a home or apartment can present a stylish opportunity to spruce up your surroundings. Thus, you need not simply discard this large and cumbersome object in a basement or bedroom - trust me, creating a life hack for dog crates will make your home look much better, create a unique conversation piece when having guests over, and your pet will thank you! Below are some steps on hiding or reinventing a dog crate.
Steps
Keeping Your Dog Crate Simple
-
1Install a special area for your dog by hiding the crate in plain sight. Hang leashes, pictures of your dog, and essentially develop a unique space for your pet. This will also allow you to easily access all of the materials related to the well-being of your cuddly friend.
-
2Broaden your creative side by turning the crate into a piece of art for the home. This approach is fairly simple and is totally up to individual creativity, but by spray painting the crate with a flashy colour and then by applying some flare or swag you can really turn a bland cage into a piece of 'modern' art.[1]
- Make sure that you paint the cage in a well-ventilated area and away from your dog. Also ensure that any flare added to the crate is 'cuddly buddy friendly' (ideally avoiding anything unsafe that the dog can eat or chew).
Advertisement -
3Use a baby gate to block off a specific area of the home for your dog. This idea works really well if, for example, your home has a small space underneath a staircase or a small box office. These areas can easily be converted into a comfortable room for your doggy. Add some pillows, bedding, or perhaps hang something decorative on the walls (pictures of you with your cuddly buddy are always a good option). Get creative and make it unique.
- Add a lamp if the space is underneath basement stairs or is just generally located in a dark area of your home - your doggy needs light too!
-
4Purchase a cover for your dog crate and subtly hide it underneath a cabinet or end table. This one is fairly simple if you have an end table or cabinet in your home. You can create a space for the crate underneath the unit and cover it with the cover as needed. This can reflect a more cost-effective route, because dog crates can be expensive (like $200+ expensive), so save yourself the extra cash by doing something that's classy, but not overly elaborate.[2]


Constructing a Table to Hide a Crate
-
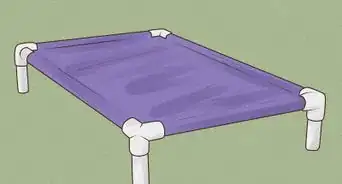
1Measure the dimensions of your crate so you can decisively plan the design of the table. This step is very important, because you will need to accommodate the size of your crate when building the table. It is advisable to build the table slightly taller and wider than the crate. This way if you need to slide the crate out from underneath later on, you can do so without disturbing the table.
-
2Begin work on building the table frame. Use a mitre saw to cut the framing boards down to the size you have selected for the table. Follow this up by using a Kreg jig to drill pocket holes into the framing boards, so you can easily connect them to your table legs.[3]
- Clamp the table legs to a secure surface prior to connecting the boards. This will ensure the legs remain stationary while you apply the frame.
- If you don't have a clamp, then ask someone to assist you with the project.
-
3Add some wood glue to the ends of the boards before connecting them to the legs. Once the pocket holes are drilled and the table legs are secured, use wood glue and a drill to construct the frame.
- Ensure that you drill pocket holes along the top of each framing board too, as these will be necessary later when attaching the table top.
-
4Start work on constructing the table top. Once the frame of the table is built, measure its dimensions. You should already have a good idea of this, but it's not uncommon to be off by a half inch or so. Measure the boards you will use for the table top and cut them down to size.[4]
-
5Organize the boards individually on the table and ensure to alternate the grain between them. This is important, because the boards will need to be individually cut, and you don't want them all going in the same direction. You can draw a triangle across the width of the surface to help with proper alignment.[5]
- All of the boards, except the end ones, will need pocket holes - using a pencil mark these about 6" to 8" apart.
-
6Use the Kreg jig to start drilling your pocket holes. Once the pocket holes are drilled it's time to start building your table top. Start at one end of the table and work your way across but apply your end boards last. Use wood adhesive to secure individual boards together and then begin drilling screws into the pocket holes.[6]
- Repeat this process until all of the boards are secured together (remember to add your end boards last).
- If either end of the table top is too long, use the mitre saw to square off the boards.
- You can also square off the table ends if you’d prefer a more ‘rounded’ off look.
-
7Begin by removing the top from the base, flipping it, then seeing how it looks. Use the opposite side of the table top for this because the side you’ve just worked on will have visible pencil markings and pocket holes. The opposite side should look smooth and clean.
-
8Commence with securing the table top to the frame. Start by placing the table top on the ground with the smooth side facing down. Then flip the frame and lay it on top of the underside of the table top.[7]
- Use the pocket holes drilled into the framing boards in Step Two to attach the base with the table top.
-
9Straighten the table upright to check how secure the build is. At this stage your table should be sturdy, however, if it wobbles you will need to reinforce the frame. For this use extra wood from the building stage – pieces from the table top should suffice.
-
10Utilizing the mitre saw cut the wood scraps down to the same size. Four pieces should be adequate. You will need to attach the wood to the table legs, base, and top along each end of the width.[8]
- Using the Kreg jig, make pocket holes on the support pieces, top, base, and legs.
- Then attach the support pieces to the table at each end along the width.
-
11Apply a coat of paint, wood varnish or shellac to your table for a better aesthetic. You’ve completed the building process of the table, but it’s going to look rather ‘rough’ without a coat of paint or shellac. Shellac is the best option, as the resin is not toxic to your pet. Thus, with a paint brush, cover your table with a layer of shellac and repeat as desired.
-
12Decide on the detail of your curtains and ensure they match the dimensions of your table sides. If you had to reinforce your table in the previous step, it should now be sturdy and wobble free. You can now start the decoration process by cutting your curtains down to size.
- If you want to cut down on the use of curtains put the table and crate in a corner. This way two sides will be hidden by wall space.[9]
- Ensure your curtains have a seam along the top for the curtain rod. If not, fold the tops over and manually pin a seam.
-
13Align the curtains along the seam, then attach them to the spring loaded tension rods. The good thing about tension rods is that they don’t require much assembly or additional screws, so you can apply them to fit the dimensions of each table side with ease. At this point fix your curtains and tensions rods to each side of the table you want to keep hidden and voila.[10]


Transforming a Baby Crib into a Dog Crate
-
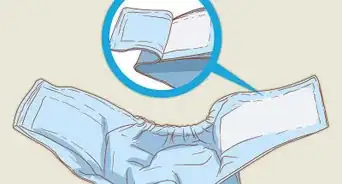
1Find a crib online. If you do not have a crib readily handy, fear not! Merely check on Craigslist or another online source where you can scoop one up for cheap. Alternatively, swing by a few garage sales or flea markets to find one.
- Dog crates can be expensive, so repurposing a used crib offers an inexpensive alternative.
- This method, however, will require some DIY skill and enthusiasm. Don't simply assume that you can make the transition from a bed for tiny humans to one for your cuddly buddy in an hour.
-
2Determine the dimensions of your dog crate and start cutting the crib down to size. Once you acquire the crib trim it down to the necessary size. If you use a full-sized crib (ca. 30" wide, 50" long, and 35" tall) this will provide you with enough materials to create a very large crate.
- You will most likely have to cut the crib ends down, as these are normally shaped and angled different than the crib railings.
-
3Use materials harvested from the crib start working on the inner frame of the crate. For the front and back of the crate you will need to build an inner and outer frame. For example, the inner frame will consist of components from the crib railing. The outer frame will add further support to the overall frame.[11]
- Make sure that you measure your sides (i.e. the crib ends) before starting this step – just to make sure the dimensions of the sides will match during the assembly process.
-
4Build the inner frame of the crate using the crib railing. Using a mitre saw, cut the crib railing down to the dimensions you have chosen for the crate You will, however, have to add an outer frame to this later in the process. Ensure to use wood that is similar in shape and size (e.g. 1"x 2") to the crib, as this will help to avoid gaps in the frame.[12]
-
5Begin drilling pocket holes in the framing wood. At this stage you are almost ready to start assembling the frame. Use a Kreg jig to drill the holes into the framing boards, crib rails and the side boards.[13]
- You also need to drill pocket holes in the top and bottom boards, so you can attach sheathing plywood to the crate later in the building process.
- The front crib rails do not require pocket holes along the sides, as these will be attached to the frame with hinges and serve as the gate – thus, cut this part in half down the centre (top to bottom).
-
6Consolidate the outer frame at the corners with a wood clamp and start building. Add wood adhesive to the frame before attaching the clamps to each corner. Then, using the wood clamps and a drill start assembling the outer frame by drilling screws into the pocket holes.[14]
- Gorilla wood glue is a good adhesive option for this.
-
7Transfer the outer frame to a flat surface and add the crib rails. Now that the outer frame is built you can attach the crib rails. Using the pocket holes drilled into the crib rails and outer frame, attach the two pieces together for both the front and back.[15]
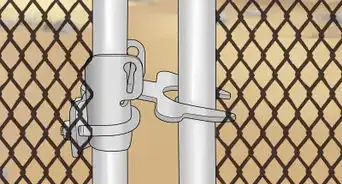
- When attaching the hinges to the front gate use tape to stabilize the two sides of the gate (i.e. the cut you made in step five).
- Attach four hinges (two on each side) to the top and bottom parts of the crib rails and outer frame, so both sides open outwards.
-
8Begin to attach the side pieces to the frame using the wood clamp. Now that you have framed the front and back parts, it’s time to finish the overall frame by attaching the side pieces. Using a wood clamp, individually clamp each corner where you made the pocket holes. Then, using a drill, start assembling the remainder of the frame.[16]
- Repeat this step seven more times (i.e. you should clamp and drill eight corners of the frame together in total).
-
9Utilizing sheathing plywood construct the top and bottom of the crate. At this stage, the overall frame of your crate should now take shape, but you still need to construct top and bottom pieces. The best option for this is sheathing plywood, because it’s cheap, easy to cut, and will easily fit onto your repurposed crib.[17]
- If you do not have spare wood for this, take a trip to your local hardware store and purchase some sheathing plywood - it's relatively inexpensive and fairly durable.
-
10Measure the length and width of your crate before cutting the plywood. After you measure your crate, use a mitre saw to cut them down to size. Using framing nails or small screws attach the bottom piece first and repeat this process for the top of the crate.
-
11Add caster wheels to the bottom of the crate if it's going to be on a hardwood surface. This will help with preventing any damage the crate might cause to a hardwood or tile surface. The wheels will also provide you with an easy way to move the crate around your home.[18]
- Caster wheels are an inexpensive option and will only require a few screws to attach along the bottom of the crate.
-
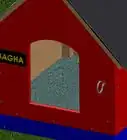
12Paint your crate with a desired colour to match your home. At this stage, your crate is nearly complete – although the frame could probably benefit from a quick coat of paint. Using spray paint is the best option, since you can easily cover the inside of the crib rails more easily with this, rather than a brush. It is also recommended that you paint the crate the original colour of the crib.[19]
- If the crib does not have an original colour, a neutral colour, such as white or egg shell both make good options.
- Also, spray paint is a cheaper option and does not require you to commit to an entire can of paint.
-
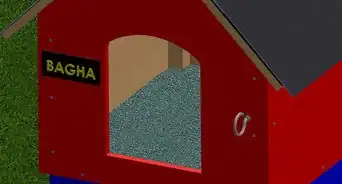
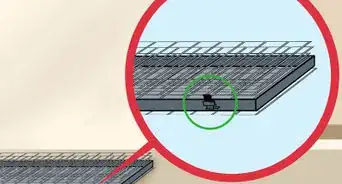
13Apply linoleum tiles to the bottom of the crate to better protect the wooden base. It is possible that your dog may have the occasional accident in the crate – which is normal. However, to protect the wood from dampness or warping, cover the inside surface with linoleum tiles. This will also allow for an easy clean-up process.[20]
- Linoleum tiles normally have an adhesive underside, so no need to purchase any other materials for the installation process.


Things You’ll Need
Constructing a Table to Hide a Crate
- Compound mitre saw
- Drill
- Kreg jig
- Wood clamp, tape measure, and square level
- Wood Glue
- Screws
- Wood and table legs
- Wood finishing or shellac
Transforming a Baby Crib into a Dog Crate
- Crib
- Compound mitre saw
- Drill
- Kreg jig
- Wood clamp
- Wood Glue
- Framing wood and sheathing plywood
- Screws and framing nails
- hinges, and a gate latch
- Four Castor wheels
- Spray paint (white)
- Linoleum tiles
Warnings
- Always ensure you take necessary precautions when using power tools. If you do not, for example, have experience using a mitre or circular saw ask someone who does to assist you.⧼thumbs_response⧽


References
- ↑ https://www.rover.com/blog/cool-dog-crate-hacks
- ↑ https://www.rover.com/blog/cool-dog-crate-hacks
- ↑ https://www.youtube.com/watch?v=AFD94aWEd9M
- ↑ https://www.youtube.com/watch?v=e0qy0QeWiFs&t=143s
- ↑ https://www.youtube.com/watch?v=e0qy0QeWiFs&t=143s
- ↑ https://www.youtube.com/watch?v=e0qy0QeWiFs&t=143s
- ↑ https://www.youtube.com/watch?v=e0qy0QeWiFs&t=143s
- ↑ https://www.youtube.com/watch?v=e0qy0QeWiFs&t=143s
- ↑ https://www.youtube.com/watch?v=0mI3WqubsQU&t=99s
- ↑ https://www.youtube.com/watch?v=gai3BycmGgE
- ↑ https://www.myrepurposedlife.com/repurposed-crib-dog-crate/
- ↑ https://www.myrepurposedlife.com/repurposed-crib-dog-crate/
- ↑ https://www.myrepurposedlife.com/repurposed-crib-dog-crate/
- ↑ https://www.youtube.com/watch?v=hPkfKwZ1w0M
- ↑ https://www.myrepurposedlife.com/repurposed-crib-dog-crate
- ↑ http://www.mylove2create.com/2016/02/turn-old-crib-into-awesome-dog-crate.html
- ↑ https://www.myrepurposedlife.com/repurposed-crib-dog-crate
- ↑ http://www.mylove2create.com/2016/02/turn-old-crib-into-awesome-dog-crate.html
- ↑ https://www.myrepurposedlife.com/repurposed-crib-dog-crate
- ↑ http://www.mylove2create.com/2016/02/turn-old-crib-into-awesome-dog-crate.html
About This Article