This article was co-authored by wikiHow Staff. Our trained team of editors and researchers validate articles for accuracy and comprehensiveness. wikiHow's Content Management Team carefully monitors the work from our editorial staff to ensure that each article is backed by trusted research and meets our high quality standards.
There are 7 references cited in this article, which can be found at the bottom of the page.
This article has been viewed 277,214 times.
Learn more...
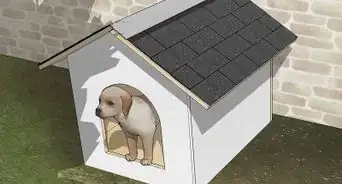
A ramp can be a huge help for any dog having trouble handling steps, getting into the car, or climbing furniture. Although you can buy dog ramps from stores, they are relatively simple to make at home out of plywood and wood boards. With a few tools, you can assemble and customize a ramp to fit your dog no matter their size.
Steps
Measuring and Cutting the Components
-
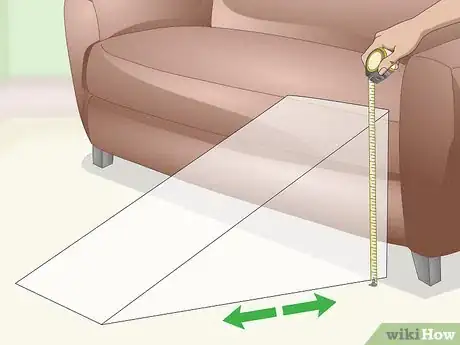
1Measure how long and high the ramp needs to be. Choose the spot where you plan on using the ramp. Starting at the top of the area you wish to help the dog reach, measure straight down to the ground to determine the height the ramp needs to be. To determine the ramp’s length, measure from the top of the area down to the ground at a gentle slope your dog will be able to walk up.[1]
- A few places where a ramp may be useful include near a steep step, couch, or bed.
- The ramp can be as long as you want it to be, although longer ramps can be more difficult to move and store.
- Make sure that the ramp’s slope isn’t too steep for your dog. If your dog is older or has trouble climbing small steps, keep the angle very gentle. Elongate the ramp as needed to avoid steepness.
-
2Wear eye glasses and a dust mask before cutting wood. You will need to cut several pieces of wood in order to construct the ramp. Before operating a saw, protect your eyes and airways. Avoid wearing gloves, jewelry, or other long clothing that can get caught under saw blades.
- Many home improvement stores will cut the wood for you if you buy it from them. Take all of your measurements in advance to reduce the amount of sawing you need to do at home.
- Also wear safety gear when drilling and assembling the ramp, since wood dust and shards are still a risk.
Advertisement -
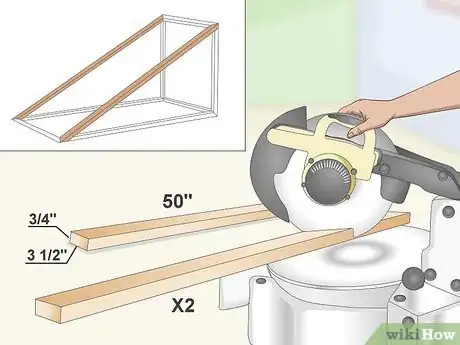
3Cut 2 pine boards to the length of the ramp using a miter saw. These pine boards will make up the ramp’s frame. They should always be as long as the ramp you plan on installing. You can easily cut these pieces to length using a miter saw or jigsaw. Hand saws are another easy method you can use, but cheaper blades tend to blunt quickly.[2]
- For an average-sized ramp, use boards 3⁄4 in (1.9 cm) thick. Cut them 50 in (130 cm) long and 3 1⁄2 in (8.9 cm) wide.[3]
-
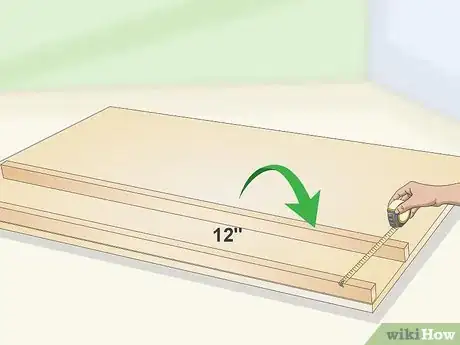
4Use the side boards to measure and cut the ramp’s length. Lay a piece of plywood down on a flat surface, then adjust the pine boards to determine how wide you want the ramp to be. A reasonable width for many dogs is 12 inches (30 cm), although you can widen the ramp to compensate for larger dogs. Trace the side boards in pencil on the ramp, then cut it to size.[4]
- For a bigger ramp, get a piece of plywood that is 1⁄2 in (1.3 cm) thick. Trim it so it is 48 in (120 cm) long and 24 in (61 cm) wide.[5]
- If you want to save money, look around your home to see if you can find loose bits of wood to repurpose. Also check out any lumber salvage yards to see what they have available.
-
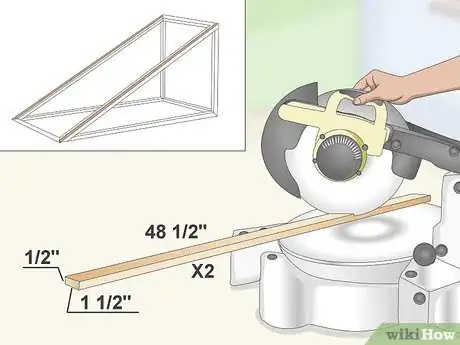
5Create 2 side supports as long and as thick as the ramp. These supports will frame the ramp, connecting it to the side boards. These supports do not need to be very wide, only enough to keep the top half of the ramp even with the base beneath it. Use the ramp and side boards as a guideline for your measurements.[6]
- For example, try making each support 48 1⁄2 in (123 cm) and about 1 1⁄2 in (3.8 cm) wide.[7]
- If you aren’t sure how big the ramp’s base will be, leave the side supports a little wider or wait to cut them so you get the correct size.
-
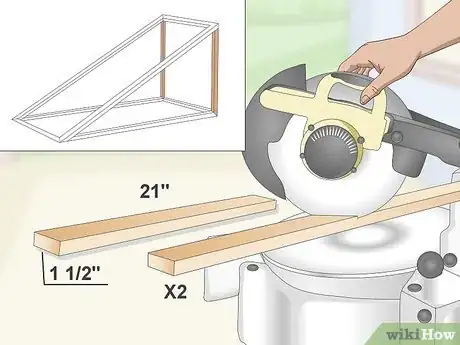
6Slice 2 more pine boards to create the ramp’s legs. The ramp needs 2 legs to support the higher end. The other end will rest against the boards used for the base. The legs should be about as tall as the ramp is.[8]
- An average size for the legs is 21 in (53 cm) long and 1 1⁄2 in (3.8 cm) wide. These will fit a ramp 24 in (61 cm) tall.[9]
- For aesthetics, you can round the tops of the legs with a jigsaw. This will eliminate corners that may stick out from the ramp after you assemble it.
-
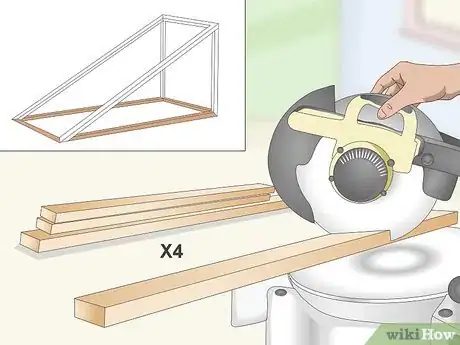
7Cut out 4 boards needed to assemble the base. The base can be the most complicated part, depending on how you build it. A simplified base can be made using only 4 boards, which provide a frame for the ramp and legs to attach to. Cut these out of pine boards about 3⁄4 in (1.9 cm) thick.[10]
- For an average ramp, cut 2 boards 23 1⁄2 in (60 cm) long and 3 1⁄2 in (8.9 cm) wide. These will form the short ends of the base.
- The longer ends of the base should be of a similar length to the ramp. Try making them 46 1⁄2 in (118 cm) long and 3 1⁄2 in (8.9 cm) wide.
- For additional stability, get 2 runner boards to attach to the longer base boards. For example, you can make them 46 1⁄2 in (118 cm) long and 1 1⁄2 in (3.8 cm) wide.
Building the Ramp’s Base
-
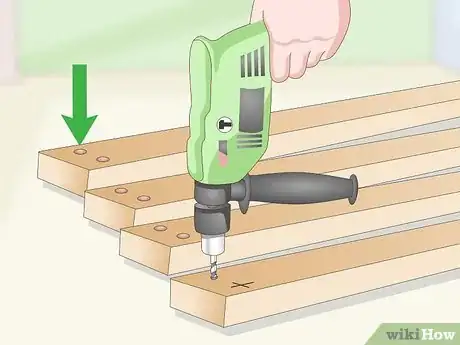
1Drill pilot holes in the ends of the boards for the base. Assemble the 4 base boards together to form basic shape of the base. To attach the boards together, you will need to create holes on each end of the longer boards. Plan on making each hole about 1 in (2.5 cm) from the end of the board. Position each hole ⅓ of the way from the board’s top or bottom edge.[11]
- Mark the boards with a pencil first, then drill through the marks with a 3⁄8 in (0.95 cm) bit.
- You will end up with a total of 4 holes on each of the long boards.
-
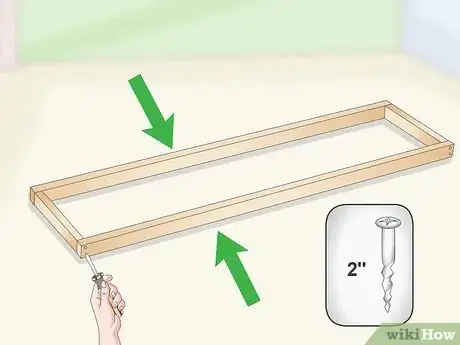
2Attach the base boards together with 2 in (5.1 cm) construction screws. Place a screw in each pre-drilled hole, then use an electric screwdriver to secure the boards. Before moving on, push against the base boards, looking for any wiggling. This can be a sign of loose boards and an unstable ramp, so tighten the screws![12]
- If the base seems unstable, you can cut some thin pieces of wood. Cut the runners almost as long as the side base boards, lay them flat inside the base, then screw them to the side boards.
-
3Attach the legs to the base with 1⁄4 in (0.64 cm) carriage bolts. Position the legs upright inside of the base, right against the corners where the base boards meet. The legs will hold up the taller side of the ramp. Drill a single hole about 5 in (13 cm) up the wide part of each leg and into the side base board. Add 3 1⁄2 in (8.9 cm) long, 1⁄4 in (0.64 cm) wide carriage bolts to complete the base.[13]
- For additional stability, place a 1⁄4 in (0.64 cm) washer onto the end of each bolt.
- The legs have to bear a lot of weight, so only use strong bolts. They hold up better than screws. Never use nails!
Assembling the Ramp
-
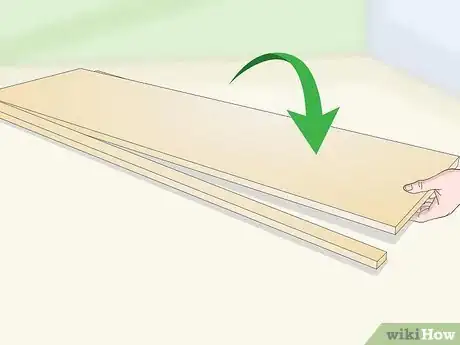
1Lay the plywood ramp between the side supports. Make sure the ramp and the other components are as straight as you can get them before you screw them together. To start, place the 48 in (120 cm)-long supports to the left and right of the ramp. They should lay flat on your work surface and be level with the ramp.[14]
- Check the ramp to make sure its edges are flush with the edges of the supporting structures. The side supports should be the same thickness as the ramp.
-
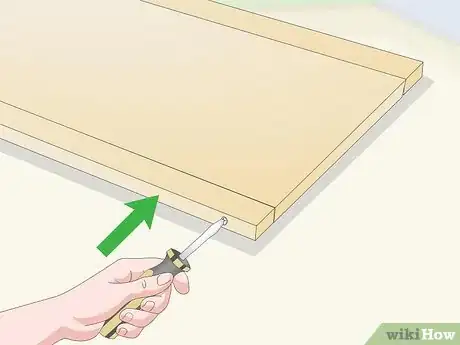
2Fasten the side supports with 1⁄4 in (0.64 cm) construction screws. Measure about 2 in (5.1 cm) from the ends of the supports and mark these spots in pencil. These spots should be in the middle of boards, even with the plywood ramp. Then, drill through each spot with a 3⁄8 in (0.95 cm) drill bit. Finish by screwing the screws through the side of the supports and into the plywood ramp.[15]
- Clamp the boards in place first to ensure they don’t slip out of alignment. Then, pre-drill the holes prevent cracking or splintering in the wood.
- To stabilize longer ramps, consider positioning additional screws along the supports. Use them to secure the ramp to the supports
-
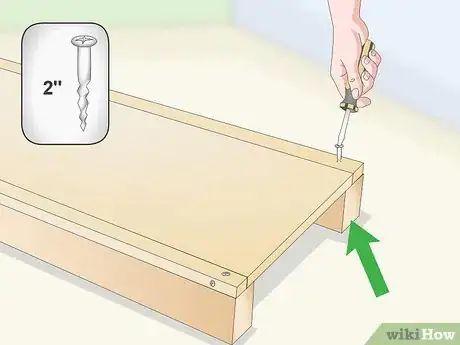
3Attach the side borders with 2 in (5.1 cm) construction screws. Set the side borders against the supports, then measure about every 12.5 in (32 cm) along their center. Mark each spot in pencil to indicate where you need to drill. Using a 3⁄8 in (0.95 cm) bit, drill into each spot, then place the screws to secure the wood together.[16]
- Depending on the length of your ramp, you may need to adjust the positioning of the screws. Try to keep them at an even distance from one another and the ends of the ramp.
-
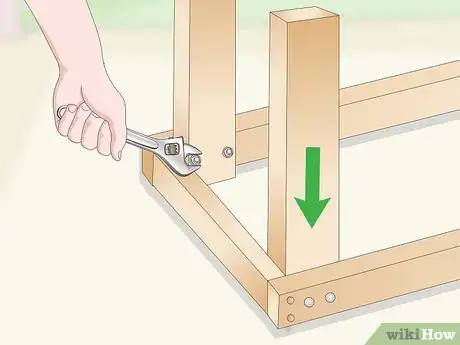
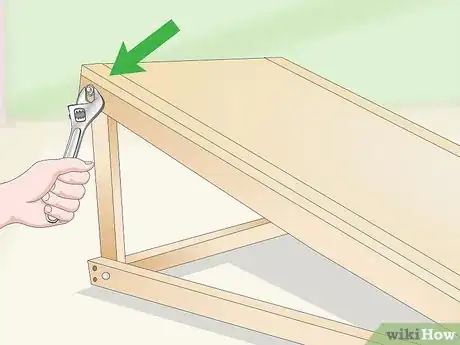
4Secure the legs to the ramp with 1⁄4 in (0.64 cm) carriage bolts. Position the ramp on top of the base, aligning the sides with the tops of the legs. Measure about 3 in (7.6 cm) down from the top of each leg and drill a hole through it using a 1⁄4 in (0.64 cm) drill bit. Screw the bolts into position, then slide 1⁄4 in (0.64 cm) washers or locking nuts on the ends of each of them for additional stability.[17]
- You will need to use an adjustable wrench to tighten the washers or locking nuts on the bolts.
- Make sure the legs are straight vertically and that the ramp is at the slope you need it to be. If the ramp looks crooked, undo the bolts and reposition the components as needed.
-
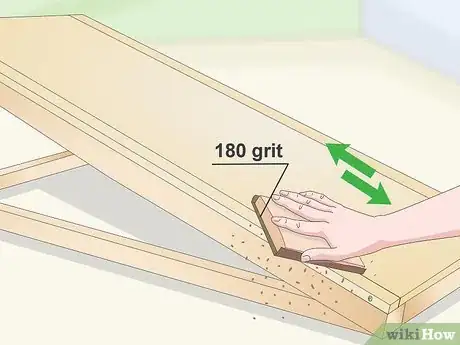
5Sand the ramp with 180-grit sandpaper to remove any rough edges. You have successfully constructed your ramp, so take some quick precautions to prevent your dog from getting splinters when they use it. The cut edges in particular may look a little sharp or jagged. Using sandpaper or a sanding block, lightly rub down these areas.[18]
- As long as you press down lightly on the wood, the sandpaper shouldn’t cause any scratches.
- You can test the wood’s smoothness by touching it with your finger. If you notice any rough parts, keep sanding them until they feel smooth.
-
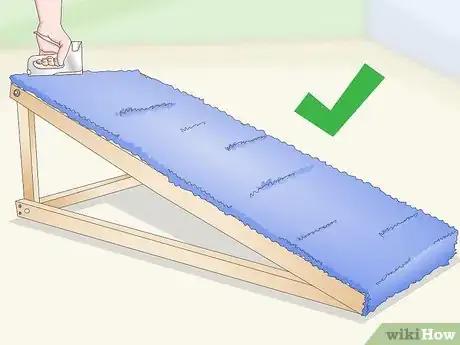
6Decorate the ramp with carpeting to make it softer. Find a scrap piece of carpeting, then use a utility knife or carpet cutter to cut a portion the same size as your ramp. Lay the carpeting over the ramp. To secure the carpeting, staple the top and bottom ends directly to the ramp with a staple gun.[19]
- You can purchase new carpeting or repurpose old scraps. Try looking at a local thrift shops or carpeting outlets for fabrics on clearance.
- Carpeting is soft on paws and adds aesthetic to your ramp. This is a great opportunity to get creative. Choose colors or patterns that match your room!
- For outdoor ramps, make sure you get something water-resistant.
Community Q&A
-
QuestionI am making a 12 ft folding dog and human ramp. I have it built, but it is bending down in the middle. How can I solve this problem?
 TheFriendlyElfOwl44Community AnswerAdd a removable support beam/post in the area on the ramp where it is bending/sagging, the post/beam will add more support to the ramp and make it more sturdy.
 -
QuestionHow do you make it so the ramp won't slip? Would rubber matting attached to the bottom work?
 Community AnswerYes, rubber matting will ensure the ramp will not slip. Making the ramp of a heavy material will also help.
 -
QuestionIf I make the ramp without the slats/steps, would it work for a shed ramp?
 Community AnswerIt depends on how high the shed is, but theoretically, yes.
Warnings
- Operating power tools and saws can be dangerous. Always wear proper safety gear, such as protective glasses and a dust mask.⧼thumbs_response⧽
Things You’ll Need
- Plywood
- Pine boards
- Nails
- Tape Measure
- Power drill
- Power screwdriver
- 2 3 1⁄2 in (8.9 cm) carriage bolts
- 2 1⁄4 in (0.64 cm) washers
- 1⁄4 in (0.64 cm) drill bit
- 3⁄8 in (0.95 cm) drill bit
- 2 in (5.1 cm) construction screws
- 1⁄4 in (0.64 cm) construction screws
- Carpet
References
- ↑ http://dogsaholic.com/care/how-to-build-a-dog-ramp.html
- ↑ http://dogsaholic.com/care/how-to-build-a-dog-ramp.html
- ↑ https://www.familyhandyman.com/bedroom/saturday-morning-workshop-how-to-build-a-collapsible-dog-ramp/view-all/
- ↑ http://dogsaholic.com/care/how-to-build-a-dog-ramp.html
- ↑ https://www.familyhandyman.com/bedroom/saturday-morning-workshop-how-to-build-a-collapsible-dog-ramp/view-all/
- ↑ https://www.thisoldhouse.com/how-to/how-to-build-dog-ramp
- ↑ https://www.familyhandyman.com/bedroom/saturday-morning-workshop-how-to-build-a-collapsible-dog-ramp/view-all/
- ↑ https://www.youtube.com/watch?v=gecSY1rzKig&feature=youtu.be&t=38
- ↑ https://www.familyhandyman.com/bedroom/saturday-morning-workshop-how-to-build-a-collapsible-dog-ramp/view-all/
- ↑ https://www.familyhandyman.com/bedroom/saturday-morning-workshop-how-to-build-a-collapsible-dog-ramp/view-all/
- ↑ https://www.youtube.com/watch?v=gecSY1rzKig&feature=youtu.be&t=51
- ↑ https://www.familyhandyman.com/bedroom/saturday-morning-workshop-how-to-build-a-collapsible-dog-ramp/view-all/
- ↑ https://www.familyhandyman.com/bedroom/saturday-morning-workshop-how-to-build-a-collapsible-dog-ramp/view-all/
- ↑ https://www.youtube.com/watch?v=sx_USdq5z6Q&feature=youtu.be&t=438
- ↑ https://www.familyhandyman.com/bedroom/saturday-morning-workshop-how-to-build-a-collapsible-dog-ramp/view-all/
- ↑ https://www.familyhandyman.com/bedroom/saturday-morning-workshop-how-to-build-a-collapsible-dog-ramp/view-all/
- ↑ https://www.thisoldhouse.com/how-to/how-to-build-dog-ramp
- ↑ http://dogsaholic.com/care/how-to-build-a-dog-ramp.html
- ↑ http://www.latimes.com/style/la-hm-dogramp16-2008aug16-story.html
About This Article
To build a dog ramp, start by measuring how long and high you want the ramp to be. Then, cut 2 pine boards and 1 piece of plywood to the length the ramp needs to be, making the plywood at least 12 inches wide so it's big enough for your dog. You'll also need to cut 2 side supports that are as long as the ramp, 2 boards that are as high as the ramp for the legs, and 4 boards to make the ramp's rectangular base. Once you've cut all of the boards for your ramp, assemble them using construction screws and carriage bolts. To learn how to assemble your dog ramp, keep reading!
