This article was co-authored by Tony Hoang. Tony Hoang is a Landscaper and the Principal at H&J Landscaping & Concrete Contractor in Newark, CA. With over six years of experience, he specializes in designing the perfect concrete driveways & backyard patios for homes. H&J Landscaping & Concrete Contractor is a 4.5-star business on Yelp.
There are 15 references cited in this article, which can be found at the bottom of the page.
This article has been viewed 24,551 times.
With the addition of a few rustic paver stones, you can transform a humdrum backyard into an enchanted wilderness escape. All you need is a basic plan for your new patio space and an eye-catching design for the stones themselves. Once the initial planning is out of the way, you can begin the process of excavating your lawn and installing the foundation layer-by-layer. When it’s all said and done, you’ll have an idyllic, professional-looking outdoor haven to show for your efforts.
Steps
Plotting Your Patio
-
1Decide where you want your patio to go. Paver patios most often serve as an extension of the house, allowing visitors to transition from the back door or porch straight onto the stone surface. You could also reserve an out-of-the-way corner of a big yard for a private lounging area. An open, scenic spot with no trees or large plants nearby will work best.[1]
- Whatever space you choose should be roomy enough to move around in comfortably and hold a few pieces of patio furniture, along with any guests you might be entertaining in the future.[2]
- Consider drainage issues, such as runoff from the patio surface and edges, to ensure water won’t pool on the patio. If you’ll be installing an awning or overhang, consider whether you’ll also need gutters or downspouts to direct the water away from the patio.
- It's also important to check the area so you can plan ahead and ensure your pavers will fit.[3]
-
2Remove nearby obstacles. Pull up any small shrubs, stumps, roots, and lawn decorations in the immediate vicinity and make sure the ground is free of fallen branches and other debris. Clear the area a few feet beyond your intended patio space to give yourself room to work comfortably.[4]
- Put your existing outdoor furniture into storage for now—you can replace it later once the patio is finished.
- If your designated patio area is covered with mulch, remove it to another part of the garden.
Advertisement -
3Line off the planned dimensions of your patio. Once you’ve got an idea of where you want the patio to go, drop a few garden stakes to mark the perimeter. Use a tape measure to make sure your boundary lines are straight and even, then close in the perimeter with string or marking paint.[5]
- When building a patio with a curved perimeter, bend a garden hose into shape and use it to serve as a rough visual aid.[6]
-
4Design your own custom patio. You can also take a free-form approach to your patio's placement, if you’d prefer. This can save you quite a bit of time and labor, since you won’t have to cut the pavers to fit an area of a specific size. It will also allow you to get as creative as you like while planning your layout.
- Build your patio along the contours of a winding walkway or in a small alcove where it would be difficult to find space for a traditional square or rectangular setup.
- Whatever shape you decide on for your patio should make sense visually within your yard as a whole.
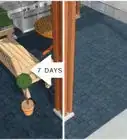
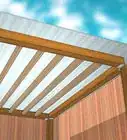
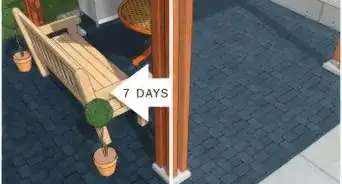
- If you’ll be adding an awning or overhang, make sure this structure is in place (and meets proper load and weight requirements) before building the patio.
-
5Choose a design for the paver stones. You have several different options when it comes to arranging the pavers themselves. Simple patterns like jack-on-jack (where the stones repeat like a grid) or running bond (where every other row is offset) will be the easiest to install. If you’d prefer a more lavish layout, consider a complex design like herringbone or pinwheel.[7]
- Keep in mind that more complex arrangements will likely require you to cut or otherwise modify the pavers in order to get them to fit. For this, you will need a circular saw with a diamond tip. Make sure to set the paver on a non-slip mat before beginning to cut as this will help to keep the paver in place during cutting and prevent any accidents.[8]


Excavating and Leveling Your Yard
-
1Contact your local utility company at least 2 days prior to digging. To ensure you don’t hit a buried utility line, get in touch with your local utility company. Call them at least 2 days before starting your project and ask them to locate and mark buried lines on your property. This service is free and can prevent accidents and power outages.
- In the U.S., call the digline at “811.” They’ll talk you through the steps you need to take to dig safely and even contact the correct utility company to mark buried lines on your property.
- If past residents have made adjustments or additions to the utilities, you may need to contact a landscaping or excavating service to help you find each point of service.
-
2Dig out the patio area to a depth of 12 in (30 cm).[9] This will leave just the right amount of space for both the paver stones and the underlying substrate. You can take care of most of the removal using a single shovel. A hand trowel will also be useful for keeping the edges of the site clean and precise.[10]
- Since most pavers are 3 inches thick, you will need, the remaining 9 inches of the hole will be filled with gravel and paver sand to help secure everything in place.[11]
- You can use a tiller to break up the soil first and make it easier to hand shovel the required depth and remove by wheel barrow. Large areas may require a skid steer or mini-excavator or tractor with a backhoe and front bucket attachment.
- When it’s complete, your paver patio should sit at or slightly above ground level.[12]
-
3Use an elevated level to create slope as you dig. A slight slope is necessary to promote runoff during wet weather. Cut a 1 in (2.5 cm) piece of scrap wood and tie it to the end of a level. That way, you can ensure that your finished patio has 1 in (2.5 cm) of drop off every 4 feet (1.2 m).[13]
- Ensure the slope angles away from the patio and add drainage if necessary.
- You may be able to get by with a perfectly level patio if you live in a place with a hot, dry climate, or if you’ve elected to place the patio beneath an overhang.
-
4Leave room for underground utilities. If you need to bury electrical cable for outdoor lighting, do it now before you begin adding the substrate—dirt is more forgiving on cables than rougher materials like sand and gravel. Make sure the wire or cable is rated for direct burying or is in an approved conduit. Notch the soil around the edges of the pit with your trowel and lay the cable in a straight path, avoiding kinks, coils, and splices wherever possible.[14]
- Take a few moments to check whether your lighting elements are functional. Otherwise, you'll just have to dig them back up if something goes wrong later on.
-
5Tamp the soil to flatten it. Use a hand tamper or a plate compactor and work your way inward from the perimeter of the site. This will provide a more stable foundation for the substrate and prevent the paver stones from shifting once they’ve been put in place.[15]
- As an optional step, you can also roll out a sheet of landscaping fabric at this point to act as a buffer for weeds and prevent them from taking root beneath the gravel base.[16]
-
6Pour 4 in (10 cm) of crushed gravel for the base.[17] Dump the gravel into the pit and use a heavy iron rake to distribute it out to the edges. Make sure you spread the gravel evenly, adding more until you reach the desired depth. As you did with the soil, tamp the gravel down until it’s firmly set. Wetting the gravel can help you distribute and pack it evenly.[18]
-
7
-
8Level the sand with a flat board. To avoid over or under-filling the base, cut a couple lengths of 1-in (2.5-cm) PVC pipe and place them parallel to one another down the middle of the pit before you pour in the sand. Then, drag a flat board, like a 2x4, along both pipes to level the heap. When you’re done, pull out the pipes, fill in the depressions, and tamp the entire surface flat.[21]
- Rather than dumping in all of the sand at once, proceed a few feet at a time—pouring, smoothing, and repeating.


Installing the Pavers
-
1Lay down the paver stones from the outer perimeter. Press the pavers gently into the leveling sand, starting at one corner of the pit and working your way toward the center. Leave a narrow gap between each stone, no less than ⅛ in (0.32 cm) and no more than ½ in (1.27 cm)—you’ll be filling in this space later with more sand.[22]
- Use photos of completed patios as a reference when figuring out the placement of your pavers.
- It will take longer to embed raw stones or pavers with natural finishes, as they’ll need to be adjusted to the right height individually.[23]
-
2Keep a consistent amount of space between each paver. It may help to separate the stones with a sheet of plywood or with spacer blocks as you install them. Slide the plywood against the edge of the pit and drop your first stone. Then, turn the sheet 90 degrees to create a gap between the neighboring stones. Continue one row or pattern section at a time, repositioning the plywood after laying down each paver.[24]
- Keep uniformly-shaped pavers as close together as possible. Leaving space between them not only requires more joint sand to fill in the gaps, it also reduces shifting later when the joint sand loosens or is washed or blown away.
-
3Check your slope as you go. Keep your level and a straightedge handy and refer to them frequently. Aim for approximately 1 in (2.5 cm) of drop off every 4 ft (1.2 m). This will ensure that your patio will be able to drain as needed.
- Adjust the amount of substrate in a given section as needed by tamping or redistributing it.
- For a flat ground patio, look for the substrate to be as level as possible before proceeding.[25]
-
4Cut the pavers to fit if necessary. Some full-sized stones may be too big to go in a certain spot. In this case, a wet saw or circular saw with a diamond blade, which can be rented from a home improvement store, will be required to cut through the hard stone.[26] Assuming that you don’t have access to a power saw, you can also break down the pavers the old fashioned way using a mallet and chisel.[27]
- When you come to a paver that won’t fit, mark it with a piece of chalk so you’ll know where you need to cut.
- Always wear gloves, a face mask, and ear and eye protection anytime you’re working with power saws.[28]
-
5Tap the pavers into place with a rubber mallet. Pound the top of the stones to set them deeper into the sand. This can be a painstaking process, but it’s crucial for ensuring that the pavers are stable enough to stand, walk and set furniture on.[29]
- Don’t attempt to secure the pavers by simply stomping on them. This may cause them to sink too deep, or knock them out of alignment.
- If you find that the pavers are sitting unevenly, you may need to work them deeper into the substrate by hand.
-
6Fill the gaps between the pavers with another layer of sand. Spread an additional ½ in (1.25 cm) of levelling sand over the tops of the stones. Use a broom to carefully push the sand into the spaces between the pavers. Sweep in several different directions to fill the joints completely. Any remaining sand can be swept off later.[30]
- Jointing sand can offer a permanent alternative to ordinary sand. This substance contains additives that form a solid bond after being exposed to moisture.
- Vacuum up any stubborn sand that collects where it's not supposed to, or use a leaf blower to blast it out into the far reaches of the yard.
-
7Install edging, if desired. If you want your patio to have a neat and uniform edge, you can install paver edging. Choose from plastic, concrete, metal, or wood. Position the edging along the perimeter of the patio pavers. Secure it with galvanized spikes per the paver manufacturer’s guidelines.[31]
-
8Hose down the entire patio. A good spray will help the pavers settle and pack the underlying substrate down tight. Just make sure you don't oversaturate the area, or you could end up with a swamp instead of a relaxing outdoor lounge. Once the water has had time to dry, you can replace your furniture and kick back![32]
- Wet the patio every hour for the first 3 hours to accelerate the compacting process.
-
9Seal the patio once it’s dried. To keep the sand in the joints and protect your new pavers, you should apply a sealer to the patio once it is completely dry. Use a 4-inch (10-cm) brush to apply sealer to the outsider perimeter of the patio. Then use a garden-style pump to spray sealant over the rest of the patio. Allow it to dry completely, then repeat the process to apply a second coat.
- Paver patio sealer can be found at home improvement stores.[33]


Expert Q&A
-
QuestionHow deep should a paver base be for a patio?
 Scott JohnsonScott Johnson is the Owner and Lead Design Consultant for Concrete Creations, Inc., an award-winning landscape and design company based in the San Diego, California metro area. He has over 30 years of experience in the pool and landscape construction industry and specializes in large estate outdoor environment construction projects. His work has been featured in San Diego Home & Garden Magazine and on Pool Kings TV Show. He earned a BS degree in Construction Management with an emphasis in Architecture and CAD design from Northern Arizona University.
Landscape & Design ConsultantA lot of people take this part for granted. They just put like an inch of sand down and call it a day. You really need to excavate at least 6 inches. Then, you can lay the road base. Put the sand on top of the road base and then your pavers go on top of that. So you really need at least 3-4 inches of material under the pavers.
Warnings
- Make sure the pavers are completely dry before bonding them with jointing sand. It’s possible for the dust to leave behind permanent white spots or streaks when it gets damp.⧼thumbs_response⧽
- Be extremely careful when operating power saws and other dangerous equipment. If you’re not sure how to run these tools safely, it may be better left to a professional.⧼thumbs_response⧽
Things You'll Need
- Paver stones
- Crushed gravel or paver base
- Leveling sand
- Jointing sand (optional)
- Shovel
- Hand trowel
- Hand tamper
- Iron rake
- Rubber mallet
- Circular saw or wet saw w/ concrete blade
- 1" PVC pipe
- 2x4 or other flat board
- Garden stakes
- String or marking paint
- Modified level
- Straightedge
- Tape measure
- Garden hose
- Landscaping fabric (optional)


Expert Interview
Thanks for reading our article! If you'd like to learn more about building a paver patio, check out our in-depth interview with Tony Hoang.
References
- ↑ https://www.bobvila.com/articles/how-to-build-a-paver-patio/#.WacNmMiGPIV
- ↑ https://www.familyhandyman.com/patio/build-a-stone-patio-or-brick-patio/view-all/
- ↑ Tony Hoang. Landscaping Manager. Expert Interview. 1 November 2022.
- ↑ http://www.bhg.com/home-improvement/patio/installation-how-to/diy-paver-patio/?slideId=e46f341d-4868-45dc-84b3-e3a1387c93b6
- ↑ http://www.homedepot.com/c/how_to_install_a_paver_patio_HT_PG_OD
- ↑ https://www.lowes.com/projects/porch-deck-and-patio/how-to-design-and-build-a-paver-patio/project
- ↑ https://www.lowes.com/projects/porch-deck-and-patio/how-to-design-and-build-a-paver-patio/project
- ↑ Tony Hoang. Landscaping Manager. Expert Interview. 1 November 2022.
- ↑ Tony Hoang. Landscaping Manager. Expert Interview. 1 November 2022.
- ↑ http://www.bhg.com/home-improvement/patio/installation-how-to/diy-paver-patio/?slideId=e46f341d-4868-45dc-84b3-e3a1387c93b6
- ↑ Tony Hoang. Landscaping Manager. Expert Interview. 1 November 2022.
- ↑ https://www.bobvila.com/articles/how-to-build-a-paver-patio/#.WacNmMiGPIV
- ↑ https://www.lowes.com/projects/porch-deck-and-patio/how-to-design-and-build-a-paver-patio/project
- ↑ http://www.popularmechanics.com/home/lawn-garden/how-to/a8906/how-to-put-in-low-voltage-landscape-lighting-15326645/
- ↑ https://www.todayshomeowner.com/video/patio-pavers/
- ↑ http://www.bhg.com/home-improvement/patio/installation-how-to/diy-paver-patio/?slideId=c68af5ba-2515-4cb7-a6aa-700530fc51c1
- ↑ Tony Hoang. Landscaping Manager. Expert Interview. 1 November 2022.
- ↑ Scott Johnson. Landscape & Design Consultant. Expert Interview. 8 April 2020.
- ↑ Tony Hoang. Landscaping Manager. Expert Interview. 1 November 2022.
- ↑ Scott Johnson. Landscape & Design Consultant. Expert Interview. 8 April 2020.
- ↑ https://www.lowes.com/projects/porch-deck-and-patio/how-to-design-and-build-a-paver-patio/project
- ↑ https://www.lowes.com/projects/porch-deck-and-patio/how-to-design-and-build-a-paver-patio/project
- ↑ https://www.familyhandyman.com/patio/build-a-stone-patio-or-brick-patio/view-all/
- ↑ https://www.bobvila.com/articles/how-to-build-a-paver-patio/#.WacNmMiGPIV
- ↑ http://www.bhg.com/home-improvement/patio/installation-how-to/diy-paver-patio/?slideId=dc3c8e58-362e-41a9-ae73-e6097ca8f680
- ↑ Tony Hoang. Landscaping Manager. Expert Interview. 1 November 2022.
- ↑ https://www.younghouselove.com/2011/05/pati-oh-thank-goodness-its-done/
- ↑ https://www.younghouselove.com/2011/05/pati-oh-thank-goodness-its-done/
- ↑ https://simplykierste.com/how-to-build-a-diy-paver-patio/
- ↑ https://www.todayshomeowner.com/video/patio-pavers/
- ↑ http://extension.oregonstate.edu/marion/sites/default/files/how_to_install_pavers.pdf
- ↑ https://www.bobvila.com/articles/how-to-build-a-paver-patio/#.WacNmMiGPIV
- ↑ https://www.doityourself.com/stry/how-to-level-paver-base
About This Article

To build a paver patio, dig out the area to a depth of 6 inches, with a shovel, taking care to create a slope of 1 inch every 4 feet to allow water to run off. Then, flatten out the soil and cover the area with 2 to 3 inches of gravel. Cover the gravel with 1 to 2 inches of sand and level it off with a flat board. Starting at one corner, press your paving stones into the sand. Fill the gaps between the stones with sand, then apply a sealer around the perimeter. For more tips from our Landscaper reviewer, including how to design your own custom patio, read on!