This article was co-authored by wikiHow Staff. Our trained team of editors and researchers validate articles for accuracy and comprehensiveness. wikiHow's Content Management Team carefully monitors the work from our editorial staff to ensure that each article is backed by trusted research and meets our high quality standards.
wikiHow marks an article as reader-approved once it receives enough positive feedback. This article received 21 testimonials and 89% of readers who voted found it helpful, earning it our reader-approved status.
This article has been viewed 1,168,056 times.
Learn more...
Electric motors power all kinds of things you probably use every day, like your fridge, washing machine, and even electric toothbrush. Building your own simple electric motor is actually really easy. To help you out, we've put together a step-by-step guide to making a basic electric motor that includes everything you'll need to get started.
Steps
Winding the Coil
-
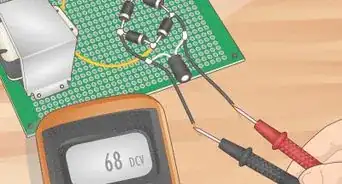
1Tape together four pencils. Tape the pencils in a two by two cluster. This will give you something solid to wrap your coil around. You can substitute the pencils for a cylinder that’s roughly half an inch in diameter.[1]
-
2Wrap wire around the pencils. Once you have the pencils taped or find a suitable cylinder, begin wrapping your wire around it tightly. Start in the middle of the wire and wrap the coil fifteen times toward one end and fifteen times toward the other. Once you have finished wrapping the coil, remove the pencils from the middle. This will leave you with two loose leads at either end of the coil.[2]Advertisement
-
3Loop the loose ends around the coil. Wrap the loose ends around either side of the coil three or four times. This will help keep the coil wound tightly. Point the remaining loose ends straight out away from the coil.[3]


Connecting the Battery
-
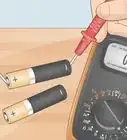
1Secure the battery. Use tape or clay to hold the battery in place on a flat surface like a tabletop or desk. This will allow you to connect it to the coil without having to hold it with your hands. Make sure the battery is laying on its side so that you can easily reach both terminals.[4]
-
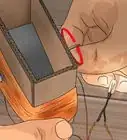
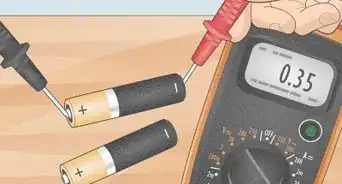
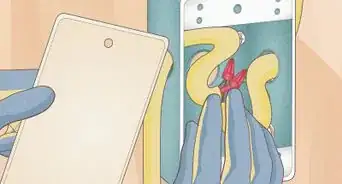
2Strip the ends of the coil wire. Use wire strippers to remove the insulation on either end of the wire, but only one half of the insulation, such that the bare wire will be connected to the circuit only half the time. These leads will connect to the battery and allow current to flow through the coil. If you sand the wire all the way around, the wire will heat up or move back and forth, and the motor will not work. [5]
-
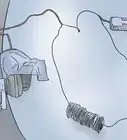
3Slide each end through the eye of a needle. A needle makes the perfect holder for the wire leads. Insert each end into the eye of a separate needle. You can also bend two paper clips (one for each side) to make a holder.[6]
-
4Tape the needles to the battery terminals. Once you have the wire in both needles, it’s time to hook your wire up to the battery. Tape one needle to the positive side of the battery (marked with a “+”). Tape the other needle to the negative side of the battery (marked with a “-”). [7]
- Be sure the needles are pointing with the sharp end down toward the battery and the eye at the top holding the coil.
- Do not let either needle touch both sides of the battery.
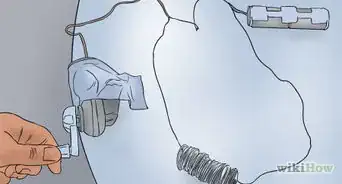
- Once both leads are connected, there will be an electric current running through the needles and the wire. It is best to use rubber or insulated gloves for this step.


Introducing the Magnet
-
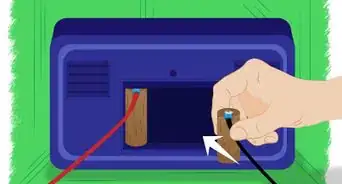
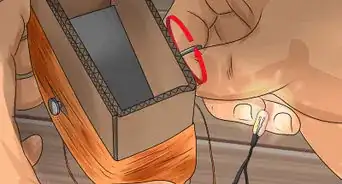
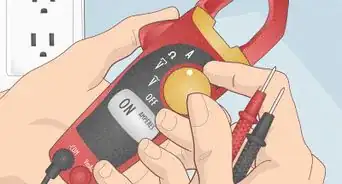
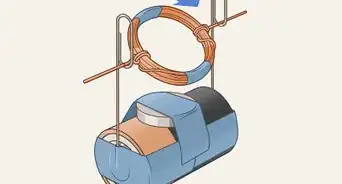
1Bring a magnet close to the coil. Once a current is flowing through the coil, it can interact with a magnet. Either hold the magnet close to the coil, or tape it to the battery right underneath the coil. The closer the magnet is to the coil the stronger it will interact.[8]
-
2Spin the coil. See what happens when you spin the coil. Depending on the direction the current is flowing and the side of the magnet that is interacting with the coil, the coil may continue to spin or may not. If the coil does not keep spinning, try spinning the other direction.[9]
-
3Experiment with different methods. Different variations will give you different results. The coil may spin faster, slower, or not at all if you change something. Try moving the magnet closer to or further from the coil, pick a stronger or weaker magnet, or use the other side of the magnet. These variations are a fun way to understand the forces in an electric motor.[10]


Community Q&A
-
QuestionWhy do I use sand? Is it to eliminate friction losses between wires?
 Community AnswerThe article is actually referring to sandpaper. You use sandpaper because the wire used for making the coil is enameled copper wire, which means the copper wire has an insulation coating. To ensure that there is proper contact between the coil end and the battery lead, you need to remove this enamel coating. So you use sandpaper to rub it off.
 -
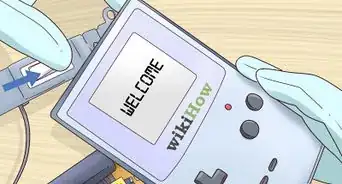
QuestionWhat can I use this electrical motor for?Community AnswerOther than a learning experience, not much. This motor is fairly weak, and won't generate enough power to move anything. It will make a great science fair project, however.
-
QuestionWhat are the uses of an electric motor?
 Community AnswerElectric motors have many uses. Motors which are used in simple circuits help in giving a better understanding of electricity, motion and technology to the students. Large motors used in cars or locomotives help in motion. Motors are a key component of the industrial world and the technological advances we are all familiar with today.
Warnings
- If you use a thin wire and a strong current, your wires can get extremely hot!⧼thumbs_response⧽
- If a child is doing the project, make sure to provide the necessary adult supervision to avoid any accidents.⧼thumbs_response⧽
Things You'll Need
- Pencils
- Insulated Copper Wire
- Wire Strippers
- Electrical Tape
- Two Needles
- Magnets
- Battery—AA to a D battery would work for this project


References
- ↑ http://www.sciencebuddies.org/science-fair-projects/project_ideas/Elec_p051.shtml#procedure
- ↑ http://www.sciencebuddies.org/science-fair-projects/project_ideas/Elec_p051.shtml#procedure
- ↑ http://www.education.com/science-fair/article/no-frills-motor/
- ↑ http://www.education.com/science-fair/article/no-frills-motor/
- ↑ https://www.wired.com/wp-content/uploads/2015/12/untitled_key5.jpg
- ↑ http://www.education.com/science-fair/article/no-frills-motor/
- ↑ http://www.education.com/science-fair/article/no-frills-motor/
- ↑ https://www.wired.com/2016/01/how-to-build-a-super-simple-electric-motor-out-of-stuff-you-already-have/
- ↑ https://www.wired.com/2016/01/how-to-build-a-super-simple-electric-motor-out-of-stuff-you-already-have/
About This Article

To begin building a simple electric motor, make a coil by wrapping insulated copper wire around something hard, like a few pencils. Then, use wire strippers to remove the insulation on each end of the wire. Lay a battery on its side and tape it to a flat surface, then slide each stripped end of wire through the eye of a needle and tape the needles to the positive and negative sides of the battery. Tape a magnet to the battery underneath the coil, spin the coil, and voila! To learn how to experiment with different magnets, read on!