This article was co-authored by wikiHow staff writer, Nihal Shetty. Nihal Shetty is a Writer and Editing Fellow at wikiHow who splits his time between Michigan and Mexico City. Before his role at wikiHow, he was an instructor of Russian literature at the University of California, Berkeley. Nihal received a BA in Comparative Literature from Columbia University and an MA in Russian at Berkeley.
There are 11 references cited in this article, which can be found at the bottom of the page.
This article has been viewed 4,082 times.
Learn more...
Wisteria is a majestic and eye-catching vine for your garden, but it needs structural support to thrive. By building a wooden trellis, you can help your wisteria grow and remain healthy. In no time at all, you’ll have an incredible display of gorgeous flowers to decorate your home. We’re here to show you how with this complete guide on how to build a trellis for wisteria.
Steps
Building a Wooden Trellis
-
1Gather good quality wood boards. The size and number of these hardwood boards depends on how large of a trellis you’re planning to build.[1] For a simple trellis, we recommend at least 8 boards that are 5 ft (1.5 m) long and 2 in (5.1 cm) wide.
- Wisteria is an aggressive grower that can overwhelm weaker structures with its weight.[2] For longevity, use a hardwood that won’t rot easily, like white oak or mahogany.[3]
- If you’re having difficulty finding boards the right size, cut them using a power tool, like a circular saw.
-
2Lay 2 wood boards next to each other. These 2 boards will be the vertical edges of your trellis, so place them apart from each other at a distance that matches how wide you’d like your trellis to be.[4]
- For example, if you are planning to have a trellis that’s 4 ft (120 cm) wide, place your boards on the ground lengthwise 4 ft (120 cm) from each other.
Advertisement -
3Lay one horizontal board at the top of the frame and one at the bottom. These 4 boards will create a square frame for the trellis. Depending on how close together your vertical boards are, you may need to cut the horizontal boards so that you can line up their outer edges with the outer edges of the vertical boards.[5]
- To make this trellis even stronger, apply a generous layer of wood glue between the horizontal and vertical boards.
- This square frame trellis will be mounted directly onto your wall. Some people prefer to build trellises that dig into the earth as well—if that is the case for you, attach the bottom horizontal board at 1/3rd of the way up from the bottom of the vertical boards so there are legs on your trellis.
-
4Drill the pieces of the external frame into place. If possible, try using deck screws, which are coated with zinc to prevent corrosion. Use a power drill and screws to secure the external frame for your trellis together.[6]
- If you applied wood glue to the pieces of your trellis, give it time to cure before drilling—this may take up to 24 hours.
-
5Measure the distance from the top to the bottom of the trellis. This helps you mark the locations for your horizontal boards. Use a pencil or other instrument to mark out locations on the left-most vertical board at 1/3rd and 2/3rds of the way up from the bottom. Mark the same points on the right-most vertical board.[7]
- Be sure that the 2 horizontal boards from the frame are sticking out above the rest of the frame—if the vertical boards of the frame are resting on them, flip the trellis over before marking it.
- If you would like to make a trellis with additional horizontal boards, mark locations at 1/4th or 1/5th intervals instead.
-
6Attach the horizontal boards to the frame. Place horizontal boards between the marks you made on the vertical boards of the frame, adjusting them if needed to make sure they’re straight. Then, screw in the horizontal boards with a power drill.[8]
- This trellis will be stronger if you apply a layer of wood glue between the horizontal boards and the frame before screwing them in. If you apply wood glue, wait 24 hours for it to cure before screwing in the boards.
-
7Flip the trellis over. Once you’ve secured the horizontal boards onto your trellis, flip it over to begin the process of adding vertical boards. This will keep your trellis from having more than 2 boards directly overlapping each other at once.
- Your trellis should have all of its horizontal boards (including the frame) level with each other, and all of its vertical boards level with each other (also including the frame).
-
8Measure the distance from the left side to the right side of the trellis. Use this measurement to decide where to place the vertical boards within the trellis’ frame. For this trellis, mark locations on the bottom board 1/3rd of the way from the leftmost point, and once more 2/3rds of the way from the leftmost point. Make the same marks on the top board.[9]
- If you would like to make a larger trellis with more vertical boards, try marking locations every 1/4th or 1/5th of the board’s length, rather than every 1/3rd.
-
9Secure the vertical boards to the frame. Using the marks that you placed on the two horizontal boards of the frame, start by placing the vertical boards in the correct location. Adjust them if they seem slanted or at all out-of-place. Attach the vertical boards to the frame using screws and the drill.[10]
- For added strength, apply a generous layer of wood glue to the trellis first. Wait 24 hours for the glue to cure, then screw the vertical boards into the frame.


Installing Your Trellis for Wisteria
-
1Choose a large wall that gets plenty of sun. Wisteria can grow very quickly—around 10 ft (3.0 m) a year. Because of this, pick a wall that is at least 7 ft (2.1 m) tall.[11]
- Wisteria grows best when exposed to plenty of light. If you’re in the northern hemisphere, choose a south or west-facing wall. In the southern hemisphere, pick a north or east-facing wall.
-
2Locate the wall studs. To make sure your trellis is securely attached to your wall, find the wall studs using a stud finder. If you don’t already have a stud finder, you can purchase one on Amazon. When you’ve identified places on the wall where you can attach the trellis, mark your wall with a pencil or piece of chalk at these locations. Try to identify several (at least 6) places along the trellis’ frame to attach it to the wall.[12]
-
3Mark the parts of the trellis where you’ll be drilling. Line up the trellis against the wall and use a pencil or other writing instrument to place a mark at the same locations you marked the wall.[13]
-
4Pre-drill holes into the trellis and wall. Hold the trellis against the wall and use a power drill to place holes through the trellis and into the wall at the locations you marked earlier. Making these pilot holes will help prevent the wood from splitting later when you screw the trellis into place.
-
5Cut a PVC pipe into 2 in (5.1 cm) segments. This PVC pipe prevents the wisteria from damaging your wall and gives it room to breathe. Use a pipe with a diameter of approximately 0.5 inches 0.5 in (1.3 cm).[14]
- To cut the pipe, you can use either a pipe cutter or a saw.
- The number of PVC pipe segments you’ll need depends on how many holes you plan on placing in your trellis—if you plan on drilling 10 holes, cut 10 pipe segments.
-
6Place the PVC pipe spacers between the trellis and wall. These spacers should be placed so that you can stick a long screw into the trellis, through the pipe, and into the wall. You may want to ask a friend to help you hold the trellis as you place the PVC pipe segments in the correct positions.[15]
-
7Screw in the trellis. Use long screws to connect the trellis to the wall. To fasten the trellis to the wall, use a power drill to screw through each of the marked and pre-drilled points of your trellis, letting the screw fit through the PVC pipe and penetrate the wall behind it by about 2 in (5.1 cm).[16]


Growing Wisteria on Your Trellis
-
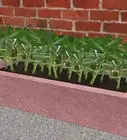
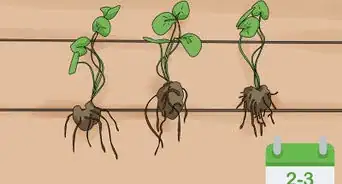
1Plant wisteria under the trellis. Keep in mind that wisteria needs plenty of space—if you’re planting more than one plant, space them apart at 10 foot (3.0 m) intervals.[17]
- There are several different types of wisteria. While Chinese and Japanese wisteria are very popular, these species are invasive in North America. American wisteria (Wisteria frutescens) is a good alternative if you live in North America.[18]
-
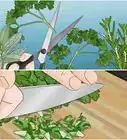
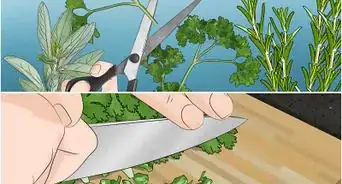
2Lightly attach the wisteria to your trellis. Weave any longer vines of wisteria through your trellis and use nursery tape or tomato string to attach the vines to the structure. A loose knot is more than enough to get the vines to start growing on the trellis.[19]
-
3Water the wisteria when its soil is dry. When the wisteria is freshly planted or during dry seasons, be sure to water it regularly. Wisteria can consume a lot of water, so check every few days to see if the soil has dried out. Touch the soil with your finger and see if you can feel any moisture.[20]
-
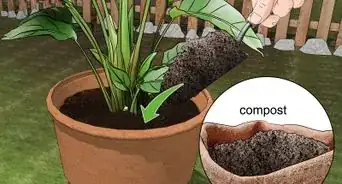
4Feed wisteria in the spring. Use a store-bought plant feed, and follow the instructions on its packaging. A potassium-rich fertilizer is especially good for wisteria. You only need to fertilize wisteria one time in the spring—liquid fertilizers work especially quickly to deliver nutrients to the wisteria, but solid ones are perfectly fine as well.[21]


Warnings
- Wisteria can be toxic if eaten—keep it away from children and pets.[24]⧼thumbs_response⧽


-Oven-Step-15.webp)


References
- ↑ https://thehomeyspace.com/garden/how-to-build-a-diy-wood-trellis/
- ↑ https://mnhardy.umn.edu/varieties/woody-ornamentals/wisteria#
- ↑ https://creatorskills.com/woods-that-do-not-rot/
- ↑ https://thehomeyspace.com/garden/how-to-build-a-diy-wood-trellis/
- ↑ https://thehomeyspace.com/garden/how-to-build-a-diy-wood-trellis/
- ↑ https://thehomeyspace.com/garden/how-to-build-a-diy-wood-trellis/
- ↑ https://thehomeyspace.com/garden/how-to-build-a-diy-wood-trellis/
- ↑ https://thehomeyspace.com/garden/how-to-build-a-diy-wood-trellis/
- ↑ https://thehomeyspace.com/garden/how-to-build-a-diy-wood-trellis/
- ↑ https://thehomeyspace.com/garden/how-to-build-a-diy-wood-trellis/
- ↑ https://www.homesandgardens.com/advice/how-to-grow-wisteria
- ↑ https://www.gardengatemagazine.com/articles/projects/all/54trellisattaching/
- ↑ https://www.gardengatemagazine.com/articles/projects/all/54trellisattaching/
- ↑ https://www.gardengatemagazine.com/articles/projects/all/54trellisattaching/
- ↑ https://www.gardengatemagazine.com/articles/projects/all/54trellisattaching/
- ↑ https://www.gardengatemagazine.com/articles/projects/all/54trellisattaching/
- ↑ https://rootingforblooms.com/where-and-how-far-apart-to-plant-wisteria-for-ideal-space-and-sun/
- ↑ https://www.floridamuseum.ufl.edu/science/five-facts-wisteria-in-florida/
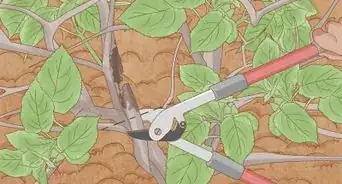
- ↑ https://www.finegardening.com/project-guides/pruning/espalier
- ↑ https://www.rhs.org.uk/plants/wisteria/growing-guide
- ↑ https://www.rhs.org.uk/plants/wisteria/growing-guide
- ↑ https://www.rhs.org.uk/plants/wisteria/growing-guide
- ↑ https://www.rhs.org.uk/plants/wisteria/growing-guide
- ↑ https://pubmed.ncbi.nlm.nih.gov/8433406/
About This Article