This article was co-authored by Deanna Ranlett and by wikiHow staff writer, Janice Tieperman. Deanna Ranlett is a Pottery and Ceramics Professional and the Owner of Mudfire Inc. in Decatur, Georgia. With more than 22 years of experience in the ceramics industry and eight years of experience owning a studio, they specialize in glaze formulation, firing ceramic and pottery pieces, general clay projects, and screen printing for ceramics. Deanna holds a BFA in Ceramic Arts and Ceramics from Georgia State University.
There are 11 references cited in this article, which can be found at the bottom of the page.
This article has been viewed 45,185 times.
Terracotta pots are an asset to many home gardens, but not when they’re cracked and broken. Before you pick up a new pot from your local gardening store, check around your home for a few simple repair supplies. Within a day or so, you might get your favorite terracotta pots back in working order again!
Steps
Epoxy
-
1Move your pot to a well-ventilated area. Epoxy fumes are no joke, and are no fun to breathe in. Find an open, well-ventilated space where you can repair your pot so you don’t have to inhale any nasty chemicals.[1]
- A room with several open windows can work, or you can repair it outside.
-
2Wipe down the broken shards with a cloth to remove any dirt. Grab a clean cloth and brush off any obvious dirt or grime from your terracotta pot so the pieces fit together snugly. It’s okay if your pieces are still a little dusty afterwards—you’ll probably be filling your pots with soil, anyway.[2]Advertisement
-
3Stir equal parts of epoxy and hardener together. Pour a blueberry-sized amount of both epoxy resin and hardener on a paper plate or dish. Grab a toothpick and mix them both together before you start reconstructing your pot.[3]
- Check the instructions on your epoxy packages beforehand. Some glues might come pre-mixed, so you don’t have to worry about stirring them together.
- Silicone caulk is also a good option for repairing a broken terracotta pot. You can also buy caulk in a color that best matches your pot![4]
-
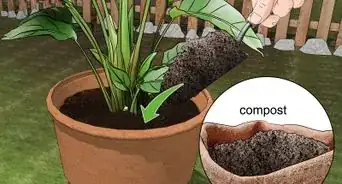
4Mix colored clay powder into the epoxy mixture so it matches your pot. Scoop a small spoonful of powdered clay and mix it in with the epoxy. This helps the epoxy blend in well with your terracotta pot, creating a more seamless finish.[5]
- You can find powdered clay online, or at your local ceramics or craft store.
-
5Spread the epoxy over the cracked edge with a toothpick. Dip a clean toothpick into the epoxy mixture and spread it along the base section of the crack. Keep dipping and spreading the epoxy in a thin layer along the fissure, so your broken shards have no trouble sticking together.[6]
- You only need to spread epoxy on the bottom portion of your pot.
- Don’t worry if you use too much epoxy—you can always wipe off the excess with an acetone-soaked towel or cloth.[7]
-
6Press the broken piece into the glue and hold it for several seconds. Grab the broken section and center it exactly over the epoxy, as though you’re putting together a puzzle. Hold the shard in place for several seconds with your fingers, or secure it in place with a metal clamp.[8]
-
7Let the epoxy dry overnight so it can cure completely. Double-check the instructions on your epoxy bottle to see how much time it needs to dry and cure. Some products need at least 1 night to cure completely.[9]
- Don’t use your pot until the epoxy is completely dried and cured.
-
8Sand down the surface with fine sandpaper to make it smooth and flat. Grab a sheet of super fine-grit sandpaper and rub along the glued seam of your pot. Work away any imperfections or inconsistencies, so your pot feels smooth and seamless. At this point, you’ll be ready to use your pot again![10]


Wire
-
1Dust off the pieces of your pot with a clean cloth. Go over the sides and edges of your terracotta pot with a rag, cleaning away any leftover dust and grime. Sometimes, dirt gets stuck in the broken cracks and makes the pot more tricky to repair.[11]
-
2Fit the broken piece of terracotta into the correct spot. Arrange the broken shard carefully, lining up the broken edges exactly with the bottom of the pot. Check that the piece is steady before removing your hand.[12]
- Depending on the break, you may need to hold the broken shard in place.
-
3Pencil in dotted marks on both sides of the terracotta crack. Mark each dot about 1⁄4 to 1⁄2 in (0.64 to 1.27 cm) away from the broken seam. Space out these dots about 1 in (2.5 cm) or so apart, like you’re sketching out a row of eyelets on a pair of shoes.[13]
- Essentially, you’ll be threading the wire through these marks to “sew” the pot back together.
-
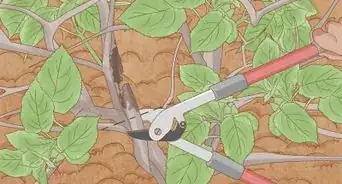
4Drill into the pencil marks with a 1⁄8 in (0.32 cm) masonry drill bit. Install a thin masonry bit in your drill and drill into each dot. Set your drill to a high setting, so you don’t have any difficulty getting through the terracotta.[14]
- Don’t use a standard drill bit for this—you don’t want to damage your equipment or pot.
-
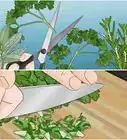
5Cut a length of copper wire into several 3 in (7.6 cm) pieces. Lay out a section of copper wire, measuring and marking every 3 in (7.6 cm). Snip off these short sections of wire with a pair of wire cutters, and set the pieces aside.[15]
- This wire will be the “thread” that sews your pot back together.
-
6String the wire through 2 holes above and below the crack. Slide 1 end of the wire through the top hole, and the other end into the bottom hole. Keep the wire even while you thread it, so even pieces of wire are going through the pot. Repeat this process with each set of drilled holes along the broken seam.[16]
-
7Twist the wires together along the inside of the pot. Grab a pair of pliers and twist the wires together into a coil. Do your best to make this as tight as possible, so the pot stays together.[17]
-
8Push the twisted wires against the inner edge of the pot. Press along the coiled wires until they’re snug against the inner wall of your terracotta pot. This way, your pot is much more likely to stay together![18]
- Once you’ve twisted and pushed in all your wires, you can use your pot again.


Things You’ll Need
Epoxy
- Epoxy (resin and hardener) or silicon caulk
- Cloth
- Toothpick
- Powdered clay
- Fine-grit sandpaper
Wire
- Clean cloth
- Pencil
- Electric drill
- Masonry drill bit
- Copper wire
- Wire cutters
- Pliers


-Oven-Step-15.webp)


References
- ↑ http://www.terracegardener.co.uk/about_pots/repairing_pots.php
- ↑ https://m.youtube.com/watch?v=ZHdmk4UW8p0&t=0m13s
- ↑ https://m.youtube.com/watch?v=ZHdmk4UW8p0&t=0m22s
- ↑ https://rosehillgardens.com/landscape-design/3-solutions-fix-cracked-terra-cotta-pots/
- ↑ http://www.terracegardener.co.uk/about_pots/repairing_pots.php
- ↑ https://m.youtube.com/watch?v=ZHdmk4UW8p0&t=0m40s
- ↑ http://www.terracegardener.co.uk/about_pots/repairing_pots.php
- ↑ https://m.youtube.com/watch?v=ZHdmk4UW8p0&t=0m54s
- ↑ https://m.youtube.com/watch?v=ZHdmk4UW8p0&t=0m59s
- ↑ http://www.terracegardener.co.uk/about_pots/repairing_pots.php
- ↑ https://www.chicagotribune.com/news/ct-xpm-2009-11-22-0911190221-story.html
- ↑ https://www.bcliving.ca/fixing-terra-cotta-pots
- ↑ https://www.chicagotribune.com/news/ct-xpm-2009-11-22-0911190221-story.html
- ↑ https://www.bcliving.ca/fixing-terra-cotta-pots
- ↑ https://www.bcliving.ca/fixing-terra-cotta-pots
- ↑ https://www.chicagotribune.com/news/ct-xpm-2009-11-22-0911190221-story.html
- ↑ https://www.chicagotribune.com/news/ct-xpm-2009-11-22-0911190221-story.html
- ↑ https://www.bcliving.ca/fixing-terra-cotta-pots
- ↑ https://blog.theenduringgardener.com/gorilla-as-opposed-to-guerilla-gardening/
- ↑ https://www.backyardboss.net/revamp-patio-pots/
- ↑ https://www.chicagotribune.com/news/ct-xpm-2009-11-22-0911190221-story.html
About This Article