This article was co-authored by wikiHow staff writer, Jack Lloyd. Jack Lloyd is a Technology Writer and Editor for wikiHow. He has over two years of experience writing and editing technology-related articles. He is technology enthusiast and an English teacher.
The wikiHow Tech Team also followed the article's instructions and verified that they work.
This article has been viewed 564,386 times.
Learn more...
This wikiHow teaches you how to burn song files, such as MP3s, onto a blank CD. If you want to be able to play the songs off of the CD, you'll need to burn the CD using iTunes or Windows Media Player. You can also burn music files (along with other files) onto a regular CD using basic Windows or Mac settings.
Things You Should Know
- Create an audio CD on iTunes, open the "Burn" menu. Click File > Burn Playlist to Disc. Check the "Audio CD" box and click Burn.
- Create a storage disk on Mac. Drag all your songs to a folder on your desktop. Copy and paste the songs you want to burn from the folder to the CD. Click File > Burn.
- Create an audio CD on Windows Media Player, click the Burn tab. Drag the songs you want to burn into the sidebar. Click "Menu" and check "Audio CD". Click Start burn.
- Create a storage disk on Windows. Select the songs you want to burn and click Share > Burn to disc > Burn > Finish.
Steps
Creating an Audio CD with iTunes
-
1Make sure that you have an audio CD. Audio CDs differ from standard CDs in that they will automatically play audio when inserted into a CD player or stereo. When buying blank CDs, look for "recordable" or "audio" in the description.
-
2Obtain a DVD drive if necessary. Most Mac computers and many Windows computers don't ship with optical drives (also known as DVD drives) into which you can insert a CD, meaning you might need to buy a USB optical drive. You can find these in tech stores and online.
- If your computer has an optical drive, look for the word "DVD" on or near the drive. If you don't see "DVD" there, the drive that you have cannot burn CDs and you'll still need to buy an external one.
- Make sure that your optical drive has burn capabilities. This feature should be mentioned in the product description.
- If you're using a Mac, you'll need a USB-C optical drive, or a USB 3.0 to USB-C adapter.
Advertisement -
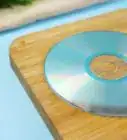
3Insert the audio CD into the DVD drive. Place the CD face-up in the DVD drive's tray, then close the tray.
-
4Open iTunes. Its app icon resembles a multicolored musical note on a white background.
-
5Click File. This option is in the top-left corner of the iTunes window (Windows) or in the top-left corner of the screen (Mac). A drop-down menu will appear.
-
6Select New. It's near the top of the File drop-down menu.
-
7Click Playlist. You'll find this in the New pop-out window. A text field will appear in the iTunes sidebar.
-
8Enter a playlist name. Type in your preferred name for your playlist, then press ↵ Enter. This will create the playlist in the left-hand sidebar of the iTunes window.
-
9Add songs to the playlist. Click and drag songs from your library onto the playlist's title, then drop them there. You can do this one at a time, or you can select multiple songs by holding down Ctrl or ⌘ Command while clicking songs.
- If you aren't in library view, click the Songs section below the "Library" heading in order to view a list of your songs.
- You can add up to 80 minutes of music to a standard audio CD.
-
10Select the playlist. Once you've added 80 (or fewer) minutes of audio to the playlist, click the playlist to open it.
-
11Open the "Burn" menu. Click File again, then click Burn Playlist to Disc near the top of the drop-down menu. A new window will appear.
-
12Check the "Audio CD" box. It should be in the middle of the menu.
-
13Click Burn. This is at the bottom of the menu. Doing so will prompt iTunes to begin burning your playlist's songs onto the CD.
- This process can take up to half a minute per song, so be patient.
-
14Eject your CD. When the burning process completes, you can eject your CD from the optical drive and try playing it in a stereo (or another computer) to test it.


Creating an Audio CD with Windows Media Player
-
1Make sure that you have an audio CD. Audio CDs differ from standard CDs in that they will automatically play audio when inserted into a CD player or stereo. When buying blank CDs, look for "recordable" or "audio" in the description.
-
2Obtain a DVD drive if necessary. Most Mac computers and many Windows computers don't ship with optical drives (also known as DVD drives) into which you can insert a CD, meaning you might need to buy a USB optical drive. You can find these in tech stores and online.
- If your computer has an optical drive, look for the word "DVD" on or near the drive. If you don't see "DVD" there, the drive that you have cannot burn CDs and you'll still need to buy an external one.
- Make sure that your optical drive has burn capabilities. This feature should be mentioned in the product description.
- If you're using a Mac, you'll need a USB-C optical drive, or a USB 3.0 to USB-C adapter.
-
3Insert the audio CD into the DVD drive. Place the CD face-up in the DVD drive's tray, then close the tray.
-
4
-
5Type in windows media player. This will search your computer for the Windows Media Player program.
- Not all Windows 10 computers have Windows Media Player built in, and you can no longer download Windows Media Player from Microsoft. If your computer doesn't have Windows Media Player, you'll need to use iTunes instead.
-
6Click Windows Media Player. It's a blue, orange, and white icon at the top of the Start window.
-
7Click the Burn tab. You'll find this in the upper-right corner of the window.
-
8Add music to the CD. Click and drag songs that you want to burn into the "Burn" sidebar, which is on the right side of the Windows Media Player window.
- If you can't see individual songs, first click the Music tab on the left side of the window.
- You can add up to 70 minutes of audio without Windows Media Player attempting to split the audio onto a second disk.
-
9Click the "Menu" icon. It's a white box with green checkmarks in it. You'll find it just below the Sync tab in the "Burn" section. Clicking it prompts a drop-down menu.
-
10Check the "Audio CD" option. This is near the top of the drop-down menu.
-
11Click Start burn. It's in the upper-left corner of the "Burn" section. Your songs will begin burning onto the CD.
- Depending on the speed of your drive, this process may take several minutes.[1]
-
12Eject your CD. When the burning process completes, you can eject your CD from the optical drive and try playing it in a stereo (or another computer) to test it.


Creating a Storage CD on Windows
-
1Make sure that you have a blank CD. This can be a CD-R or a CD-RW, so long as it is blank.
-
2Obtain a DVD drive if necessary. Most Mac computers and many Windows computers don't ship with optical drives (also known as DVD drives) into which you can insert a CD, meaning you might need to buy a USB optical drive. You can find these in tech stores and online.
- If your computer has an optical drive, look for the word "DVD" on or near the drive. If you don't see "DVD" there, the drive that you have cannot burn CDs and you'll still need to buy an external one.
- Make sure that your optical drive has burn capabilities. This feature should be mentioned in the product description.
- If you're using a Mac, you'll need a USB-C optical drive, or a USB 3.0 to USB-C adapter.
-
3Insert the CD into the DVD drive. Place the CD face-up in the DVD drive's tray, then close the tray.
-
4
-
5
-
6Select a file location. On the left side of the window, click the folder in which the music files that you want to burn are located.
-
7Select files to burn. Click and drag your mouse across the files that you want to burn, or select individual ones by holding down Ctrl while clicking each one that you want to burn.
-
8Click Share. This tab is in the upper-left corner of the window. A toolbar will appear at the top of the File Explorer window.
-
9Click Burn to disc. It's an option in the "Send" section of the toolbar. Doing so prompts a pop-up window.
-
10Click Burn. This is at the bottom of the pop-up window.
-
11Click Finish when prompted. This will complete the burn process and, in some cases, eject the burned disc. Your music files are now stored on the CD.


Creating a Storage CD on Mac
-
1Make sure that you have a blank CD. This can be a CD-R or a CD-RW, so long as it is blank.
-
2Obtain a DVD drive if necessary. Most Mac computers and many Windows computers don't ship with optical drives (also known as DVD drives) into which you can insert a CD, meaning you might need to buy a USB optical drive. You can find these in tech stores and online.
- If your computer has an optical drive, look for the word "DVD" on or near the drive. If you don't see "DVD" there, the drive that you have cannot burn CDs and you'll still need to buy an external one.
- Make sure that your optical drive has burn capabilities. This feature should be mentioned in the product description.
- If you're using a Mac, you'll need a USB-C optical drive, or a USB 3.0 to USB-C adapter.
-
3Insert the CD into the DVD drive. Place the CD face-up in the DVD drive's tray, then close the tray.
-
4Open Finder. Click the blue face icon in your Mac's Dock. A Finder window will open.
-
5Select a file location. Click a folder on the left side of the window. This should be a folder that contains music files which you want to burn onto the CD.
-
6Select songs to burn. Click and drag your mouse across the files that you want to burn, or select individual ones by holding down ⌘ Command while clicking each one that you want to burn.
-
7Copy the songs. Click Edit in your Mac's menu bar, then click Copy Items in the resulting drop-down menu.
- You can also press ⌘ Command+C to copy these files.
-
8Open your CD. Click your CD's name in the left-hand sidebar of the Finder window, or double-click your CD on your Mac's desktop.
-
9Paste in the songs. Click Edit again, then click Paste Items in the drop-down menu.
- You can also press ⌘ Command+V to paste files.
-
10Click File. It's a menu item in the top-left corner of the screen. A drop-down menu will appear.
-
11Click Burn. This option is in the File drop-down menu, and will have the CD's name to the right of it.
-
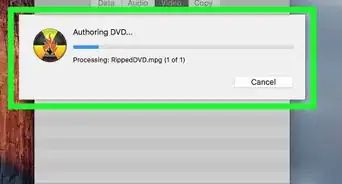
12Click Burn when prompted. It's near the bottom of the pop-up window. Your music files will begin burning onto the CD.
-
13Wait for the files to finish burning. When the burn is complete, you'll be prompted to click OK, at which point you can safely eject the disc. Your music files are now stored on your CD.


Community Q&A
-
QuestionWhy does my computer not read the CD song titles correctly?
 Community AnswerThere can be many reasons for this. The CD might be corrupted or scratched, the songs might not have recorded properly or have jumped during recording due to movement, there might be DRM on it, etc. Or, there could be a malfunction with your computer's software or even its CD drive. You'd need to explore each of the different possibilities.
 -
QuestionHow do I add other songs to a disc that already has something burned on it?
 Community AnswerThat can only be done if the disc is rewritable. If it's not then it wont work.
 -
QuestionHow do I burn all my songs onto one CD instead of multiple cds?
 Community AnswerIf you have under 80 minutes of music, then you can put all of your songs on one instead of multiple very easily, just by creating a playlist in iTunes and burning the CD.
Warnings
- Spotify, Google Play Music, and other streaming services are not able to burn CDs, as their music is copyright-protected.⧼thumbs_response⧽


About This Article
1. Insert a blank DVD.
2. Open iTunes.
3. Create a new playlist.
4. Add songs to the playlist.
5. Click File and select Burn playlist to disc.
6. Click Audio CD.
7. Click Burn.