This article was co-authored by Erik Bakirov. Erik Bakirov is a Cleaning Specialist at Room413 Cleaning in Los Angeles, California. Erik specializes in deep, move-in, and move-out cleaning services. Room413 matches homeowners with reliable and trustworthy cleaning services. They also promote environmentally friendly cleaning products.
This article has been viewed 73,496 times.
If your vacuum cleaner doesn’t seem to be picking things up as effectively as it used to, it may be time to change your vacuum bag. Some vacuums come equipped with disposable bags, which are removed and thrown away, while other models have reusable bags that are emptied and replaced. Handheld vacuums, too, have bags that must be removed and replaced or cleaned, so knowing how to change bags is pivotal in properly and effectively operating a vacuum.
Steps
Changing Disposable Bags
-
1Set out a sheet or newspaper. Laying out some newspaper or an old sheet will help trap any dirt that might burst from the bag during the removal process. This is a useful step for older vacuums, and vacuums whose bags are extremely full.
- You may also want to keep your trash can close by to avoid dragging dirt or other debris through the house.
-
2Open the vacuum chamber. Either zip your vacuum’s bag chamber open, or remove the plastic top to access the bag. Most upright vacuums have a zip closure, while most hose-attachment vacuums use a plastic receptacle to house the vacuum bag.Advertisement
-
3Check the bag for bulging. To determine how full (and messy) your job will be, check your bag for bulging. If there is no bulge at all to your bag, a full vacuum may not be the cause of your vacuum’s troubles. If there is a slight bulge at the bottom of the bag, or the bag is bulging almost to full capacity, it is time to replace the bag.
- If your bag is extremely full, you may need to manually remove dirt and debris from the chamber connecting to your bag.
-
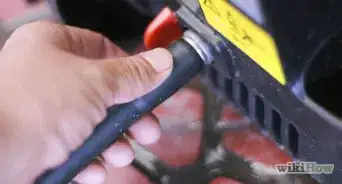
4Remove the bag from its case gently. The manner in which you do this will depend on your vacuum’s make and model. Most have a cardboard covering that attaches to a small, circular opening. You may need to remove a clip to remove the bag, or you may be able to simply twist the bag free. Check your specific brand’s instruction manual for further instruction.[1]
- Although newer models usually have a seal that clicks into place once a vacuum bag is removed, old vacuums typically do not. To minimize dirt escaping, you can place duct tape or another adhesive over the bag’s opening.
-
5Place the old bag in the garbage. Disposable bags should not be emptied and reused, as they are intended for single use and may not hold up under multiple uses. Once you have removed the old bag, place it into the garbage.[2]
- While it may be tempting to make each bag stretch further, emptying and reusing disposable bags has been linked to a decrease in performance.
-
6Place a new bag in the proper slot. Place a new bag in the exact same place, repinning any clips or switches that were in place when you removed the bag. Some vacuums have a mechanism to keep the bag firmly in place, while others rely upon gravity to keep the bag from moving around.
-
7Re-zip the vacuum body or replace the vacuum lid. Close up the body of your vacuum, and you are ready to once again get cleaning. If, after replacing the bag, the vacuum makes an odd noise or does not suck as it should, reopen the chamber and make sure you have replaced the bag properly.[5]


Changing Reusable Bags
-
1Open the vacuum body. Reusable bags are usually stored in the same manner and place as disposable bags. Open the body of your vacuum, whether it is a zip closure or plastic lid to find your reusable bag.
-
2Remove the cloth bag or plastic chamber carefully. Remove the bag from the vacuum chamber, keeping your hand over the hole that attaches to the vacuum itself. This will keep any stray dust from wandering out of the vacuum bag and spreading over the room.
- Some companies recommend completing this exercise outdoors to minimize the amount of trapped dust and debris that is released upon opening the chamber.
-
3Dump the contents into the garbage. Using a kneading motion starting from the bottom of the bag, dump out the bag’s contents, keeping the vacuum bag close to the trash receptacle. Keeping it close will limit the amount of dust that is released into the air, and will direct most of the waste into the trash.[6]
-
4Wipe out a plastic chamber or clean a cloth bag with a damp rag. If your vacuum uses a plastic chamber to hold its contents, you can wipe it out with a dry or damp rag to remove any lingering dirt or debris. If your vacuum uses a reusable bag, you may be able to wipe down the exterior of the bag with a damp rag, or you may run it through a wash cycle. Refer to your owner’s manual for definitive cleaning instructions.[7]
- You may also run a plastic canister under hot water to remove stubborn residue.
-
5Replace the chamber or bag. Once your bag has dried, replace it in the body of the vacuum, once again placing it into the vacuum the same way it was removed. If there were any parts that needed to be lifted, pressed, or removed, lift, press, and replace them as you install the freshly-emptied vacuum receptacle.
-
6Close the vacuum body. Once you’ve finished replacing the bag or plastic bin, close your vacuum and check to make sure it is functioning properly with the clean bag. If not, check to make sure the bag or bin is dry and clean.


Changing Handheld Vacuum Bags
-
1Dismantle your handheld vacuum. Most handheld vacuums have a small, reusable bag or plastic chamber used to store any dirt and debris that has collected. Remove the plastic surrounding the chamber or bag to access the collected dirt and miscellaneous items.
- Because handheld vacuums are small, removing the tray or bag is usually a small enough task that it can be done over a kitchen trash.
-
2Place the bag’s contents into the trash. Dump the bag’s contents into the trash, making sure everything has left the bag or chamber. Small vacuums are far more prone to malfunction, so making sure both the bag (or chamber) and filter are clean is pivotal in getting the most out of your vacuum.
-
3Run the bag under warm water to remove dust and debris. Run the bag or bin under warm water, using your fingers to tease out any stubborn dirt or debris. Leaving dirt behind could affect the efficiency of your handheld vacuum, so make sure you are thorough in cleaning your device.
- Some models allow you to place the bag and filter into the washer and dryer. Check your owner’s manual for more information.
-
4Set the bag out to dry before placing it back into the vacuum. Always allow your bags and filters to dry before placing them bag into the chamber of your device. Placing a wet bag or filter into your handheld vacuum could result in an electrical short and subsequent electrocution.


Expert Q&A
Did you know you can get expert answers for this article?
Unlock expert answers by supporting wikiHow
-
QuestionWhat are the mistakes to avoid when you're changing a vacuum bag?
 Erik BakirovErik Bakirov is a Cleaning Specialist at Room413 Cleaning in Los Angeles, California. Erik specializes in deep, move-in, and move-out cleaning services. Room413 matches homeowners with reliable and trustworthy cleaning services. They also promote environmentally friendly cleaning products.
Cleaning SpecialistThe first would be using the wrong size, and the second would be putting it in clumsily. Other than that, it's hard to get it wrong.
Support wikiHow by unlocking this expert answer.
-
QuestionWould a vacuum bag that comes loose cause dirt to get inside so the motor will not start again?
 Community AnswerThe bag compartment and motor housing are separate, usually, so a loose bag and loose dirt would not be able to get in contact with the motor. However, if the suction is clogged, some vacuums have a fail safe to not turn off. Disassemble the vacuum and check for clogs and/or loose wires. Make sure while doing this the vacuum is unplugged, to prevent being electrocuted.
 -
QuestionHow do I put a new bag in my Hoover Telios vacuum cleaner?
 Community AnswerPretty much the same as the article. Press the release between the hose and the handle to pop the lid, and simply pull out the old bag to install a new bag.
Warnings
- Always make sure to unplug your vacuum before you open the chamber.⧼thumbs_response⧽
- If you have children or pets, you may have to change your bag more frequently.⧼thumbs_response⧽
- There may be a cloud of dust that accompanies this job, so wear a mask if you need to.⧼thumbs_response⧽


References
- ↑ https://community.sears.com/Projects/How-to-Change-a-Vacuum-Cleaner-Bag
- ↑ https://www.godfreys.com.au/blog/how-to-change-a-vacuum-bag/
- ↑ Erik Bakirov. Cleaning Specialist. Expert Interview. 7 January 2021.
- ↑ Erik Bakirov. Cleaning Specialist. Expert Interview. 7 January 2021.
- ↑ http://blog.evacuumstore.com/post/2014/08/13/Fix-of-the-Week-Changing-the-Bags-and-Filters-on-an-Electrolux-Canister-Vacuum.aspx
- ↑ https://www.realsimple.com/home-organizing/cleaning/worst-cleaning-jobs-made-easy/changing-vaccum-bag
- ↑ http://www.maids.com/blog/the-maids-how-to-change-and-empty-the-vacuum-bag/
About This Article