wikiHow is a “wiki,” similar to Wikipedia, which means that many of our articles are co-written by multiple authors. To create this article, 11 people, some anonymous, worked to edit and improve it over time.
There are 9 references cited in this article, which can be found at the bottom of the page.
wikiHow marks an article as reader-approved once it receives enough positive feedback. In this case, 91% of readers who voted found the article helpful, earning it our reader-approved status.
This article has been viewed 75,844 times.
Learn more...
The head gasket is one of the most important components of your car’s engine. It is a mechanical seal that is fitted between the engine block and piston cylinder head. Its purpose is to ensure that the compression process is contained within the combustion chamber, and to prevent the mixing of fluids such as the coolant and engine oil.
Steps
How to Check for a Blown Head Gasket
-
1Look for a high engine temperature. High temperatures can cause your gasket to blow, and once this has occurred, your engine temperature will only continue to rise. If your car is constantly overheating, this could be a sign that your head gasket has blown.[1]
-
2Check for lower coolant levels. If your head gasket is blown, coolant may be leaking from the cooling system.Advertisement
-
3Look out for milky or frothy oil. Check the colour of your oil. If it’s white and milky looking, or if your oil dipstick reveals a frothy substance, chances are your oil has mixed with the coolant and your head gasket has blown.[2]
-
4Beware of light smoke emerging from the exhaust pipe. If you spot white smoke emerging from your exhaust pipe, this could mean that the coolant has leaked into the combustion chamber.[3]


How to Repair a Blown Head Gasket
-
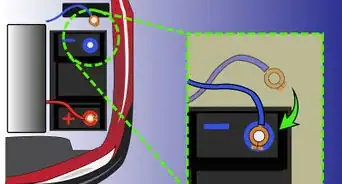
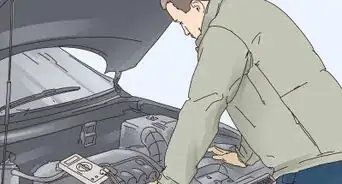
1Disconnect the negative battery terminal, located at the top of the car battery.[4]
-
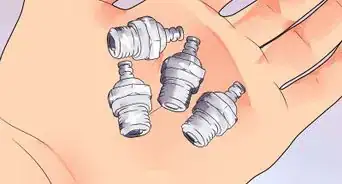
2Remove the intake hose and airbox.
-
3Take off the air conditioner compressor; this will require you to remove several bolts. Once the compressor is free, lay the device on its side in order to access the cylinder head.
-
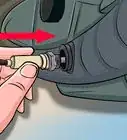
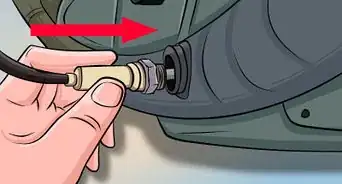
4Disconnect the water pump hose, by using a screwdriver to loosen the clamp.
-
5Remove the alternator. You won’t need to take off the entire alternator harness; simply remove the bolts.
-
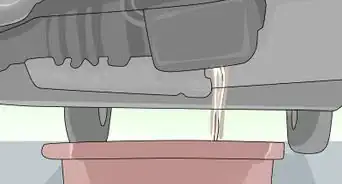
6Drain the radiator and remove the radiator hoses. Disconnect all the lines running to the air conditioner.[5]
-
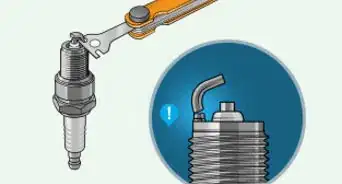
7The head gasket should now be visible. Refer to your service manual and pay close attention to the tightening sequence for the head bolts that hold the head gasket in place, as these must be loosened in the correct reverse order.
-
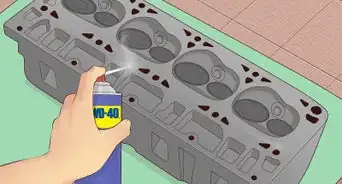
8Remove the old blown head gasket. Be sure to thoroughly clean the cylinder head, so that the new head gasket sits correctly.
-
9Once you have fitted the new head gasket into the space, tighten the bolts again in the correct order. You’ll need a torque wrench to do so, as the bolts must be torqued to a specific tightness, relevant to your particular vehicle. It’s crucial that these bolts are torqued correctly, as otherwise you may cause damage to your new head gasket.[6]
-
10Replace the components. Reconnect the hoses in the order in which you disconnected them, replace the alternator, and ensure that all necessary parts are once again in place.
-
11Fill the cooling system with fresh coolant and turn on the engine, allowing it to idle until it reaches operating temperature.[7] Allow the engine to run for several minutes before switching it off and checking your new head gasket for any leaks.


Community Q&A
-
QuestionI have heat while idling, but when driving the car, there is no heat and it turns cold. Replaced water pump and timing belt, which stopped the overheating, but the heat changes while driving car. What could it be?
 Community AnswerIt sounds like the thermostat is stuck open.
 -
QuestionWhat should I do first if my car is producing white smoke?
 Community AnswerWhen you go from hot to cold weather temperatures and encounter humidity, condensation can cause white smoke. This should not happen all the time. If it does, check the motor oil for water. If it's all foamy white, than you have a leaking head gasket.
 -
QuestionHow can I tell if I need new front shocks?Community AnswerYou will see uneven tire wear and the car might bounce excessively. Sometime noise and squeaks may be heard, however that alone is not an indicator of bad shocks. Rubber parts tend to squeak, especially in moist and humid regions or when it rains.
Warnings
- Repairing a blown head gasket can be very difficult, especially if you’re not familiar with the internal workings of your car. Improperly repaired blown head gaskets can cause long-lasting damage, so if you don’t feel confident completing the task yourself, it’s best to have the repair carried out by a professional.⧼thumbs_response⧽


-Beetle-Step-5-Version-3.webp)


References
- ↑ http://knowhow.napaonline.com/eight-signs-blown-head-gasket/
- ↑ https://www.2carpros.com/articles/head-gasket-blown-test
- ↑ https://shop.advanceautoparts.com/r/advice/car-maintenance/what-does-it-mean-to-blow-a-head-gasket
- ↑ https://www.youtube.com/watch?v=xzG2tvp68mQ
- ↑ https://www.2carpros.com/articles/coolant-flush-and-refill-all-cars
- ↑ https://mobiloil.com/en/article/car-maintenance/how-to-do-it-yourself/how-to-change-a-head-gasket
- ↑ https://www.familyhandyman.com/automotive/car-maintenance/how-to-change-coolant/
- HowStuffWorks Vehicle Maintenance
- DoItYourself General Car Repair
About This Article
The head gasket is a mechanical seal that’s fitted between the engine block and the piston cylinder head. If your engine often overheats, your head gasket may have blown. You can also check your coolant levels, since low levels may mean the head gasket has blown and coolant is leaking out. You can also tell that coolant’s leaking if your oil is white or milky looking. To repair your head gasket, first, you’ll need to disconnect the negative battery terminal on the car battery. Then, remove the intake hose airbox, and air conditioner compressor. Once the compressor is free, loosen the clamp on the water pump hose with a screwdriver until it’s free. Then, remove the alternator, drain the radiator, and remove the radiator hoses. Now, you can remove the old blown head gasket and fit a new one in place. Make sure to use a torque wrench to tighten the bolts properly or else you could damage the new head gasket. To learn how to replace the rest of the components, read on!