wikiHow is a “wiki,” similar to Wikipedia, which means that many of our articles are co-written by multiple authors. To create this article, 18 people, some anonymous, worked to edit and improve it over time.
wikiHow marks an article as reader-approved once it receives enough positive feedback. In this case, 91% of readers who voted found the article helpful, earning it our reader-approved status.
This article has been viewed 367,979 times.
Learn more...
Glow plugs preheat the air in the combustion chamber in diesel engines so that they start faster when they are cold. If your engine is having trouble starting or you see smoke coming from your exhaust, then one or more of your glow plugs might be failing. Testing the glow plug yourself can help you avoid a trip to the mechanic.
Things You Should Know
- Set your multimeter to ohms.
- Remove the caps or connectors to the glow plugs.
- Clip the multimeter’s negative lead to a ground point and the positive lead to the top of the glow plug.
- Read the results on multimeter and check your vehicle's manual for the necessary specs.
Steps
Testing Glow Plugs in the Engine
-
1Grab a multimeter. A multimeter is a black box of electronic circuitry used to test electrical wiring or devices. There is a large dial in the center of the multimeter where you can adjust the settings. The multimeter uses black (negative) and red (positive) leads to test electrical currency and resistance. These leads usually have metal clamps at the end of them. While the multimeter can seem daunting because of its many numbers and dials, you only need to use one setting for this test.[1]
- Analog meters may apply higher voltage to the circuit than the digital meter, so use them with care.[2]
- The first reading you get from a digital multimeter may not be accurate, since the current can fluctuate. Digital multimeters have a difficult time measuring current that is constantly changing.[3] Because analog multimeters have a changing display, they can show you the current fluctuations. However, analog multimeters are less accurate overall.
- It is best to use a digital multimeter for this test. A digital multimeter shows the exact number result of the test. An analog multimeter is harder to read because every possible result is listed at the top.[4]
- If you are using an analog multimeter, make sure to choose one with at least 20k ohm/V sensitivity.[5]
-
2Set your multimeter to ohms. The ohms setting will be denoted by a shape that resembles an upside down horseshoe. There will be two long vertical lines containing the range of the ohms.Advertisement
-
3Find resistance value of your multimeter. Cross the two leads of the multimeter over each other and record the result. Make sure the metal clamps of the leads touch each other. If you are using a digital multimeter, then the reading will appear across the screen.
- Subtract this amount from the glow plug reading.
-
4Test the voltage of the battery. Put your multimeter in DC Volt reading mode. Place the negative lead of your multimeter onto the negative terminal of the battery, and the positive lead onto the positive terminal. The reading should be close to 12.5 Volts when the car is off and close to 13 Volts when the car is running.
- If this is not the case, check your battery or alternator before proceeding. Glow plugs will not work correctly if they do not have the correct voltage running into them.
-
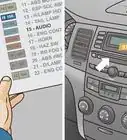
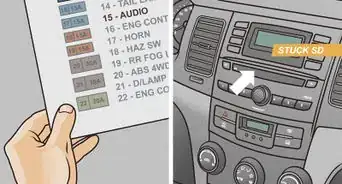
5Locate the glow plugs. Consult the shop manual of your vehicle to find the location of the glow plugs in the engine. This will vary based on the make and model of your vehicle.
-
6Remove the caps or connectors to the glow plugs. There is usually a cover or cap over the glow plugs. Remove the cover or cap in order to apply the multimeter clamps to the glow plugs.
- Look at the connector and pins for any signs of rust or corrosion and looseness. Take this opportunity to clean them.
-
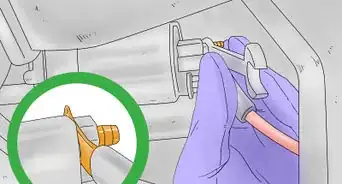
7Clip the multimeter’s negative lead to a ground point in the engine. The main two ground points can be found by following the wire that leads from the negative battery terminal into the engine wall or following the wire that leads from the alternator into the engine wall. These wires are attached to bolts. Attach the negative lead onto one of these bolts for grounding.
- Consult your owner’s manual to find the exact locations of the ground points.
-
8Connect the positive lead of your multimeter to the top of the glow plug.
- If the multimeter's negative lead is still connected to the negative battery terminal, then you can leave it there.
-
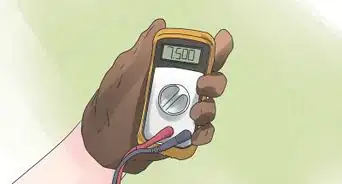
9Evaluate the multimeter’s reading. Refer to your shop manual to determine the test specs for your vehicle.
- Subtract the resistance value of your multimeter from the resistance value of your glow plug. For example, if your plug's resistance measured .9 ohms and your meter's resistance measured .2 ohms, the real reading for the plug is .7 ohms.[6]
- All the glow plugs in your engine should have similar readings. One glow plug with a higher resistance can affect your engine's performance--even if the plug is still good.[7]
-
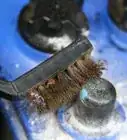
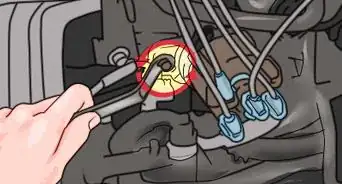
10Replace the glow plugs. If one or more of the glow plugs is faulty, replace all of them. Never replace a single plug.[8] If the area around the glow plugs has dirt or buildup, clean it first.
- Some manufacturers have special tools to clean out the bore where the glow plugs are inserted into the cylinder head. These tools clean out carbon buildup in the area inside the combustion chamber or precharge chamber. The tool also cleans the threads that the glow plug screws into. This tool is sometimes called a "reamer."[9]


Testing Removed Glow Plugs
-
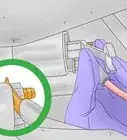
1Remove the glow plugs from your engine. Check your owner’s manual to locate the glow plugs and find the best way to remove them. This will vary based on the model and make of your vehicle.
-
2Set your multimeter to ohms. Use the lowest ohms setting. If the measurement of the glow plug is too high for the setting of the multimeter, then the plug is bad.
-
3Find resistance value of your multimeter. Cross the two leads of the multimeter over each other and record the result.
- Subtract this amount from the glow plug reading.
-
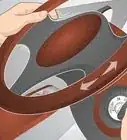
4Place the negative lead of the multimeter onto the nut of the glow plug. Make sure you do no not place the negative lead higher than the nut.
-
5Place the positive lead onto the tip of the glow plug. The tip is exposed when you pull the glow plug cap off.
-
6Find the results on the multimeter. Check your shop manual for your vehicle's test specs.
- Subtract the resistance value of your multimeter from the resistance value of your glow plug. For example, if your plug's resistance measured .9 ohms and your meter's resistance measured .2 ohms, the real reading for the plug is .7 ohms.
- All the glow plugs from your engine should have similar readings. One glow plug with a higher resistance can affect your engine's performance--even if the plug is still good.[10]
-
7Replace the glow plugs. If one or more of the glow plugs is faulty, replace all of them. Never replace a single plug.[11]


Community Q&A
-
QuestionNo power to glow plugs, why?
 Community AnswerCheck your relay. In older vehicles, you can hotwire a line from the battery to the low-voltage terminal and you should hear the relay click on and off with the application of power.
 -
QuestionWhy do I have to replace all the plugs if only one tests bad?
 Community AnswerGlow plugs are in direct contact with combustion gases and temperatures at all times regardless of whether they're being used or not. This means that they are exposed to ambient gases that can exceed thousands of degrees depending the scenario. If one is bad, the others are not far behind, and replacing all of them is suggested for this reason.
 -
QuestionWhy do I need to change all glow plugs if only one reads faulty?Community AnswerAs a rule of thumb, if one is bad the others are not far behind. It's better to have a whole new set than just one new glow plug.
Things You'll Need
What you need:
- Multimeter
- A 10-12 amp Battery Charger
- Safety glasses


References
- ↑ http://www.familyhandyman.com/electrical/how-to-use-a-multimeter/view-all
- ↑ http://www.autoshop101.com/forms/h4.pdf
- ↑ http://www.ebay.com/gds/Multimeters-Buying-Guide-/10000000177627218/g.html
- ↑ http://www.ebay.com/gds/Multimeters-Buying-Guide-/10000000177627218/g.html
- ↑ http://www.ebay.com/gds/Multimeters-Buying-Guide-/10000000177627218/g.html
- ↑ http://www.dieselhub.com/maintenance/idi-glow-plug-troubleshooting.html
- ↑ http://www.dieselhub.com/maintenance/idi-glow-plug-troubleshooting.html
- ↑ http://www.4crawler.com/Diesel/CheapTricks/GlowPlugs.shtml
- ↑ https://www.ngk.de/en/technology-in-detail/glow-plugs/installation-tips/removing-carbon-deposits-with-a-reamer/
About This Article
To test glow plugs, start by getting a multimeter and setting it to ohms. Then, cross the 2 leads of the multimeter over each other and write down the result you get. Next, remove the caps or connectors to the glow plugs and connect the negative multimeter lead to a ground point in the engine. Once the negative lead is secure, attach the positive lead to the top of the glow plug. Finally, subtract the result you wrote down earlier from the glow plug's reading to determine its actual reading. To learn how to test glow plugs when they're outside of the engine, scroll down!