This article was co-authored by wikiHow staff writer, Caroline Heiderscheit. Caroline Heiderscheit is a Staff Writer for wikiHow living in Santa Monica, CA. She has two years of experience working in content, including a year of editing work for first-time novelists. Caroline graduated from Stanford University in 2018 with degrees in American Studies and Creative Writing.
There are 11 references cited in this article, which can be found at the bottom of the page.
This article has been viewed 4,254 times.
Learn more...
Have you noticed your lawn mower engine having trouble starting, stalling, running rough, or producing black smoke while in use? A dirty carburetor is the likely culprit—but luckily, a quick clean can fix the issue straight away. By removing the carburetor from your mower for a clean, you can usually do a more thorough job. But if the idea of taking apart and reassembling your mower feels intimidating, don't worry, we'll also show you how to clean your carburetor without removing it. We're walking you through both processes step by step—so there’s no need to stress. To learn how you can clean your dirty lawn mower carburetor, read on!
Steps
Removing and Cleaning Your Carburetor
-
1Turn off your mower and give it time to cool down. If you've used it recently, the inside of your lawn mower could be extremely hot to the touch. To avoid risking a burn, turn your lawn mower off and wait until it's cooled before getting started.[1]
- Whether you have a push mower or a self-propelled mower, a dirty carburetor can cause a lot of issues. Fortunately, the cleaning process is the same.
-
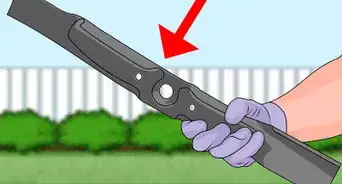
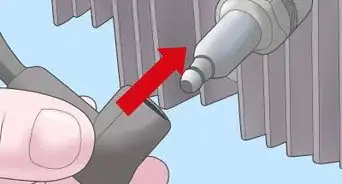
2Remove the spark plug cable. Grip the (usually black) plug and pull directly away from the engine. This may require a bit of force but make sure to not pull on the actual cable, just the plug, as you could damage it.
- This is an extremely important safety step, as with this plug attached the engine is 'live' and could start suddenly with any movement of the blades of the engine or work on the rest of the mower.[2]
- Even though you won't be working directly on the blades or parts that could cause the engine to start, it's still best practice to remove the cable.
Advertisement -
3Set up in an area with good ventilation. Your lawn mower’s old oil can be toxic to inhale, so open all of your doors and windows in your workspace. To increase ventilation, set up a garage fan or two as well.[3]
-
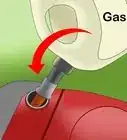
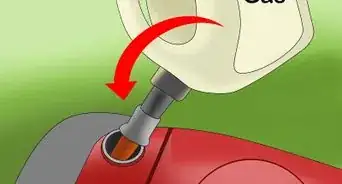
4Clamp the fuel line with a vice clamp or turn the shut-off valve. Typically, the fuel line will be a black, rubber cord running from under your gas tank into your carburetor. Gas runs from the fuel line into the carburetor, so to keep from making a huge mess—stop the flow of glass. If your fuel line has a shut-off value, simply turn it. Or, use a vice grip to clamp the fuel line.[4]
- Note that there will already be a little gas in the fuel line, so you’ll need to catch some gas drips. Lay out a rag or a bowl that you don’t mind getting dirty under the line.
-
5Detach the throttle cable with needlenose pliers. First, locate your throttle cable—typically this will be a long, black cord attached to the carburetor. Next, using a pair of needlenose pliers, carefully wiggle this cord out of its position to remove it.[5]
-
6Remove your air filter with a screwdriver and clean it with a rag. Find your air filter near the top or side of the engine. Then, remove the outer casing, usually by unscrewing four screws holding it in place using a screwdriver. Then, pull your air filter from its housing. Using a rag or a vacuum cleaner, lift as much dirt and debris from the air filter as possible.[6]
-
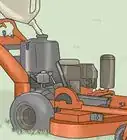
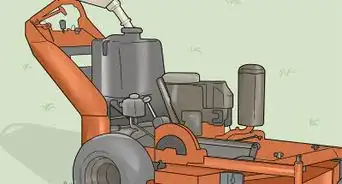
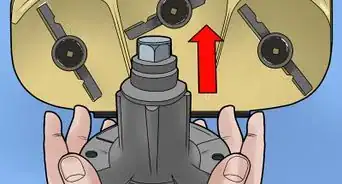
7Remove the carburetor. Behind your air filter, you'll see a small, metal piece with a hole in the center and a bowl attached below it. This is the carburetor. You might be able remove it by simply sliding your carburetor off of its mounting bolts. Otherwise, unscrew the screws holding it in place. More remaining gas may spill out at this point, so have a rag or bowl placed underneath you while you remove it.[7]
-
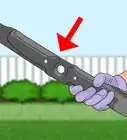
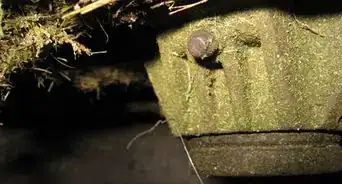
8Unbolt the carburetor bowl and clean the nut with carb cleaner and a wire brush. Typically, just one nut will hold your bowl in place. Unscrew this and clean the bolt thoroughly with carburetor cleaner and a brush, removing all gunk and debris. It’s also extremely important to use a paper clip to clean out the hole found halfway down the side of the bolt. If grass of dirt gets stuck here, it could cause the entire carburetor to stop working.[8]
-
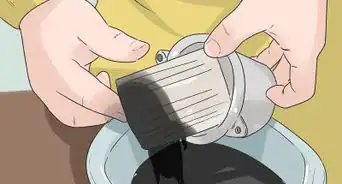
9Remove the bowl and clean it with carburetor cleaner. Now that you’ve unscrewed the one screw holding your bowl in place, remove it from its position. Thoroughly scrub the inside and outside of your bowl with carburetor cleaner. If the carburetor is too dirty to be cleaned by hand, consider replacing your bowl.[9]
- Finally, inspect the gasket paired with your lawn mower bowl. It might be corroded or broken—in that case, replace it. If it’s a little dirty but can be cleaned, use a rag to remove debris.
-
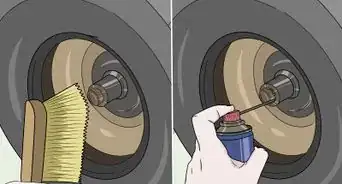
10Clean your carburetor with carburetor cleaner. With your carburetor now fully removed, clean out small crevices and the outside of the carburetor, removing as much grass and muck as possible. To get off stubborn dirt and debris, use a wire brush.[10]
- If you notice signs of rust on your carburetor, use sandpaper to remove it.
- Let your carburetor dry fully before reinstalling it in your machine.
-
11Reinstall the carburetor, the air filter, and the throttle cable. Now that you’ve deep-cleaned your carburetor, resituate all of your pieces in their correct position. First, slide the carburetor back on its mounting bolts. Position the bowl and fasten the bolt that holds it in place.[11]
- Place the air filter and screw on its outer cover.
- Reattach the throttle cable.
- Turn the fuel line’s shut-off valve or remove its clamp.
- Plug the spark plug cable back into the spark plug.


Cleaning Your Carburetor without Removing It
-
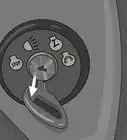
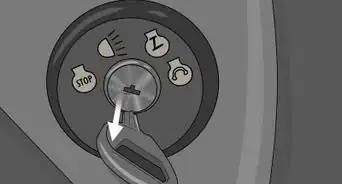
1Turn off your mower. Before you begin working, double-check that your lawn mower is turned off. If you’ve used your mower recently, allow your hot engine time to cool down to avoid dangerous burns.[12]
- Whether you have a push mower or a self-propelled mower, you can follow the same cleaning instructions to clean your carburetor.
-
2Remove the spark plug cable. Grip the (usually black) plug and pull directly away from the engine. This may require a bit of force but make sure to not pull on the actual cable, just the plug, as you could damage it.
- This is an extremely important safety step, as with this plug attached the engine is 'live' and could start suddenly with any movement of the blades of the engine or work on the rest of the mower.[13]
- Even though you won't be working directly on the blades or parts that could cause the engine to start, it's still best practice to remove the cable.
-
3Unscrew your air filter with a screwdriver and clean your air filter with a rag. First, find your air filter (usually near the top or side of the engine). Next, take off the air filter’s outer case by removing the snaps or unscrewing the screws holding it in place. Then, if your air filter itself is removable, pull it from its housing. Using a rag or a vacuum cleaner, remove the dust and debris from your air filter.[14]
-
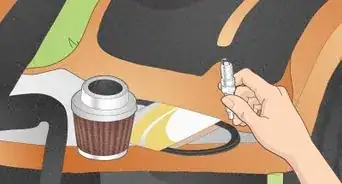
4Turn the engine on and spray your aerosol spray onto the carburetor. Once you’ve turned on your mower, spray the aerosol liquid in the middle of carburetor for 10-15 pulses. Then, stop spraying and let the mower sit, still turned on, for a minute. Finally, identify the carburetor’s throat and now, spray the aerosol onto this part of the machine as well.[15]
-
5Clean remaining dirt with a damp rag. Next, inspect your carburetor. Did you get everything, or do you still spy leftover moss, grass, or grime? Scrub these bits away using a damp rag. Take care not to use a dripping rag—as this could cause your mower to rust.[16]
-
6Return your air filter and casing to its original position. Typically, this will mean sliding the air filter back into its housing. Then, screw on the bolt or bolts that hold it in position.[17]
- Plug the spark plug cable back into the spark plug.


Thing You'll Need
Removing and Cleaning Your Carburetor
- Vice grip
- Needlenose pliers
- Rag
- Screwdriver
- Wire brush
- Carburetor cleaner
Cleaning Your Carburetor without Removing It
- Rag
- Screwdriver
- Sandpaper
- Wire brush
- Aerosol spray


References
- ↑ https://nasdonline.org/918/d000761/mow-your-lawn-safely.html
- ↑ https://www.weingartz.com/expert-advice/2011/03/disconnect-the-spark-plug-before-doing-lawnmower-maintenance/
- ↑ https://www.lawnmowerfixed.com/mower-carburetor-cleaning/
- ↑ https://igoprolawnsupply.com/blogs/iampro-blog/how-to-clean-a-lawn-mower-carburetor
- ↑ https://upgradedhome.com/how-to-clean-a-carburetor-on-a-push-lawnmower/
- ↑ https://upgradedhome.com/how-to-clean-a-carburetor-on-a-push-lawnmower/
- ↑ https://www.appliancepartspros.com/b/how-to-clean-a-lawnmower-carburetor/
- ↑ https://poweredoutdoors.com/clean-a-zero-turn-mower-carburetor/
- ↑ https://poweredoutdoors.com/clean-a-zero-turn-mower-carburetor/
- ↑ https://www.gardentoolexpert.com/where-to-spray-a-carb-cleaner-on-a-lawnmower-use-these-7-steps/
- ↑ https://www.appliancepartspros.com/b/how-to-clean-a-lawnmower-carburetor/
- ↑ https://nasdonline.org/918/d000761/mow-your-lawn-safely.html
- ↑ https://www.weingartz.com/expert-advice/2011/03/disconnect-the-spark-plug-before-doing-lawnmower-maintenance/
- ↑ https://homesthetics.net/how-to-clean-the-lawn-mower-carburetor-without-removing-it/
- ↑ https://homesthetics.net/how-to-clean-the-lawn-mower-carburetor-without-removing-it/
- ↑ https://www.gardentoolexpert.com/how-to-clean-a-carburetor-on-a-lawnmower-without-removing-it/
- ↑ https://www.gardentoolexpert.com/how-to-clean-a-carburetor-on-a-lawnmower-without-removing-it/
About This Article