This article was co-authored by Anthony Stark, EMR and by wikiHow staff writer, Jessica Gibson. Anthony Stark is a certified EMR (Emergency Medical Responder) in British Columbia, Canada. With over 11 years of experience, he has worked as an industrial medic and provided urban and rural paramedic services. He currently works for Mountain View Safety Services and previously worked for the British Columbia Ambulance Service. Anthony has a Bachelor of Engineering in Electrical, Electronics, and Communications Engineering from the Georgia Institute of Technology. He has completed the EMP Canada EMT Course and Swiftwater Awareness Training associated with the British Columbia Ambulance Service.
There are 13 references cited in this article, which can be found at the bottom of the page.
This article has been viewed 65,626 times.
During a disaster or in a chaotic trauma bay, injuries are sometimes missed, even after an initial examination. In fact, between 2% and 50% of injuries are missed among combined life-threatening and non-life threatening injuries.[1] Blunt trauma injuries (like car accidents) and situations in which patients were unconscious, sedated, or intubated during the primary exam were more likely to have overlooked injuries.[2] [3] However, a thorough secondary survey (and tertiary survey) decreases the chance that injuries will be overlooked.
Steps
Preparing to Conduct a Secondary Survey
-
1Make the patient comfortable. If the patient is awake and alert, explain to her what you are going to do and why. Ask her to describe any pain she may be feeling. Remove all clothing and cover the patient with a blanket (for warmth and modesty) while different areas are being examined. If the patient is unconscious, look for involuntary responses (like lack of reflexes or a rigid abdomen) and signs of primary injuries (like swelling, redness, lacerations, or physical illness).[4]
- Realize that secondary surveys are the same for children as for adults. However, note that infants won't be able to cooperate with some parts of the assessment (like the cranial nerve exam). Do as much as you are able.
-
2Distinguish between primary, secondary, and tertiary surveys. When dealing with trauma, a structured approach to examining wounds is important. This approach begins with a primary survey which recognizes and treats any immediate threats to life within minutes of arrival in the trauma bay. Then, the secondary survey examines the patient from head to toe in order to diagnose all possible injuries before deciding treatment. The tertiary treatment is the final assessment designed to catch any missed injuries.
- A tertiary survey is important since many trauma patients are immediately rushed into surgery, are unconscious, or can't express their pain.[5] Also, sometimes other symptoms will present after the patient has been treated for primary injuries.
Advertisement -
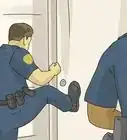
3Have a plan for examining all parts of the body. To catch overlooked injuries, you'll need to look over each system and area of the body methodically. Usually, you'll start the secondary survey by examining the front of the patient, log rolling the patient over onto her front side, and then checking the back of the patient. Ideally, several people should assist in rolling the patient in a blanket to protect the spine, when chances of spinal injury are low.
- If you are putting the patient on the stretcher yourself, cut the patient's clothing along their back and expose the spine during the initial log roll. This will allow you to look for injuries to the back and you won't have to move the patient again to check later.
- Wear gloves and apply gentle but firm pressure while you are assessing the patient's back. This may allow you to locate areas of pain, bruising, or bleeding.
- If you suspect the patient has a spinal injury, wait to roll her until x-rays can determine if there are any vertebral fractures.


Surveying the Anterior (Front) Side of the Patient
-
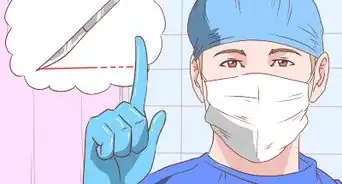
1Inspect the head, ears, eyes, nose, and throat. Look at these areas for any lacerations (cuts), blood collection, or bruising. Feel along the bridge of the nose for fracture. Open the mouth and check the jaw for alignment, clicking, or fracture. Look for chipped or lost teeth and damage to the tongue. You should also look at the cheek bones for fracture and bruising. Look into the pupils of the eyes to evaluate their size (in millimeters), whether they're equal, and if they're reacting to light.[6]
- Be thorough when checking. For example, you'll want to look behind the ears for bruising and inside the ear canals and nostrils (using an otoscope or even a pen light and your unassisted eyes) for bleeding.
-
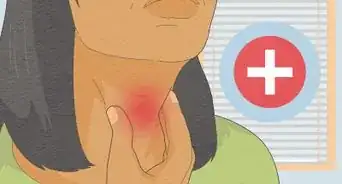
2Place a cervical collar around the neck. You should almost always do this when performing a secondary survey, since you don't yet know the extent of the patient's injuries. Tracheal shift can be verified in many cases while the collar is still on, due to the holes in the hard collar. Do not remove unless you have to. Check the trachea for any shift to the left or right. If you have to remove the cervical collar (also known as clearing the cervical spine), the patient must:[7]
- Be conscious.
- Be cooperative.
- Not have any distracting injuries like a fractured leg.
- Be sober (not under the influence of drugs or alcohol).
- Be developmentally able to engage in the assessment.
- Not be reporting any back or neck pain..
-
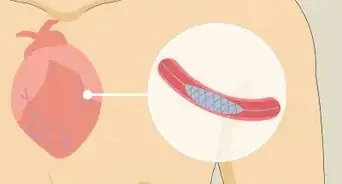
3Inspect the chest. Make sure the chest is symmetrical and look for signs of bruising or trauma (such as lacerations, gun shot wounds and exit wounds). Listen to the lungs for breathing from both sides to make sure a lung hasn't collapsed. Listen to the heart for any distant or muffled sounds. These could mean there's fluid or blood around the heart sac (indicating pericardial tamponade).[8]
-
4Survey the abdomen. Look for bruising and Cullen's sign which is swelling and bruising around the belly button (signaling bleeding from an injection). Feel the abdomen for rigidity (muscle stiffness) which can also indicate internal bleeding and infection.[9] Press the four quadrants of the abdomen by placing the fingers of one hand on each quadrant, and pressing on your fingers with your other hand. Press in a rolling motion using both sets of fingers to assess for rigidity or guarding (flinching from pain). Also, watch for pain when you remove your hand. Listen for the sound of blood rushing (bruits), which could mean there's been a tear from trauma.[10]
- Pay attention to other signs, like pain when you lightly tap across the abdomen. This reverberation might be intensely painful.
-
5Check for testicular twisting (torsion) in a male patient. Feel the area to determine if the testicles have twisted (torsion). Take the metal end of a reflex hammer and lightly run it along the inner thigh. When you do this, each testicle should rise in the scrotum, if there's no testicular torsion (a testicle-threatening injury).[11]
- At this time you can also check the perineum for any lacerations, burns or injuries.
-
6Examine the genital and rectal areas in a female patient. Place gloved and lubricated index and middle fingers into the vagina. At the same time, press or palpate against the lower abdomen using the opposite hand. You're checking for pain. However, if the patient is pregnant you should consult an obstetrician before doing an internal exam since ultrasounds and fetal monitoring might be needed.
- At this time, you could also check the perineum for any lacerations, burns, or injuries.


Performing a Complete Neurological Exam
-
1Perform an initial examination of deep tendon reflexes. Use a reflex hammer to check for motor strength, sensation, and reflexes of the upper and lower extremities (arms and legs). If you notice anything unusual such as decreases in these abilities, get a neurosurgical consultation. If you don't find anything unusual, you can start palpating the seven cervical vertebrae along the spine. Check for any pain or tenderness overlying any of the vertebrae.[12]
- If there is any pain, take x-rays of the cervical spine to look for any fracture. If the x-rays show a fracture, get an emergent neurosurgical consultation before continuing to check motion range.
-
2Evaluate the patient's motor or muscle strength. Record the muscle strength for all muscle groups of the upper and lower extremities. Rate the strength from flaccid paralysis (0) to normal (5) with - and + for grades falling in between. Compare strength from left side to right side to compare what's baseline normal for your patient. Use the following grades to rate muscle strength:
- 1: Contraction of the muscle but no movement
- 2: Movement but cannot resist gravity
- 3: Movement but can barely resist gravity
- 4: Can move against gravity but not normal strength
- 5: Normal strength
-
3Check for skin sensation. Rub a cotton ball over the skin to determine soft touch, with a cotton-tipped swab to determine dull touch, and with the wooden sharp part of a broken cotton-tipped swab to determine sharp touch. Tell the patient to close her eyes and alternate between the various sensations to see if she can distinguish between them.
- Next, see if she can distinguish between one item and two items touching her. The patient's eyes should again be closed. Ask her, "Are you feeling two points or one?"
-
4Test the nerves. Next, you can test the patient's nerves by using some simple tests. The following nerves need to be tested:
- Olfactory Nerve: Ask whether the patient can smell (try something like soap).
- Optic Nerve: Use a fundoscope to examine the inside the eye. Turn off the lights and look for blurring of the optic disc (papilledema). This can signal bleeding in the brain.
- Cranial Nerves: This is particularly important if there was head trauma.[13]
- Oculomotor Nerve: Check the pupils to see that they are equal round and reactive to light. Have the patient hold her head straight while you move your finger. She should watch while only moving her eyes.
- Trochlear Nerve: Test the downward and internal gaze of the eyes.
- Trigeminal Nerve: Lightly touch the patient on the cheek using your finger.
- Abducens Nerve: Check this nerve when you check the extraocular movements of the eyes in all directions (side to side, up and down).
- Facial nerve: Have the patient smile big, or close her eyes tight.
- Acoustic Nerve: Check hearing by whispering in each ear to pick up any subtle deficits.
- Glossopharyngeal and Vagus Nerves: Have the patient drink a small amount of water and test gag reflex with a tongue depressor.
- Spinal accessory nerve: Have the patient shrug her shoulders.
- Hypoglossal nerve: Have the patient stick her tongue out straight ahead and to the left and to the right, showing strength, against the cheek.


Surveying the Posterior (Back) Side of the Patient
-
1Log roll the patient. You'll need two or three people to help you roll the patient onto her back. Wash your hands before rolling and explain to the patient what you're going to do (if she's conscious). The patient should be lying on a blanket or turning sheet with her hands placed across her chest. You should all be holding the blanket or sheet on the side of the patient that's farthest from you. Gradually pull the sheet towards you and over the patient, turning her onto her back.[14]
- Once the patient is on her back, you can examine the skin. Look for any bruising that might indicate trauma, lacerations or gunshot wounds.
-
2Access the patient's back. Since you should have already examined and cleared the cervical spine, you'll need to press (palpate) each individual vertebrae of the back. Specifically, palpate the thoracic and lumbar spine, feeling each vertebrae for pain that might indicate a fracture.
- Don't forget to check any parts of the musculo-skeletal system that you might not have examined earlier. For example, you can ask the patient to grasp your finger with their clutched hand to check for motor control and strength, and then ask the patient to tell you without looking which finger of theirs you are gripping.
- Palpate down the lengths of the arms and legs as well, all the way to the toes and fingers to feel for possible fractures. You can also do this when you are doing the log roll check of the patient's spine.
-
3Move on to a trauma tertiary survey (TTS). Once the primary and secondary surveys are complete, perform a TTS. This extensive examination should take place within 24 hours of admitting the patient. Or, do it when the patient is awake and alert enough to participate in the examination. You'll need to get the patient's medical chart that includes all laboratory and radiologic data.
- This information will be combined with the opinions of consultants in order to make a management and care plan that's specific to the patient.[15]


Warnings
- Do not attempt to move a patient who has a suspected head or spinal wound unless absolutely necessary to preserve life (danger of fire or falling debris).⧼thumbs_response⧽
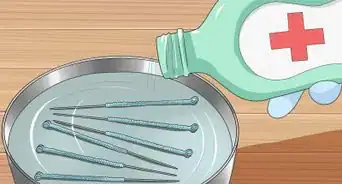
- Wear medical gloves while examining the patient to guard against blood-borne diseases if possible.⧼thumbs_response⧽
- Do not remove any penetrating object from a patient's body. Removing a foreign object can cause uncontrollable bleeding (hemorrhage). Support the object in place with bandages and gauze pads to keep it from being jostled and further damaging the injury. Wait until the patient reaches the hospital to remove the object if at all possible.⧼thumbs_response⧽


References
- ↑ SCA Hughes MD, Advanced Trauma Life Support Secondary Survey Mneumonic as Critical Care Assessed Patients Priorities or Next Management Decision? Emergency Medicine Journal 2006 Aug 23 (8) pp 661-662
- ↑ SCA Hughes MD, Advanced Trauma Life Support Secondary Survey Mneumonic as Critical Care Assessed Patients Priorities or Next Management Decision? Emergency Medicine Journal 2006 Aug 23 (8) pp 661-662
- ↑ Vagn Peterson MS, ACNP,CCRN,CEN.,Trauma Tertiary Surveys What, Why, When, Who. Detecting Missed Injuries in the Muliply Injured Trauma Patients Trauma.Org Dec 2006 11 (12)
- ↑ https://www.rch.org.au/trauma-service/manual/primary-and-secondary-survey/
- ↑ James Merlini MD, James Polk MD, Jose Acosta MD, Trauma, 1st edition Feb 2007: Chapter 14 Secondary Survey: Comprehensive Trauma Evaluation pages 255-266)
- ↑ https://www.rch.org.au/trauma-service/manual/primary-and-secondary-survey/
- ↑ Royal Melbourne’s Children’s Hospital Clinical Practice Guidelines Cervical Spine Assessment
- ↑ https://youtu.be/buWvtTExcgA?t=48/
- ↑ https://youtu.be/buWvtTExcgA?t=68
- ↑ https://www.nlm.nih.gov/medlineplus/ency/article/003136.htm
- ↑ http://www.ncbi.nlm.nih.gov/pmc/articles/PMC2966582/
- ↑ http://www.ncbi.nlm.nih.gov/books/NBK396/
- ↑ Barbara Bates: Guide to Physical Examination and History Taking by Lynn S Bickley, Barbara Bates Edition 10 Lippincott Williams and Wilkins 12/31/08
- ↑ http://journals.lww.com/nursing/Citation/2004/02000/Logrolling_a_patient.19.aspx
- ↑ Vagn Peterson MS, ACNP,CCRN,CEN.,Trauma Tertiary Surveys What, Why, When, Who. Detecting Missed Injuries in the Muliply Injured Trauma Patients Trauma.Org Dec 2006 11 (12)


Medical Disclaimer
The content of this article is not intended to be a substitute for professional medical advice, examination, diagnosis, or treatment. You should always contact your doctor or other qualified healthcare professional before starting, changing, or stopping any kind of health treatment.
Read More...