This article was co-authored by wikiHow staff writer, Travis Boylls. Travis Boylls is a Technology Writer and Editor for wikiHow. Travis has experience writing technology-related articles, providing software customer service, and in graphic design. He specializes in Windows, macOS, Android, iOS, and Linux platforms. He studied graphic design at Pikes Peak Community College.
This article has been viewed 234,302 times.
Learn more...
C# is a great programming language, and all the tools you need to get started are free and easy to use. While C# is usually associated with Microsoft and closed source, you can download a free version of Visual Studio Community and start programming. This wikiHow teaches you how to create a program in C# using Visual Studio.
Steps
Setting Up Visual Studio
-
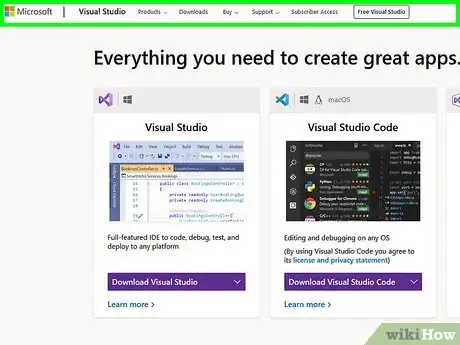
1Go to https://visualstudio.microsoft.com/free-developer-offers/ in a web browser. This is the website for Visual Studio Express. You can download your free copy of Visual C# Community Edition.
-
2Hover over "Download Visual Studio" and click Download Community 2019. It's the purple button on the left side of the page. Placing the mouse cursor over this displays a drop-down menu with three versions of Visual Studio. Visual Studio Community 2019 is the free version.
- If the file doesn't download automatically, click the blue text that says Click here to retry at the top to download it again.
Advertisement -
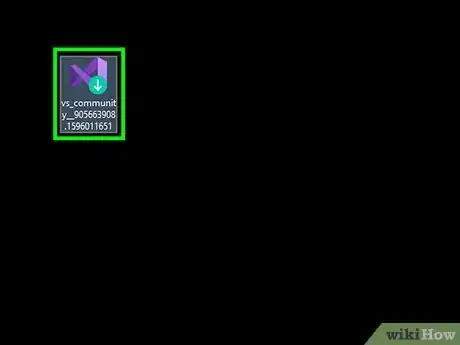
3Run the downloaded executable. The downloaded executable is called "vs_community__[version number].exe". By default you can find downloaded files in your Download folder or in your web browser.
-
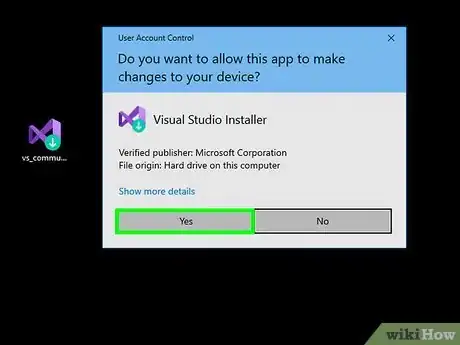
4Click Yes. This gives VS_Community permission to make changes to your Windows system.
-
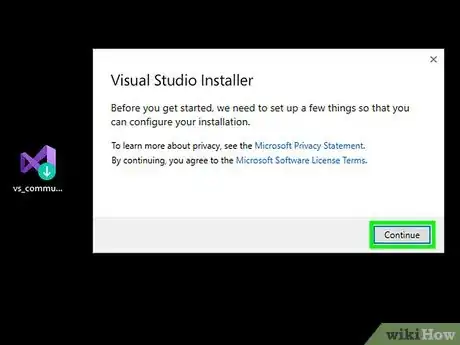
5Click Continue. It's in the lower-right corner. This begins the process of installing Visual Studio Express.
-
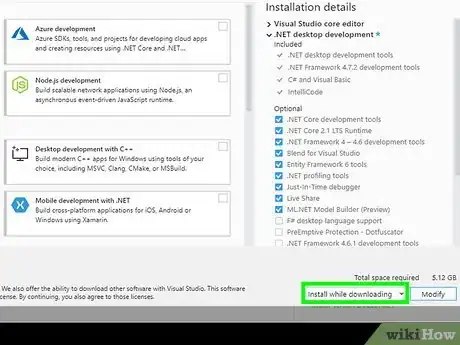
6Click the checkbox next to .Net desktop development. It has a icon that resembles a computer screen with a purple square that says ".Net". This contains the components for C#.[1]
- You can also check "Universal Windows Platform development" for additional components related Windows development.
- Look at all the other workloads and check any additional workloads you want to add. There are workloads related to other languages, like Python and C++, game development, mobile development and more.
-
7Click Install. This installs Visual Studio with the workloads you selected. It may take a while for Visual Studio to download.
-
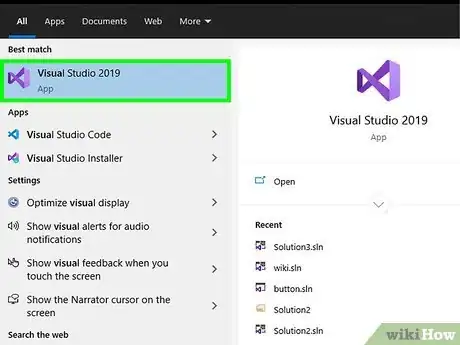
8Open Visual Studio. Visual Studio has an icon that resembles a purple ribbon. Click the icon in Windows Start menu to open Visual Studio.
-
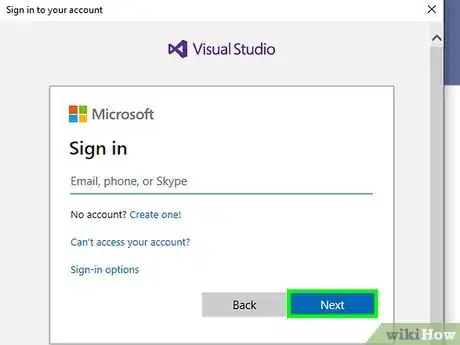
9Sign in to your Microsoft account. If you don't have a Microsoft account, click Create One and fill out the form to create a new Microsoft account. You can also click Not now, maybe later to skip this step for now. Use the following steps to sign in to your Microsoft account:
- Click Sign In
- Enter the email address associated with your Microsoft account.
- Click Next.
- Enter the password associated with your Microsoft account.
- Click Sign In.
-
10Select "Visual C#" as the Development Settings. Use the drop-down menu next to "Development Settings" to select "Visual C#".
-
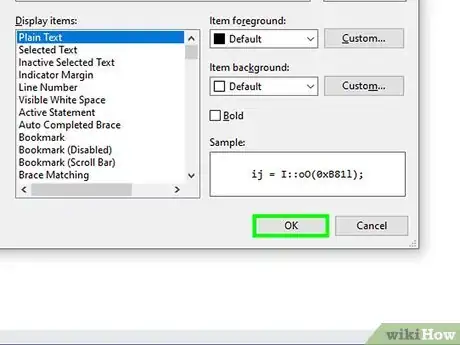
11Select a color theme. Click the radio option next to the color scheme you want to use in Visual Studio. You can use any color theme you want.
-
12Click Start Visual Studio. This will start Visual Studio.
Creating Your First Program
-
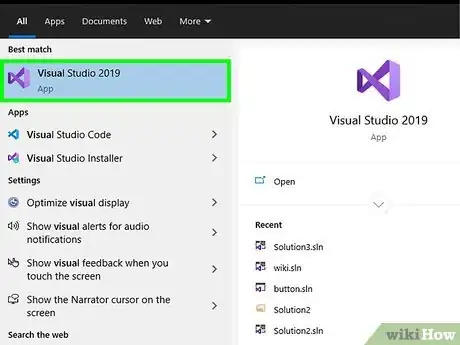
1Open Visual C#. Visual Studio has an icon that resembles a purple ribbon. Click the icon in Windows Start menu to open Visual Studio.
-
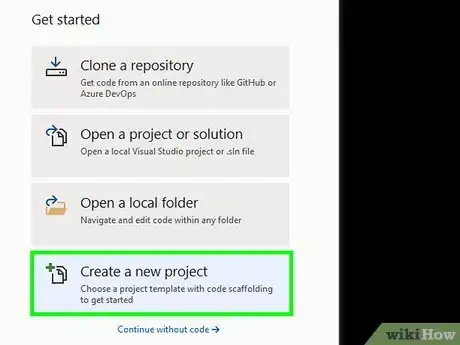
2Click Create a new project. It's the last option on the title page.
-
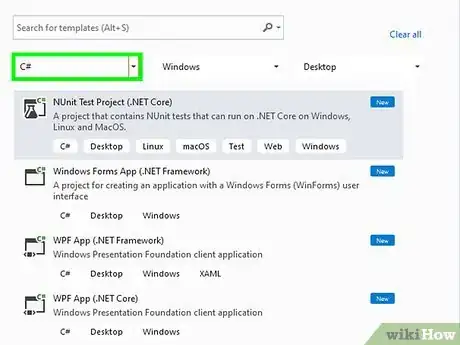
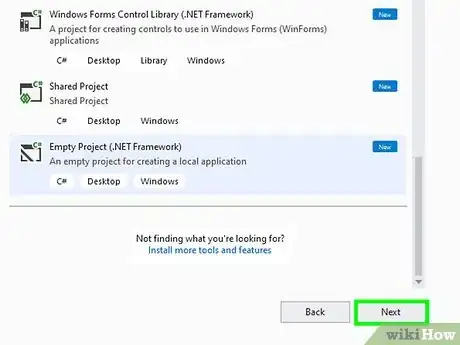
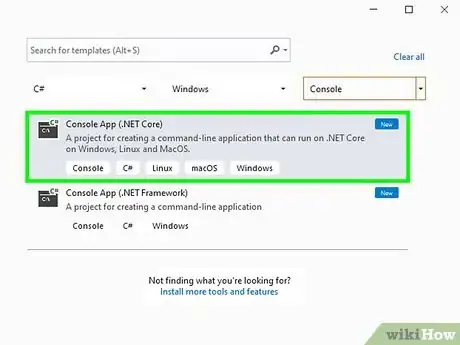
3Select Console App (.NET Core) for C# and click Next. It's the first option at the top of the page. It has a green "C#" icon in the upper-right corner.
-
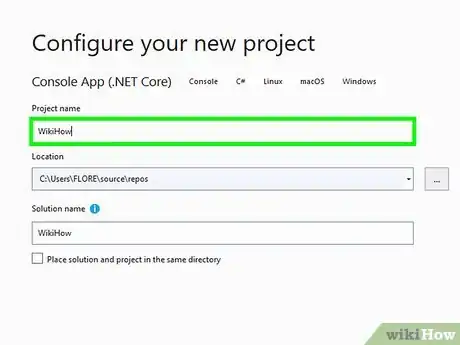
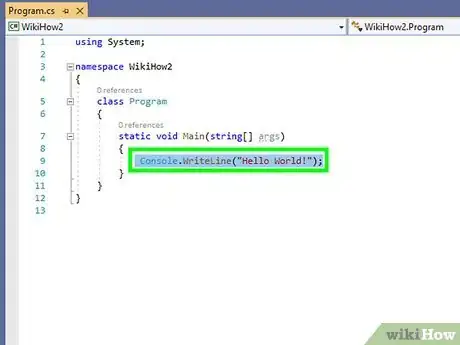
4Type a name for your project and click Create. Enter whatever name you want to name your project under "Project Name". You can name it "Hello World", leave the default name or pick a different name. Click Create to start your project. You should see some placeholder code that looks like this:
using System;

namespace Adding
{
    class Program
    {
        static void Main(string[] args)
        {
            Console.WriteLine("Hello World!");
        }
    }
}
-
5Remove the line "Console.WriteLine("Hello World!");". It's right under the line that reads "static void Main(string[] args)".
-
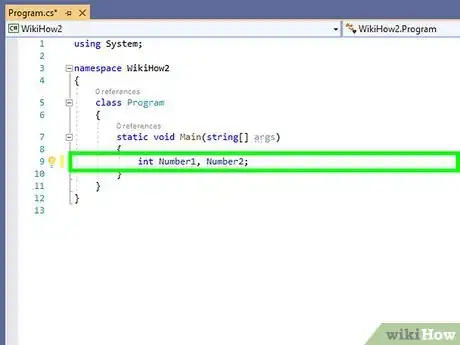
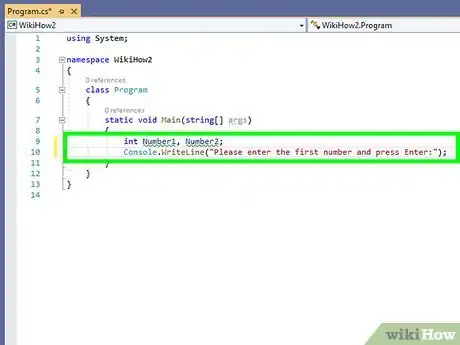
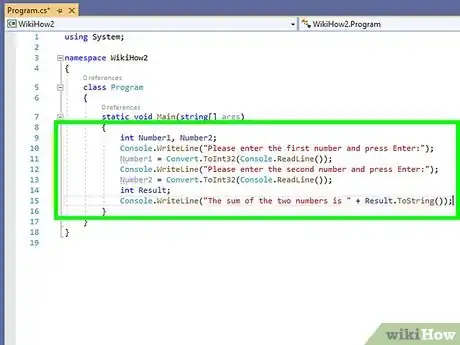
6Write int Number1, Number2; in it's place. This goes right after the curly bracket below " static void Main(string[] args)". This line of code declares two new integers (which are numbers) and gives them the label "Number1" and "Number2".
-
7Write Console.WriteLine("Please enter the first number and press Enter:"); in the next line. This goes in the next line after the line that declares two new integers. This line of code instructs the user to enter the first number and press enter.
-
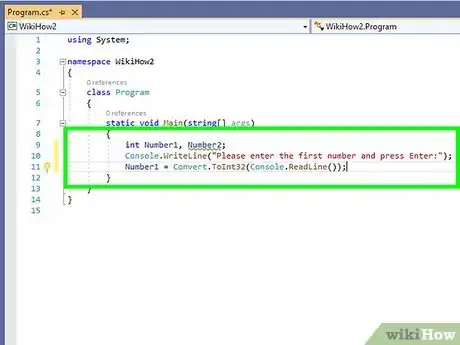
8Write Number1 = Convert.ToInt32(Console.ReadLine()); in the next line. This goes after the line that instructs the user to enter a number. This line of code takes the number the user enters and stores it as a 32-bit floating signed integer and assigns the value to the label "Number1".[2]
-
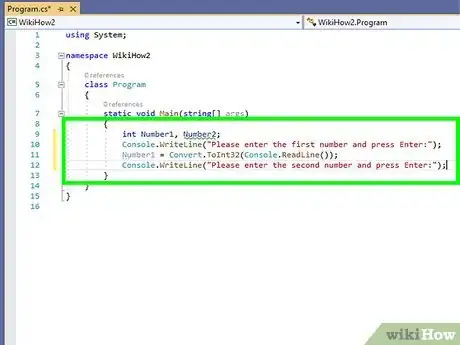
9Write Console.WriteLine("Please enter the second number and press Enter:"); in the next line. This goes in the next line after the line that converts the first number to an integer. This line of code instructs the user to enter the second number and press Enter.
-
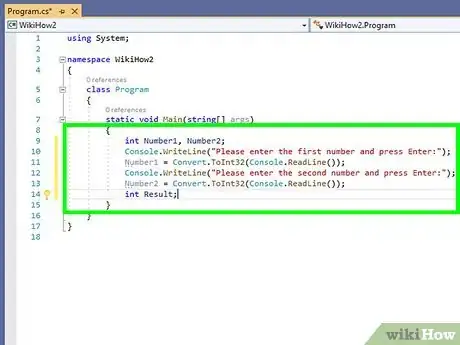
10Write Number2 = Convert.ToInt32(Console.ReadLine()); in the next line. This goes after the line that instructs the user to enter a number. This line of code takes the number the user enters and stores it as a 32-bit floating signed integer and assigns the value to "Number2".
-
11Write int Result; in the next line. This goes after the line that converts the second number to an integer. This line of code declares a new integer with the label "Result".
-
12Write Console.WriteLine("The sum of the two numbers is " + Result.ToString()); in the next line. This goes after the line that declares the Result integer. This line of code adds Number1 and Number2 and stores the sum under the integer label "Result". It then displays that number as a string (text) and displays the result along with a line explaining to the user that this is the sum of the numbers they entered.
-
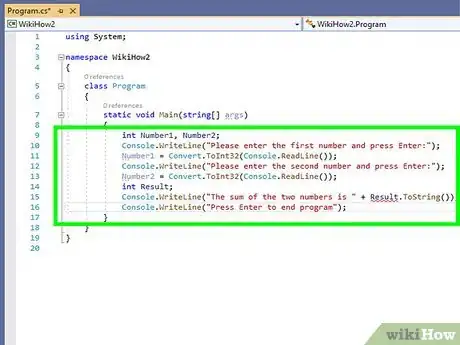
13Write Console.WriteLine("Press Enter to end program"); in the next line. This goes after the line of code that displays the sum of the two numbers the user entered. This line of code informs the user to press the Enter key to return to the console.
-
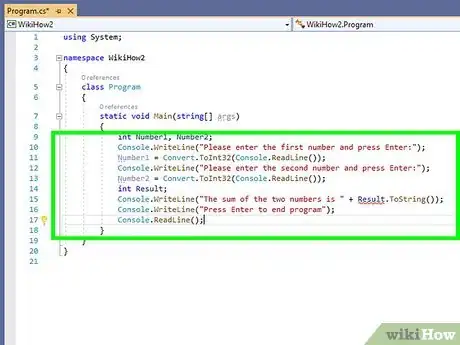
14Write Console.ReadLine();. This goes after the line of code that instructs the user to press the Enter key. This returns the user to the command console.
-
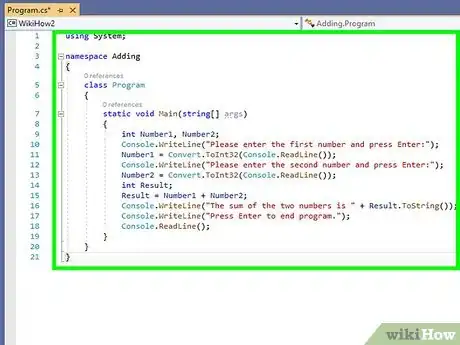
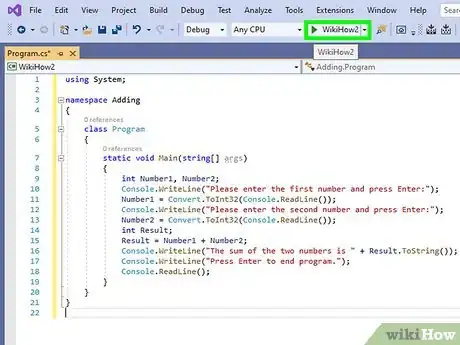
15Proof read your code. Go over each line and make sure the spelling and syntax is correct for each line. If it is not, you will get an error message. Also make sure that all open curly brackets "{" have a corresponding closing bracket "}". Your entire page of code should look something like this:[3]
using System;

namespace Adding
{
    class Program
    {
        static void Main(string[] args)
        {
            int Number1, Number2;
            Console.WriteLine("Please enter the first number and press Enter:");
            Number1 = Convert.ToInt32(Console.ReadLine());
            Console.WriteLine("Please enter the second number and press Enter:");
            Number2 = Convert.ToInt32(Console.ReadLine());
            int Result;
            Result = Number1 + Number2;
            Console.WriteLine("The sum of the two numbers is " + Result.ToString());
            Console.WriteLine("Press Enter to end program.");
            Console.ReadLine();
        }
    }
}
-
16Click the Run ► button on the toolbar. It's the green play button at the top of Visual Studio. If everything was entered correctly, this will build the program and run it. The command console will appear. It will tell you to enter a number and press Enter. Then it will tell you to enter another number and press Enter. It will then displays the sum of both those numbers. Congratulations, you just made your first program in C#
Community Q&A
-
QuestionWhy do I need variables in C#?
 Community AnswerVariables are used in C# to store information in the form of data. They may be used to store info for later use, to give different values at runtime or to show the logic and functionality of the code to create a "readable code."
 -
QuestionWhat's the difference between the original version and the express edition? Will there be more options available in the original version?
 Community AnswerThe original version has legacy support, while the express version has all of the up-to-date information.
 -
QuestionI created a Windows Forms C #, but I do not know how I can make this app available to my users. In fact, I really do not know how the program can be run outside of Visual Studio. What do I do?
 Community AnswerGenerally the .exe file is stored at Documents > Visual Studio 20xx > Projects > "Your solution name" > "Your project name" > bin > Debug/Release (depends on where you set it to be).
References
About This Article
1 Download Visual Studio from https://visualstudio.microsoft.com/free-developer-offers/.
2. Install Visual Studio with the ".Net desktop development" workload.
3. Select "Visual C#" as the development settings.
4. Open a new project in Visual Studio.
5. Review the placeholder code.
6. Replace the code with new code of your own design.
7. Click the green 'Play' icon at the top to build the program and run it.






-Step-16-Version-3.webp)
