This article was co-authored by Ricardo Mitchell. Ricardo Mitchell is the CEO of CN Coterie, a fully licensed and insured Lead EPA (Environmental Protection Agency) Certified construction company located in Manhattan, New York. CN Coterie specializes in full home renovation, electrical, plumbing, carpentry, cabinetry, furniture restoration, OATH/ECB (Office of Administrative Trials and Hearings/Environmental Control Board) violations removal, and DOB (Department of Buildings) violations removal. Ricardo has over 10 years of electrical and construction experience and his partners have over 30 years of relevant experience.
wikiHow marks an article as reader-approved once it receives enough positive feedback. In this case, several readers have written to tell us that this article was helpful to them, earning it our reader-approved status.
This article has been viewed 114,780 times.
If you're reading this and thinking "what's 'Ethernet'?" then you probably take your Internet connection for granted. You're about to learn what carries that little electrical signal you use to check for Twitter feed every five seconds. It's all thanks to a little yellow/blue/whatever cable that hooks to the hole next to the blinking light on the back of your computer (unless you're using a mobile device, but that's a whole different discussion), and here you can learn how to make one for yourself should you want to avoid the expensive labor fee of having some IT field agent come to your house and plug one in! Once you get the hang of it, you can do it faster than the phone call to call the technician, and all for under $30!
Steps
-
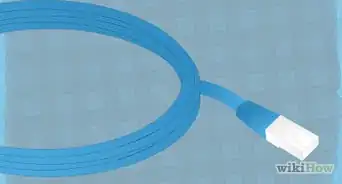
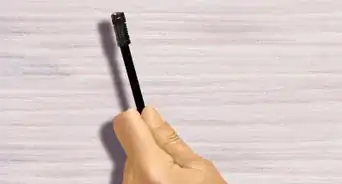
1Strip your cable. Use your cable strippers at about 1-2 inches from the end of the cable to remove the outer jacket.
-
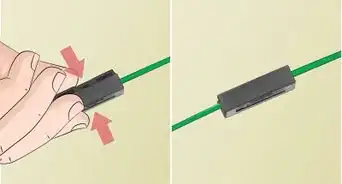
2Untwist the twisted pair wires all the way back to the jacket. This can be done just like a regular twist-tie on a loaf of bread, but with four of them of different colors.Advertisement
-
3Align the untwisted wires in the order necessary for your needs. For this scenario, you'll be making a straight-through cable, which has both ends of the cable with the same alignment of wires, so it's easy enough to do. Since this is your first cable, we'll consult the cheat sheet to know what order we're aligning in!
-
4Cut the extra wire. Once you've untwisted the wires, you'll have a superfluous amount of copper wiring left; we don't need this much, but it's good to have it in the previous step to help in aligning the colors properly. Use the wire-cutting scissors to cut these off.
-
5Push the remaining wires into the RJ45 head. Be careful not to bend the wires while pushing them in or you run the risk of creating a bad cable. You also don't want too little or too much wire left in the head; there's no definite length necessary, but it's pretty obvious to tell if there's too much cable or not enough. A short length of the jacket should be up the RJ45 head; use this knowledge as a reference.
-
6Double-check that the wires are all the way up into the gold pins of the head and made it up in the proper order. (Consult your cheat sheet if needed!)
-
7Push the head into the open space of the crimping tool and squeeze it closed, hard. If you don't crimp the cable all the way, the head may come off.
-
8Open the crimping tool and remove your newly-crimped Ethernet connector.
-
9Repeat the crimping process on the other side of the cable if you're making a completely new cable. If you're repairing one end, this won't apply to you, so move on.
-
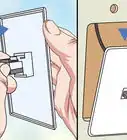
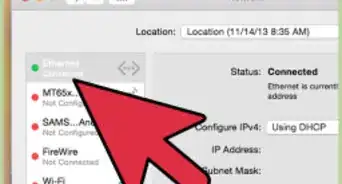
10Plug one end of the cable into the tan, two-port end of the cable tester, and the other end into the other part of the tester with the graphic display window. Turn it on and listen for the beep. If it beeps once, you successfully made an Ethernet cable; if it beeps twice, some part of the cable is messed up and needs repairing. Depending on the error, the cable may or may not still be usable.
-
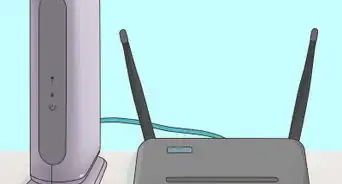
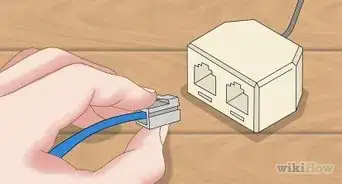
11Plug your Ethernet cable in. Now that you've made an Ethernet cable all by yourself, you can connect all kinds of devices together! Of course, for the cable you just made, make sure they're different devices! You can connect to Xbox Live now, to Playstation Network, to your wireless router, and many more devices you don't even know about! Or, if you're known as the life of the party, you can show off to your friends and never have to worry about being invited to another party again... !


Community Q&A
-
QuestionCan the same port be used for a 2.0 and 3.0 USB connector?
 Community AnswerEthernet cables cannot run through USB ports. USB ports and Ethernet ports are completely different and have different functions.
 -
QuestionDo longer Ethernet cables reduce connection speed?Yes, but not to the extent that you'll ever notice. Ethernet cables lose speed over massive distances. There will be no significant difference between a cable that travels the length of your house and one that's connected to a device right next to the router.

Warnings
- There's a reason you need eye-protection: when cutting the copper wires, they can go flying and potentially get your eye! Be smart, be safe!⧼thumbs_response⧽
Things You'll Need
- Appropriate length of Cat5e Ethernet cable
- Safety goggles (or glasses if you have those)
- Wire-cutting scissors
- Cat5e RJ45 head(s)
- Crimping tool
- Cable strippers
- Ethernet cable tester


References
- Videos provided by dial2fast
About This Article