X
This article was co-authored by Mantas Silvanavicius. Mantas Silvanavicius is a Licensed Electrician and the Owner of M+S Electric based in Las Vegas, Nevada. With more than 20 years of experience, he specializes in home electrical installations, testing, and wiring. Mantas and his team have completed projects for companies such as Seiko and Springhill Suites by Marriott. M+S Electric is licensed, bonded, and insured.
This article has been viewed 57,775 times.
Are you looking to wire your own Ethernet cable? It's actually much easier than it sounds. If you have the cable and tools you need, it'll only take a few minutes.
Steps
-
1Make sure you have the correct tools. This task will require: Ethernet cable, an Ethernet socket head and an Ethernet socket head crimper. Before you start cutting and crimping the wire, make sure that it's the correct length! You don't want to successfully wire your Ethernet cable and discover it's not long enough for its desired purpose! It's best to make sure that there is a little bit of extra length as well, just to be safe.
-
2Take your Ethernet cable and carefully strip it. Make sure that you don't damage any of the smaller wires found inside it, as this can cause problems in regards to the life of the wire, and whether or not the wire will even work at all!Advertisement
-
3Separate the individual wires and straighten them out. This is will make your life a lot easier when you have to put them in order.
-
4Put the wires into the correct order. This part can be particularly frustrating as the wires have a tendency to move around from the positions you put them in. Be patient and eventually they'll remain in position. When you've straightened the wires out put them in this order:
- Orange/White
- Orange
- Green/White
- Blue
- Blue/White
- Green
- Brown/White
- Brown
-
5Make sure that the length of the wires isn't too long. When you insert the wires into the Ethernet socket head, you want to make sure that the wires aren't crushed by the plastic clip. Make sure the wires are roughly half an inch in length and slowly push them into the socket head. Make sure that when you do this the "clip" is facing away from you. If you do it the opposite way around, the wires will be backwards!
-
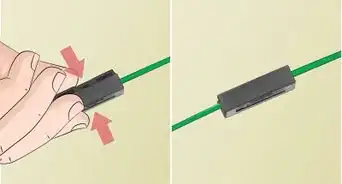
6Crimp the wires. If you haven't already checked the order of the wires check it now, and if you have checked, check again! There's no way to go back once it's crimped other than to cut it off and start again. When you are satisfied the wires are in the correct order, make sure they are push as far as they can go, and are seated nicely next to the gold pins at the end. Also make sure there is plenty of sleeving to make sure you don't cut into the wires during crimping.
-
7Push the socket head into the crimping device. Push down extremely hard and the cable will be correctly crimped (Note that you won't feel or hear any "clicks" or "pop" letting you know when it's been correctly crimped).
-
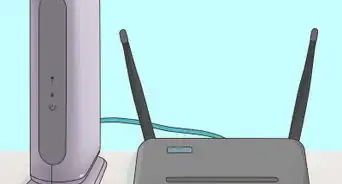
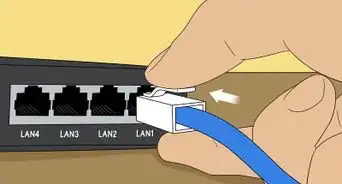
8Plug in your cable where you need it! If you followed the steps correctly you should have a perfectly working Ethernet cable.


Advertisement
Community Q&A
-
QuestionAre both ends identical?
 Garrie NassauCommunity AnswerUsually, Ethernet cables have identical ends with RJ45 connectors. Often fiber Ethernet cables have different connectors on each end because the connector to a switch and the usual style of the patch panel are different.
Advertisement
Things You'll Need
- Ethernet cable
- An Ethernet socket head
- An Ethernet socket head crimper


About This Article
Advertisement