This article was co-authored by wikiHow staff writer, Jessica Gibson. Jessica Gibson is a Writer and Editor who's been with wikiHow since 2014. After completing a year of art studies at the Emily Carr University in Vancouver, she graduated from Columbia College with a BA in History. Jessica also completed an MA in History from The University of Oregon in 2013.
There are 16 references cited in this article, which can be found at the bottom of the page.
The wikiHow Video Team also followed the article's instructions and verified that they work.
This article has been viewed 48,552 times.
Learn more...
It's easy to make beautiful lacy crocheted gloves. Work with your favorite color and style of yarn to crochet a quick ribbed cuff. Then single crochet the main body of the glove. Crochet in the round to make each finger and then finish off the yarn. Make another glove and weave in the loose ends. Enjoy your handmade gloves!
Steps
Crocheting the Cuff
-
1Get out your crochet hook and yarn. You'll need to use a US F (3.75 mm) crochet hook to make these women's gloves. Choose a worsted weight yarn in your favorite color and material. The skein should be 100 g or 280 yards (256 m) and you'll only be using half of it to make the gloves.
- Save the rest of the skein for another pair of gloves or for a different project.
- You can use a single color, use multi-colored yarn, or select several colors for your gloves.
-
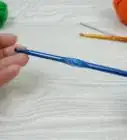
2Secure a slip knot to the hook and start 1 chain stitch. Tighten the slip knot around your crochet hook and wrap the yarn over the hook. Pull it through the knot to make 1 loop. Do this again to make another loop.[1]Advertisement
-
3Make a foundation chain of 15 stitches. Push the hook into the first loop and wrap the yarn around the hook. Pull the loop through the 1 loop on your hook to make 1 chain stitch. Wrap the yarn over and pull it through both of the loops.[2]
- This will make 1 foundation single crochet stitch. Make a total of 15 foundation chain stitches.
-
4Single crochet (sc) into the remaining stitches. Insert your hook into the second chain stitch away from your hook. Wrap the yarn around the hook and pull it through the loop so you have 2 loops on your hook. Wrap the yarn over your hook again and pull it through both of the loops.[3]
- This will make 1 single crochet stitch. Single crochet into every stitch across the first row.
-
5Chain 1 stitch and turn the work. When you reach the end of the row, add 1 chain stitch. Flip the work so your crochet hook is now at the right side of the work.
-
6Single crochet into the back loop of every stitch and chain 1 for 22 rows. Instead of inserting the hook from the front of the loop on your next row, insert it from the top into the back of the loop. Work the loop as a single crochet stitch and continue to single crochet into the back loop of every stitch on the row. Remember to chain up 1 stitch at the end of each row.[4]
- You should have 23 completed rows of crochet once you're done single crocheting into the back loops.
-
7Single crochet into the back loop of every stitch on row 24. Once you've finished crocheting the ribbed cuff, single crochet into the back loop of every stitch. Don't chain 1 stitch at the end.[5]
-
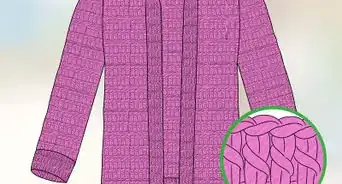
8Seam together the ribbed edges. Bring the edges of the ribbed piece together so the stitches line up and form a cuff. Insert the crochet hook into the stitch on the other end of the ribbed row and wrap the yarn around. Pull it through both of the stitches and then insert the hook through both stitches of the next row.[6]
- Continue to wrap the yarn around and pull through the stitches on each row until you reach the bottom of the cuff.

Making the Body
-
1Turn the cuff inside out and pick up 38 chain stitches. Flip the cuff inside out to hide the seamed edge. You should have 1 chain stitch on your needle after you flip the work inside out. Insert the hook into the next stitch and wrap the yarn around it. Pull the stitch onto your hook and wrap the yarn over again.[7]
- Pull the hook through both stitches to pick up 1 chain stitch. Pick up another 37 chain stitches to get to the end of the round.
-
2Single crochet stitch the first row. Insert a stitch marker and start counting rows all over again now that you're crocheting in the round. Make a single crochet stitch into each stitch for row 1. You'll need to crochet into the front of the loops.[8]
-
3Alternate 3 stitches of back loop crochet with front loop crochet for row 2. Crochet 3 single crochet stitches into the back of the loops. Then single crochet 3 stitches into the front of the loops.[9]
- Keep alternating between the front and back loops every 3 stitches until you reach the end of the round.
-
4Alternate single crochet stitches between the front and back loops. To make row 3, single crochet 3 stitches into the front loops. Then single crochet 3 stitches into the back of the loops. Repeat this 3 times and then finish the row by single crocheting into the front loops only.[10]
-
5Alternate 3 stitches of back loop crochet with front loop crochet for row 4. Repeat the second row where you crocheted 3 single crochet stitches into the back of the loops. Then single crochet 3 stitches into the front of the loops.[11]
- Alternate between the front and back loops every 3 stitches until you reach the end of the round.
-
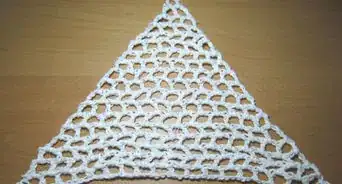
6Crochet row 5 by single crocheting into front and back loops. Single crochet 3 stitches into the front loops and then single crochet 3 stitches into the back of the loops. Do this another 3 times and then finish the row by single crocheting into the front loops only.[12]
-
7Alternate 3 stitches of back loop crochet with front loop crochet for row 6. Repeat an earlier row by single crocheting 3 single stitches into the back of the loops. Then single crochet 3 stitches into the front of the loops.
- Alternate between the front and back loops every 3 stitches to get to the end of the row.
-
8Crochet the 7th row on the left glove. Single crochet 3 stitches into the front loops and then single crochet 3 stitches into the back loops. Do this another 3 times and then sc into the front loops for the last 7 stitches. Make 6 chain stitches and push the hook into the last stitch on the row. Wrap the yarn around and pull it through the stitches.[13]
- This will create a gap or hole where the thumb on the left glove will be.
-
9Crochet the 7th row on the right glove. When you're making the other glove, single crochet 3 stitches into the front loops and single crochet 3 stitches into the back loops. Do this another 3 times and then single crochet into the front loops for the last 18 stitches. Make 6 chain stitches and push the hook into the 12 stitch away from the end of the row. Wrap the yarn around and pull it through the stitches.
- This will make a gap or hole for the right thumb.
-
10Alternate the second and third row to finish the body. Alternate the pattern from earlier rows to crochet rows 8 through 12. These rows will finish the main body of the glove:[14]
- Row 8: *Back loop sc 3, front loop sc 3*, repeat this 3 times, then front loop sc to the end
- Row 9: *Front loop sc 3, back loop sc 3*, repeat this 3 times, then front loop sc to the end
- Row 10: *Back loop sc 3, front loop sc 3*, repeat this 3 times, then front loop sc to the end
- Row 11: *Front loop sc 3, back loop sc 3*, repeat this 3 times, then front loop sc to the end
- Row 12: *Back loop sc 3, front loop sc 3*, repeat this 3 times, then front loop sc to the end
Crocheting the Fingers
-
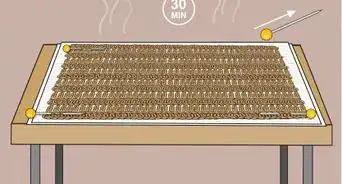
1Crochet single stitches into the front and back loops to make the pinkie finger. Alternate single crochet stitches between front and back loops and then push your hook back into the row. Wrap the yarn around the hook and bring it through the stitch to create a small circle. Continue to crochet in the round for 6 rows before you decrease your stitches.[15]
- Finish off the yarn when you get to the end of the pinkie and cut the yarn to leave a 1 in (2.5 cm) tail.
-
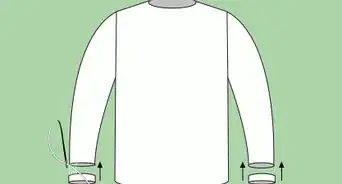
2Single crochet in the round to make the ring finger. Tie the yarn into a stitch near the base of the pinkie finger. Chain stitch along the row and join the stitches with the loops on the other side of the glove. Single crochet in the round for 7 to 8 rows and then decrease the stitches.[16]
- Finish off the yarn and cut it to leave a 1 in (2.5 cm) tail.
-
3Attach the yarn near the ring finger and crochet the middle finger. Chain stitch for 7 stitches along the row and join the stitches with the loops on the other side of the glove. Single crochet in the round for 8 to 9 rows and then decrease the stitches.[17]
- Single crochet until you get the desired length. Consider trying on the glove so you can see how many more rows to crochet.
- Finish off the yarn and cut it to leave a 1 in (2.5 cm) tail.
-
4Single crochet into the front loops to make the ring finger. Tie the yarn to the base of the middle finger and front loop single crochet for 10 stitches. Join the yarn to the row on the other side of the glove and single crochet in the round for about 8 rows.[18]
- Decrease the stitches and finish off the yarn. Cut the yarn to leave a 1 in (2.5 cm) tail.
-
5Crochet single stitches into the front loops to make the thumb. Secure the yarn to the base of the thumb and insert your hook into the next stitch. Wrap the yarn around the hook and pull the stitch onto your hook. Wrap the yarn over again and pull it through both stitches to pick up 1 chain stitch. Pick up 14 more stitches and single crochet every stitch until the thumb is as long as you want it to be.[19]
- Decrease the stitches and finish off the yarn. Leave a 1 in (2.5 cm) yarn tail when you cut it.
-
6Weave in any yarn tails. Use the end of your crochet hook to push the tail on the end of each finger down into the finger. Turn the work inside out so you can weave each tail into each finger.
Things You'll Need
- 1/2 skein of worsted weight yarn (100 g or 280 yards/256 meters)
- Stitch marker
- Crochet hook size US F (3.75 mm)
- Tapestry needle, optional
- Scissors
References
- ↑ https://youtu.be/x_C9Kvri5dw?t=47
- ↑ https://youtu.be/x_C9Kvri5dw?t=82
- ↑ https://youtu.be/x_C9Kvri5dw?t=158
- ↑ https://youtu.be/x_C9Kvri5dw?t=262
- ↑ https://youtu.be/x_C9Kvri5dw?t=356
- ↑ https://youtu.be/x_C9Kvri5dw?t=406
- ↑ https://youtu.be/x_C9Kvri5dw?t=507
- ↑ https://youtu.be/x_C9Kvri5dw?t=590
- ↑ https://youtu.be/x_C9Kvri5dw?t=623
- ↑ https://youtu.be/x_C9Kvri5dw?t=817
- ↑ https://youtu.be/x_C9Kvri5dw?t=843
- ↑ https://youtu.be/x_C9Kvri5dw?t=916
- ↑ https://youtu.be/x_C9Kvri5dw?t=1004
- ↑ http://interunet.com/how-to-crochet-gloves-for-a-woman
- ↑ https://youtu.be/x_C9Kvri5dw?t=1467
- ↑ http://interunet.com/how-to-crochet-gloves-for-a-woman
- ↑ http://interunet.com/how-to-crochet-gloves-for-a-woman
- ↑ http://interunet.com/how-to-crochet-gloves-for-a-woman
- ↑ https://youtu.be/x_C9Kvri5dw?t=2263
About This Article