wikiHow is a “wiki,” similar to Wikipedia, which means that many of our articles are co-written by multiple authors. To create this article, 10 people, some anonymous, worked to edit and improve it over time.
This article has been viewed 80,133 times.
Learn more...
Coving is a type of decorative molding that covers the joint where the wall of a room meets the ceiling. Coving comes in pre-cut sections. You will need to cut the edges of each length of coving at an angle in order to achieve a smooth, secure fit between pieces. Cutting the edges at an angle will help to disguise the points where each piece of coving meets. You can buy coving, as well as all of the supplies needed to cut it, at a home improvement store or a hardware store. Use these tips to cut coving.
Things You Should Know
- Use a miter block and crosscut saw to cut coving.
- Smooth the cut edges of the coving with sandpaper.
- Mark where the edges of the coving will fall on the ceiling and walls for reference.
Steps
-
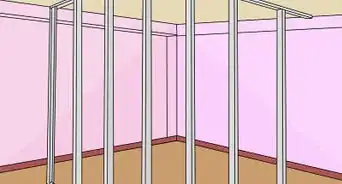
1Clean the wall and ceiling.
- Remove old backing paper or wallpaper from the wall and ceiling where you will install the coving.
- Use a sponge and water to wipe down the wall and ceiling. Ensure that the sponge is damp, but not dripping water. Scrub the surfaces to remove all dust or leftover wallpaper paste.
-
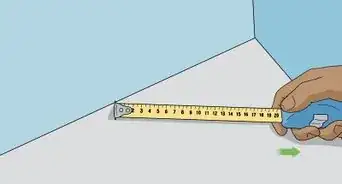
2Measure the coving.[1]
- Use a tape measure to determine the width of the coving you will be using. Measure from the bend in the coving to the outside edge of the coving on both the ceiling and wall sides.
- Measure the length of coving you will need to cover the space on your wall and ceiling.
- Divide the length to be covered by the length of coving strips that you have. If you require a total of 60 feet (18.3 m) of coving and have coving in 3-foot (.9-m) strips, then you will need at least 20 strips of coving.
- Ensure that you have a few extra strips of coving.
Advertisement -
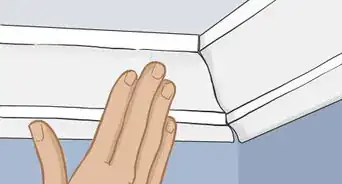
3Mark the wall and ceiling. Use a tape measure and pencil to mark the spaces on the wall and ceiling where the edges of the coving will fall. These marks form your guidelines.[2]
-
4Score the ceiling and walls. Use a putty knife to score the space between the marks you made on the wall and ceiling. Scoring the ceiling and wall will allow the coving to fit more securely against the surface.
-
5Differentiate the edges on the coving. Look at the back of the coving. The back edges of the coving will be labeled according to which edge will be placed against the ceiling, and which edge will be placed against the wall.[3]
-
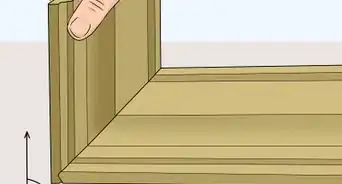
6Place the coving into the miter block.[4]
- Ensure that the edge of the coving that will be set against the ceiling is at the bottom of the miter block. The ceiling edge of the coving should touch the bottom base of the miter block.
- Situate the coving so the display side faces you.
-
7Cut the coving.
- Steady the piece of coving by holding onto it with 1 hand.
- Use the other hand to saw the coving. Use a crosscut saw with medium teeth and a rigid blade.
-
8Remove the coving. Lift the coving out of the miter block.
-
9Sand the coving. Use sandpaper to smooth the cut edge of the coving. Ensure that the cut edge is free of coarse spots.[5]


Things You'll Need
- Coving strips
- Sponge
- Water
- Tape measure
- Pencil
- Putty knife
- Miter block
- Saw
- Sandpaper


References
- ↑ https://www.diydoctor.org.uk/projects/coving.htm
- ↑ https://www.diydoctor.org.uk/projects/coving.htm
- ↑ https://www.youtube.com/watch?v=lFintPrsb-Q
- ↑ https://www.diydata.com/decorating/coving/cutting_cornice/cutting_coving.php
- ↑ https://www.diydata.com/decorating/coving/cutting_cornice/cutting_coving.php