This article was co-authored by wikiHow Staff. Our trained team of editors and researchers validate articles for accuracy and comprehensiveness. wikiHow's Content Management Team carefully monitors the work from our editorial staff to ensure that each article is backed by trusted research and meets our high quality standards.
There are 7 references cited in this article, which can be found at the bottom of the page.
This article has been viewed 31,258 times.
Learn more...
When it comes to heating and air conditioning materials, duct board is the new standard. This specially designed insulation is manufactured in 4’x10’ (1.2mx3m) sheets, which can be scored and folded as needed to fit almost any ductwork system imaginable. To cut duct board for your next heating and air installation, you’ll use an L-shaped guide square and a sliding duct knife to score the sheet in multiple points along its length. This will allow it to be folded to specific dimensions to outfit your HVAC system with ducts that move air more efficiently, reduce noise, and prevent leaks and temperature loss.
Steps
Gathering the Necessary Materials
-
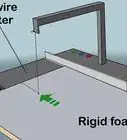
1Start with a full-sized sheet of duct board. Standard duct board comes in sheets that are typically 48 inches (120 cm) wide by 96 inches (240 cm) long. On one side of the sheet is a thick layer of fiberglass insulation. On the other is a thin foil backing which serves as the outside of the duct.[1]
- Duct board is manufactured in three different thicknesses: 1 inch (2.5 cm), 1.5 inches (3.8 cm), and 2 inches (5.1 cm). The thickness of the board you use will be determined by the type of installation you’re performing.
-
2Acquire a set of color-coded duct knives. Unlike conventional cutting tools, duct knives feature specially-shaped blades that are designed to cut male and female flaps into the surface of duct board. To cut folding ductwork, you’ll need either a red-handled or orange-handled knife, as well as a gray-handled knife and separate utility knife for fashioning the edge flaps.
- A red-handled duct knife slices a V-shaped groove into the insulation so that the individual sections can be folded neatly over on themselves with no wasted space at the corners. An orange-handled knife creates an interlocking “shiplap” edge.
- When folded, these grooves create an airtight seal that safeguards against air leaks, heat or cool air loss, moisture drips, and other airflow complications.
Advertisement -
3Do your measuring with a guide square. The longer arm of the L-shaped tool is 48 inches (120 cm) long, and will lay directly across the width of the duct board, which is also 48 inches (120 cm). The shorter arm is 24 inches (61 cm) long, and is used to gauge the width of each individual panel.[2]
- Always position the guide square so that the longer vertical arm is on the right. It will serve as a straight edge when you begin cutting.


Cutting the End Joints
-
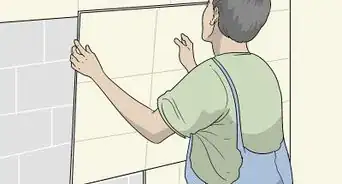
1Set the duct board on a flat surface. Lay the sheet widthwise across an elevated work surface, such as a woodworking platform or crafting table. The female edge of the duct board (the notched groove through which the colored insulation is visible) should be pointed towards you.[3]
- Make sure the side with the foil backing is facing down. When working with duct board, you’ll be making your measurements and cuts to the inside of the duct.
- For best results, use a tilting table or some other surface that will give you a little elevation on one side. This will make it easier to guide the duct knives all the way through the opposite end of the duct board.
-
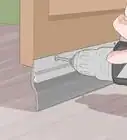
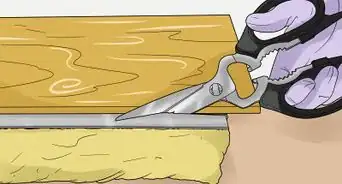
2Cut a closure joint rabbet on the lefthand side of the board. Line up the gray duct knife with the far edge and use it to score the insulation from bottom to top. Pull away the trimmed insulation, trimming rough spots with a utility knife as needed. This will leave a shiplap edge that will intersect with the staple flap on the opposite end of the board when it comes time to assemble the duct.
- The metal blade guard on the gray duct knife will wrap around the outer edge of the board and rest flat against your work surface.[4]
-
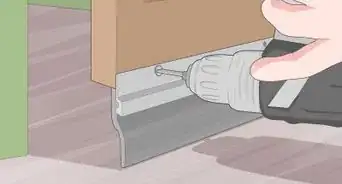
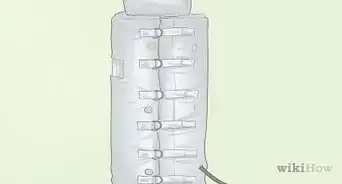
3Cut a 1.5 inches (3.8 cm) wide staple flap into the righthand edge of the board. Measure the board from the end with your guide square or a straight edge, then use a utility knife to score and remove the fiberglass insulation and create a loose flap. This section can later be fastened to the top of the folded duct to secure it.
- Be careful not to cut through the foil backing, or you’ll have no way of conjoining the top and side panels.
- The staple flap will form a connection with the closure joint you just cut with the gray duct knife.[5]


Scoring the Corner Folds
-
1Measure and mark the width of each panel. Refer to your project specifications to determine the height and width of the completed duct. Then, take a white marking pen and draw a line on each vertical plane where you’ll be cutting a groove. It will be necessary to make 3 separate cuts to create 4 individual panels, which you’ll then fold into a square or rectangular duct.[6]
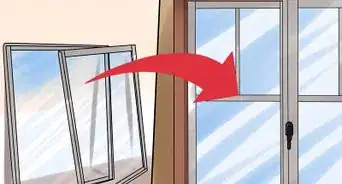
- Once they’ve been folded, the first and third panels will form the sides of the duct, while the second and fourth panels will serve as the top and bottom.
- You’ll need to add a few extra inches to the width of each panel in order for them to align properly. 1 inch (2.5 cm) duct board will require an additional 1.75 inches (4.4 cm), 1.5 inches (3.8 cm) duct board will need 2.75 inches (7.0 cm), and 2 inches (5.1 cm) duct board calls for 3.75 inches (9.5 cm).[7]
-
2Line up the guide square with the line for the first cut. Double check the width of the first panel by referring to the measurements on the shorter arm of the square. Place the longer arm to the left side of the mark so you can use it as a straight edge when scoring the board.
-
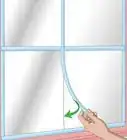
3Use the red or orange-handled duct knife to make your first cut. Center the duct knife on the line indicating where the first cut should be made. Slide the knife up through the duct board, being careful to keep its path perfectly straight. When you reach the far end of the board, hold the knife level and push it until it comes free of the insulation.[8]
- Press the lefthand side of the knife up against the outer edge of the guide square. It will help guide the movement of the knife to ensure that every cut is straight and precise.[9]
- It can help to use a guide square with some grip on the backside. That way, you won’t have to press down as hard to hold it in place or worry about it slipping as you move the duct knife along.
-
4Adjust the guide square and make the second cut. Slide the guide square down the board and line it up with the second mark. Run the duct knife through the insulation from end to end. The width of this panel will correspond to the bottom of the completed duct.[10]
- If you’re using an orange-handled duct knife to cut shiplap edges, you’ll need to turn the blade around the other way when making the second cut to allow the corner folds to fit into place properly.[11]
- Remember to start each cut on the righthand side of the guide square to keep them consistent.
-
5Make the third and final cut. Set the guide square to the left of the third marking line you traced earlier. Score the third groove just as you did the first two, in a straight line from the bottom of the board to the top. When you’re finished, you’ll have 2 sets of panels with the same dimensions—the first and third, and the second and fourth.
- Be sure to turn orange-handled knives back around (the way you were holding them originally) before making the final pass.


Warnings
- Be careful when working with duct knives. Even though these tools feature metal guard plates to keep your hand from getting too close to the blade, it’s still possible to have an accident if you get in a rush or handle them carelessly.⧼thumbs_response⧽
Things You'll Need
- 48 inches (120 cm) x 96 inches (240 cm) duct board (1 inch (2.5 cm), 1.5 inches (3.8 cm), or 2 inches (5.1 cm) thickness)
- Color-coded duct knives (red/orange and gray)
- Guide square
- Utility knife
- Marking pen
- Straight edge (optional)
- Shiplap tool (optional)


References
- ↑ http://insulationinstitute.org/wp-content/uploads/2015/11/AH136.pdf
- ↑ https://homesteady.com/how-8769465-cut-board-using-duct-square.html
- ↑ https://homesteady.com/how-8769465-cut-board-using-duct-square.html
- ↑ https://www.youtube.com/watch?v=HuJ5JXmqDTY&feature=youtu.be&t=284
- ↑ https://www.unicosystem.com/files/6713/8930/2953/Bulletin_30-040_2004-07.pdf
- ↑ https://homesteady.com/how-8769465-cut-board-using-duct-square.html
- ↑ https://www.certainteed.com/resources/Duct_Board_Fabrication_Instructions_2011_30-30-027.pdf
- ↑ https://www.youtube.com/watch?v=HuJ5JXmqDTY&feature=youtu.be&t=359
- ↑ https://www.youtube.com/watch?v=HuJ5JXmqDTY&feature=youtu.be&t=318
About This Article