This article was co-authored by wikiHow Staff. Our trained team of editors and researchers validate articles for accuracy and comprehensiveness. wikiHow's Content Management Team carefully monitors the work from our editorial staff to ensure that each article is backed by trusted research and meets our high quality standards.
This article has been viewed 74,193 times.
Learn more...
Heating or cooling your home is usually quite expensive. As you try to keep your home at the right temperature, drafty windows can cost you a fortune over time. One way to increase the efficiency of your windows throughout the year is to attach aluminum foil insulation to them. The installation process is pretty straightforward with the foil being taped directly to the window frame after you’ve made the measurements and cuts. If you are really looking for a quick fix, you can even insert a foil-wrapped piece of cardboard into a window frame to block the air flow.
Steps
Measuring Out Your Aluminum
-
1Check your windows for drafts. If you are concerned about conserving heat, go around to each window and place your hand in front of it. Check to see if your hand feels a cold draft coming from outside. This means that the window is leaching out some of your house’s heat.[1]
- To test for drafts in the summer, go outside to a window. Place your hand near the window’s seam and see if you feel any cold air. If you do, this means that air from your air conditioner is leaking from the inside to the outside.
- You can also test for drafts by turning off your air conditioner, heater, or any fans. Then, light a stick of incense near the window. If the smoke is pushed toward the window or away from it, you have a draft.
-
2Measure each window. Place a measuring tape along the top of the window frame and record the length. Then, do the same thing with the side of the window frame and record the height. Take your time and measure twice just to be certain. These are the dimensions for your window.[2]
- If the window has a slight lip for a screen, include that in the measurement as well.
- Measure from inside the building, as you will attach the foil from the interior.
Advertisement -
3Add at least 3 inches (7.6 cm) to your measurements. This gives you enough extra room to attach the foil to the window panel or frame. If you are concerned that the panel is extra-large, don’t be afraid to add even more inches. In general, it’s better if your measurements are a bit longer than shorter, as you can always trim off excess foil.[3]
- These added inches will also give you enough space to fold the sides of the foil over to prevent injuries.


Cutting the Aluminum
-
1Use aluminum foil insulation for extended protection. This is bubble wrap that is covered with foil on both sides. It comes in rolls or sheets and can be purchased at your local hardware store. The bubble wrap helps to trap the cold or warm air from outside the window and keeps it from crossing into the room.[4]
- You can also remove and move these pieces of insulation as often as needed.
-
2Insulate with kitchen foil as a temporary solution. If you don’t have the money or time to track down aluminum insulation, kitchen foil will work as well. Attach it to the window in double layers to increase its effectiveness as a barrier. Fold over the sides of the foil to protect yourself from its sharp edges.
- Heavy-duty kitchen foil can provide even more protection, as it is thicker.
-
3Place the foil vertically or horizontally depending on the whole window’s shape. Compare the window’s final dimensions to the width of your foil roll. Your goal is to have the fewest number of seams/foil pieces across the window, as they let out additional heat or cool air. Map out your layout of foil for each window prior to making any cuts.[5]
-
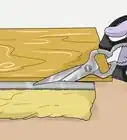
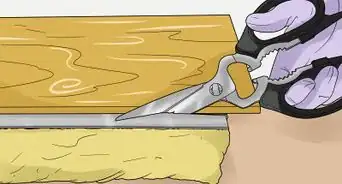
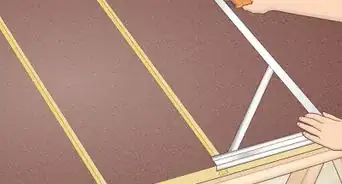
4Cut out your foil pieces. Place your foil sheets or rolls on a flat surface, such as a work table. Measure out the dimensions of your whole window on the foil, making small cutting guide marks with a marker. Then, carefully cut along these points with a pair of scissors or utility knife. Repeat this process for each window.
- Handle the foil with caution to avoid cutting yourself on the edges, which can be sharp.
-
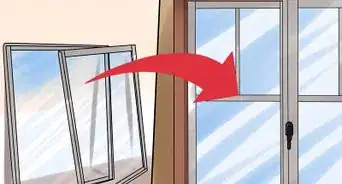
5Go with a foil-wrapped insert for more stability. If your window is larger or if you are worried about the foil ripping, consider wrapping a piece of cardboard with kitchen foil instead. Cut out the cardboard to fit the whole window’s measurements. Then, cover the cardboard fully with foil on both sides. When you are finished, simply insert the piece into the window casing and secure the edges with tape.[6]


Attaching the Aluminum to the Window
-
1Place a foil piece against the window. The shiny side should be facing out. Position the piece so that it overhangs the lip of the window by 1 inch (2.5 cm) on all sides. If the window will take 2 or more pieces to fully cover it, consider that too and leave enough room.[7]
- It also helps if you flatten the foil slightly with your palm. Don’t bend it, just apply a bit of pressure until it’s flat against the window.
-
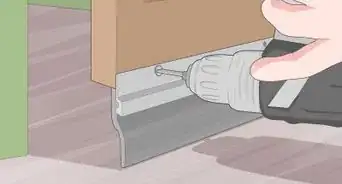
2Tape the edges down. Use masking or duct tape to attach the foil to the edges of the window. The tape should overlap at the corners. The goal is to eliminate any open spaces around the sides of each foil piece, creating a secure border around the window.[8]
-
3Cover each seam with masking tape. If you need multiple pieces of foil to cover the window, you should position them so that they overlap by at least 1 inch (2.5 cm) above the window pane. Then, you’ll see a gap where they meet over the glass. Place a piece of tape fully along this seam. Otherwise, air drafts can escape through this space.[9]


Things You’ll Need
- Measuring tape
- Aluminum foil insulation
- Kitchen aluminum foil
- Incense
- Marker
- Scissors or utility knife
- Cardboard
- Masking or duct tape


References
- ↑ https://homesteady.com/how-7421271-cover-window-aluminum.html
- ↑ https://homesteady.com/how-7421271-cover-window-aluminum.html
- ↑ https://homesteady.com/how-7421271-cover-window-aluminum.html
- ↑ https://www.doityourself.com/stry/how-to-install-a-vapor-barrier-over-fiberglass-insulation
- ↑ https://homesteady.com/how-7421271-cover-window-aluminum.html
- ↑ https://www.apartmentratings.com/renters-library/frugal-apartment-living-staying-cool-without-air-conditioning.html
- ↑ https://www.apartmentratings.com/renters-library/frugal-apartment-living-staying-cool-without-air-conditioning.html
- ↑ https://www.apartmentratings.com/renters-library/frugal-apartment-living-staying-cool-without-air-conditioning.html
- ↑ https://www.apartmentratings.com/renters-library/frugal-apartment-living-staying-cool-without-air-conditioning.html
About This Article