This article was co-authored by Art Fricke and by wikiHow staff writer, Hunter Rising. Art Fricke is a home renovation and repair specialist and the owner of Art Tile & Renovation based in Austin, Texas. With over 10 years of experience, he specializes in bathroom and kitchen renovations. Art focuses on a single contractor approach to customized renovation work, and performs projects such as installing custom tile showers, fixing tiled shower leaks, replacing cracked tiles, and installing floor and wall tile.
There are 10 references cited in this article, which can be found at the bottom of the page.
This article has been viewed 103,488 times.
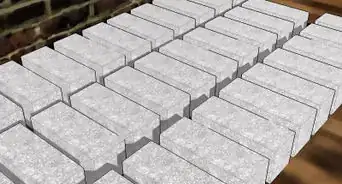
Marble tiles look great in a bathroom or kitchen, but sometimes you may need a smaller piece of tile to fill in a gap. While ceramic tiles can be scored and snapped, marble needs to be cut completely or else it will shatter. You can use either a wet saw to make straight lines or an angle grinder to make curves as long as you have a diamond blade. Once you make your cuts, you can make marble tiles any size you need.
Steps
Choosing a Blade and Taking Safety Precautions
-
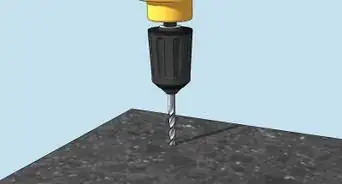
1Pick a diamond blade for your saw or angle grinder. Diamond blades have a harder cutting edge, making it easier for them to grind through tough materials like stone or marble. Purchase a blade for a wet saw or an angle grinder depending on what you plan on using.[1]
- Look for diamond blades at your local hardware store or online.
- The size of your blade depends on the model of your machine. Check with the instruction manual to see what size blade it requires.
-
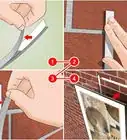
2Mark the line you’re cutting on the tile with a pencil. Set a straightedge on top of your tile and trace along the edge with a pencil to mark it. The mark won’t wash off when you use a wet saw, and it can easily be rubbed off the tile when you’re finished.[2]
- If you’re making a curved cut, use a compass to trace a perfect circle.
Tip: If you don’t want to mark your tile directly, place a straight piece of masking tape on the tile and use a marker to draw your line on it. It’s okay to cut through the tape.
Advertisement -
3Wear safety glasses, earplugs, and a respirator. Cutting through marble kicks up a lot of dust, so protect your eyes, nose, and mouth. Since using the saw or angle grinder will be loud, put in earplugs so you don’t damage your hearing.[3]
- Most hardware stores should carry all of the safety equipment you need.
- You may wear work gloves if you want, but they’re not necessary.


Making Straight Cuts with a Wet Saw
-
1Install the diamond blade on your saw. Tip the wet saw on its side and unscrew the nut holding the blade in place. Lift the current saw blade out from the machine carefully so you don’t cut your hand. Insert your diamond blade so the teeth face in the cutting direction before securing it in place with the nut again. Use a socket wrench to tighten the nut completely.[4]
- How you change the saw blade and the direction it spins depends on the model of wet saw that you have. Consult the instruction manual to learn how to properly install the blade.
Tip: Some saws come with a blade wrench you can use to tighten the nut. If your saw doesn’t have one, a ratchet wrench will work.
-
2Fill the reservoir on the bottom of the machine with cold, clean water. Water in a wet saw helps cool down the blade and reduces the amount of dust. Locate the tray on the bottom of your wet saw for the water reservoir. Fill the reservoir with water until the bottom of the blade is slightly submerged.[5]
- Wet saws kick up water while you use them, so you may need to refill the reservoir if you plan on cutting multiple tiles.
- Since you’re working electronics and water, plug the saw into a GFCI outlet. GFCI outlets will automatically turn off the power if any of the electronic components in your saw get wet.[6]
-
3Adjust the fence on the saw to keep your cut straight. The fence is the straightedge piece that attaches to the base of your wet saw. Hold the marble tile that you’re cutting against the edge of the fence to see where it lines up with your saw. Adjust the fence closer or further from the blade until your mark lines up with the saw.[7]
- Saw blades usually cut out 1⁄8 inch (0.32 cm) from your material, so make sure your blade is on the scrap side of your line.
-
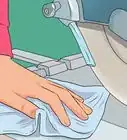
4Cut a 1 in (2.5 cm) line along your mark with the tile face down. Flip your tile over so the finished side faces the bottom of your saw. Turn on your saw using the switch on the side of the front of the saw. Guide the saw forward until you cut 1 in (2.5 cm) in from the edge.[8]
- Making this relief cut prevents the tile from chipping or breaking when you cut through it completely.
-
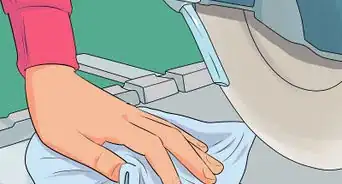
5Flip the tile so it’s face-up and guide it slowly through the saw. Make sure the finished side of your tile is face up for the remainder of your cut. Start from the side of your mark that hasn’t been cut yet. Slowly push the tile forward to feed it through the saw. Once the tile is cut, turn your saw off before removing the tile from your work surface.[9]
- If you’re cutting a narrow piece of tile, use a wooden guide to hold the tile from the other side. This way, the smaller piece won’t break or kick back.


Cutting Curves with an Angle Grinder
-
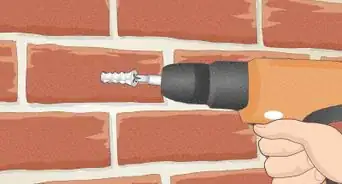
1Change the blade on your grinder to a diamond blade. Loosen the nut attaching the blade to your grinder using a ratchet wrench. Remove the current blade, and set the diamond blade in its place. Put the nut back onto the blade and tighten it again with your wrench.[10]
- Check your grinder’s rotation in the instruction manual and compare it to which direction the arrow faces on your blade. If they go in opposite directions, install the blade upside-down so it cuts the right way.
-
2Place a 2 in (5.1 cm) piece of scrap wood or foam underneath the tile. Find a flat piece of plywood or stiff foam that you can put underneath your tile. Make sure the wood or foam is at least 2 inches (5.1 cm) thick. That way, your angle grinder won’t cut into your work surface.[11]
- In a pinch, clamp multiple pieces of cardboard together to make a new cutting surface.
Warning: Don't hang your tile over the edge of your work surface since it’s more likely to break or shatter.
-
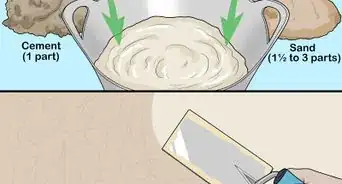
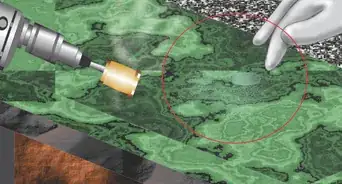
3Cut halfway through the tile for its entire length. Turn your angle grinder on with the switch on the main body. Carefully lower the blade of the grinder onto your tile in a slow and steady motion. Push the grinder halfway through the tile and follow along with your line for the entire length. When you finish your cut, turn off the grinder.[12]
- Keep your fingers clear from your blade so you don’t accidentally cut yourself.
- Don’t attempt to cut through the entire tile right away since it may create sparks or break your blade.
-
4Follow along with the line again to cut through the tile completely. Turn on your grinder again and start from one side of your cut line. This time, push the grinder through the rest of the tile so it cuts through it completely. Push the grinder slowly in a straight line so it doesn’t jump out of the cut.[13]


Expert Q&A
Did you know you can get expert answers for this article?
Unlock expert answers by supporting wikiHow
-
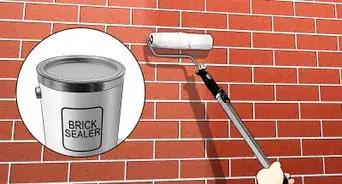
QuestionWhat are some good alternatives to marble if I'm redoing a kitchen?
 Art FrickeArt Fricke is a home renovation and repair specialist and the owner of Art Tile & Renovation based in Austin, Texas. With over 10 years of experience, he specializes in bathroom and kitchen renovations. Art focuses on a single contractor approach to customized renovation work, and performs projects such as installing custom tile showers, fixing tiled shower leaks, replacing cracked tiles, and installing floor and wall tile.
Home Renovation & Repair SpecialistSo marble is really beautiful, but it is pretty expensive. You can achieve a very similar look and effect with ceramic tile. Ceramic will cost maybe a third of what marble will cost and you'll still get a really elegant look.
Support wikiHow by unlocking this expert answer.
Warnings
- Wear all safety equipment so that you don't injure yourself while working with the tools.⧼thumbs_response⧽
- Always use caution when working with power tools so you don’t injure yourself.⧼thumbs_response⧽
- Use a GFCI outlet when working with a wet saw.[14]⧼thumbs_response⧽
Things You’ll Need
Choosing a Blade and Taking Safety Precautions
- Diamond blade for a wet saw or angle grinder
- Tape measure
- Pencil
- Safety glasses
- Earplugs
- Respirator
Making Straight Cuts with a Wet Saw
- Wet saw
- Ratchet wrench
- Water
Cutting Curves with an Angle Grinder
- Angle grinder
- Wrench
- Scrap wood or foam


References
- ↑ https://youtu.be/sxE88zw35oU?t=76
- ↑ https://thespacebetweenblog.net/cutting-grouting-sealing-marble-tile-tips/
- ↑ https://www.familyhandyman.com/kitchen/countertops/how-to-cut-marble/view-all/
- ↑ https://youtu.be/sxE88zw35oU?t=125
- ↑ https://youtu.be/sxE88zw35oU?t=269
- ↑ https://www.familyhandyman.com/kitchen/countertops/how-to-cut-marble/view-all/
- ↑ https://thespacebetweenblog.net/cutting-grouting-sealing-marble-tile-tips/
- ↑ https://thespacebetweenblog.net/cutting-grouting-sealing-marble-tile-tips/
- ↑ https://youtu.be/sxE88zw35oU?t=388
About This Article

To cut marble tiles with a wet saw, install a diamond blade on your saw with its teeth facing the cutting direction. With the new blade attached, fill the reservoir on the bottom of the machine with cold, clean water, as this will help cool the blade and reduce the amount of dust. You can keep your cut straight by placing the marble on your machine and adjusting the fence until the blade lines up with your mark. Once everything’s lined up, flip the tile over so the finished side faces the bottom of your saw, turn on your machine, and cut 1 inch into the marble. This relief cut will prevent the tile from chipping or breaking when you cut through it completely. After making the relief cut, flip the marble over and finish the cut, starting from the side that hasn’t been cut yet. For more help, like how to cut a curve with an angle grinder, read on!