This article was co-authored by wikiHow staff writer, Jessica Gibson. Jessica Gibson is a Writer and Editor who's been with wikiHow since 2014. After completing a year of art studies at the Emily Carr University in Vancouver, she graduated from Columbia College with a BA in History. Jessica also completed an MA in History from The University of Oregon in 2013.
There are 13 references cited in this article, which can be found at the bottom of the page.
The wikiHow Video Team also followed the article's instructions and verified that they work.
This article has been viewed 12,816 times.
Learn more...
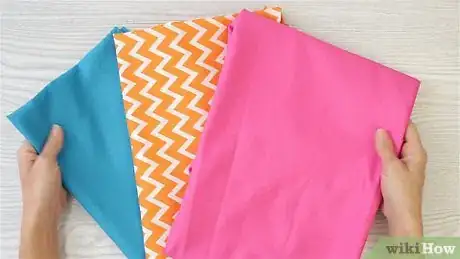
If you have old sheets, T-shirts, or clothes that you don't want to throw away, use them to make a rag rug. Although you can use almost any type of fabric, cotton is a great choice since it's soft and easy to wash. Create individual rag strips if you want your rug to be shaggy or make a long, continuous strip if you'll be weaving a tight rag rug. Grab your scissors and rags so you can get started on your rug!
Steps
Selecting Fabric for the Strips
-
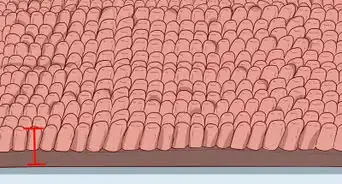
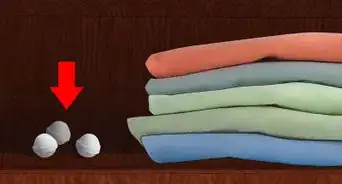
1Find old cotton or wool clothes and fabric for thick, soft strips. If your rug will be getting a lot of use, choose materials made with medium-weight fabric like wool so the rug holds up. It is fine to use lightweight cotton fabric if you won't be walking on the rug very much.[1]
- Although you can use lots of different colors, try to make strips that are made of the same material so you can wash easily wash the rug. For example, use pale blue cotton T-shirts with bright cotton dishcloths.
- Save fabric scraps from sewing projects, clothing that you've outgrown, or bedding that you don't use anymore to use for rag rug strips.
-
2Pick up old sheets to make a lot of thin, long strips. If you don't have old clothes lying around, don't worry! You can use your old sheets or buy them from the local thrift store. Flat sheets are great, but you can also cut the elastic edge from a fitted sheet and use the fabric.[2]
- Save duvet covers or thin blankets to turn into rag rug strips.
- Sheets are great for making a simple, lightweight rug that doesn't get a lot of use.
Advertisement -
3Wash and dry your fabric. Toss the clothes or sheets you're going to cut into the washing machine. Read the care instructions for the fabric and run a cycle. Then, dry the material completely.[3]
- Iron the fabric if it's wrinkled when you take it out of the dryer or off of the clothes line.
-
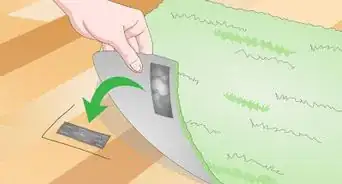
4Cut off elastic or hems so the fabric lies flat. If you're using a fitted sheet, cut off the edge with the stretchy elastic. If you're working with a flat sheet or pillowcase, cut off bulky hems so you just have a piece of flat fabric.[4]
- To use old shirts for rag strips, cut off the bottom hem and cut across the garment near the armpits. You don't need to keep the upper portion of the shirt that has the sleeves and neckline.
Making Individual Strips
-
1Fold your fabric into a rectangle and place it on a cutting mat. Put a cutting mat that's at least 24 by 36 inches (61 cm × 91 cm) on your work surface. Then, take your fabric and lay it on the mat. To cut a sheet or large piece of fabric, fold it a few times to make a rectangle that fits on the cutting mat.[5]
- If you're cutting small pieces of fabric like a shirt or sweater, you don't need to fold the material.
- Most braided rug strips are around 1 yard (0.91 m) long, so check that the fabric is at least this long before you fold it.
-
2Place a ruler on the fabric so it's 2 to 3 inches (5.1 to 7.6 cm) from the edge. Lay a rigid ruler across the short end of the fabric. Position it from the edge to cut strips that are as wide as you like. If you're using a medium to heavyweight fabric, move the ruler 2 1⁄2 to 2 3⁄4 inches (6.4 to 7.0 cm) from the edge.[6]
- For lighter weight materials, move the ruler so it's 3 inches (7.6 cm) from the edge.
-
3Hold the ruler in place and use a rotary cutter to slice along its edge. Use 1 hand to hold the ruler steady and grip a sharp rotary cutter with your dominant hand. Put the blade against the straight edge of the ruler and carefully slice through the fabric to make a very long strip.[7]
- Since rotary cutters are dangerously sharp, it's a good idea to wear a cut-resistant glove.
-
4Move the ruler and cut another strip. Slide the ruler over by 2 to 3 inches (5.1 to 7.6 cm) from the new edge. Then, cut along the edge of the ruler to create another fabric strip. Continue to move the ruler and cut strips until you've worked across all of your fabric.[8]
- Make the strips the same width so your rug will look even.
- You may need to move the fabric back onto the mat if your material is longer than your cutting mat.
-
5Cut the material into shorter strips if your project calls for a specific size. In general, your strips should be about 1 yard (0.91 m) long if you'll be braiding the rug. Check your rag rug pattern to see if it calls for shorter strips. If it does, measure the size of the strip and use scissors to cut the pieces to size.[9]
- Lay your strips flat and stack them or roll the strips into a ball to store them until you're ready to make your rag rug.
Creating a Continuous Strip
-
1Fold a sheet in half lengthwise and sew straight stitches across the long edge. Lay a flat sheet on your work surface and smooth out the wrinkles. Fold it in half lengthwise and line up the edges. Then, make straight stitches along the long edge. This makes a tube of fabric.[10]
- Remember that you can do this with a fitted sheet as long as you cut off the elastic first.
- Try this method with sheets instead of clothes since you can get a much longer strip.
-
2Fold the fabric over lengthwise so it comes 4 in (10 cm) from the top. Spread the tube of fabric flat and bring the bottom edge over towards the top. Don't line up the edges or you'll cut individual loops of fabric. Instead, bring the bottom edge 4 inches (10 cm) from the top edge.[11]
-
3Place the stacked material on a cutting mat and lay a ruler across it. Move the folded sheet onto a big cutting mat. Since the entire sheet won't fit on the cutting mat, just ensure that the end you're going to start cutting is on top of the mat. Then, put a ruler across the short end of the fabric.[12]
- Use your longest ruler or a yardstick so it stretches across the entire width of fabric.
-
4Cut from the bottom edge until just past the fold. Move the ruler 1 1⁄2 inches (3.8 cm) from the edge so your strip will be 1 1⁄2 inches (3.8 cm) wide. Then, put a rotary cutter at the bottom of the fabric that's closest to you and slice up to the fold that's 4 inches (10 cm) from the top edge. Stop cutting as soon as you've sliced through that fold.[13]
- It's really important that you don't cut through the top edge of the sheet or your fabric won't be continuous.
- If you don't have a rotary cutter, use scissors to cut through the sheet.
-
5Move the ruler over by 1 1⁄2 inches (3.8 cm) and cut the fabric again. Slide the ruler over and use the rotary cutter to slice through the fabric layers again. Remember to stop cutting as soon as you've cut through the fold. Repeat this until you reach the end of your fabric.[14]
- You might need to slide the fabric towards your cutting mat as you work.
-
6Slide your arm through the fabric so the seam faces up. Lift the fabric off of your work surface and slip your arm in between the sides. Keep sliding your arm through it and move the seam edge so it's facing up on the top of your arm.[15]
- Put the fabric on your non-dominant hand so it's easy for you to cut the fabric into the strip.
-
7Cut diagonally across the seam to make a continuous strip of fabric. To get your strip started, use scissors to cut diagonally from the seam to the bottom of the slit above it. Let the strip fall and cut diagonally from the bottom slit up and over to the next top slit. Continue to cut diagonally across the seam so you keep the fabric in a single piece.[16]
- Use your strip immediately or roll the strip of fabric tightly so it doesn't get twisted.
Warnings
- Use caution when you handle the rotary cutter since the blade is extremely sharp.⧼thumbs_response⧽
Things You'll Need
- Fabric
- Cutting mat
- Rotary cutter
- Scissors
- Ruler
- Cut-resistant gloves, optional
References
- ↑ https://digitalcommons.unl.edu/cgi/viewcontent.cgi?article=4578&context=extensionhist
- ↑ https://youtu.be/mN8_51F3wZc?t=92
- ↑ https://www.pikespeakweavers.org/pdfs/ppwg_journal/PPWGJ-Weaver-Rugs.html
- ↑ https://digitalcommons.unl.edu/cgi/viewcontent.cgi?article=4578&context=extensionhist
- ↑ https://warpedforgood.com/2014/01/tools-day-weaving-rag-rugs/
- ↑ https://digitalcommons.unl.edu/cgi/viewcontent.cgi?article=4578&context=extensionhist
- ↑ https://youtu.be/d5dEvw34MF8?t=85
- ↑ https://youtu.be/d5dEvw34MF8?t=93
- ↑ https://digitalcommons.unl.edu/cgi/viewcontent.cgi?article=4578&context=extensionhist
