This article was co-authored by Sarah Fogle. Sarah Fogle is a DIY Home Improvement Specialist and the creator of Ugly Duckling House. With over a decade of experience, Sarah specializes in beginner-friendly home remodeling projects. Sarah holds an MBA from Georgia State University. She has been featured in multiple publications including Better Homes and Gardens and Make Magazine. She has also partnered with brands such as Lowe's, Home Depot, and Martha Stewart Crafts.
This article has been viewed 320,723 times.
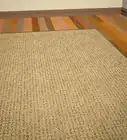
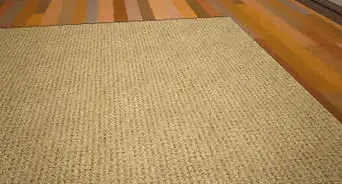
Patching a carpet is a task that just about every homeowner will face at one time or another. Spills, cigarette burns, and other mishaps can ruin a small area of wall to wall carpeting, making it necessary to remove the section as a way to repair the damage. Fortunately, the task of patching a damaged carpet is relatively easy and requires nothing more than a little time and a few simple supplies.
Steps
Using Adhesive Disks
-
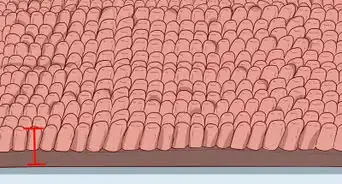
1Measure the damaged area of the carpeting. Use the tape measure to identify the size of the patch that will be extracted from the surrounding carpet. This will make it easier to cut a replacement patch to size.[1]
-
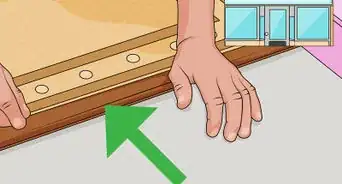
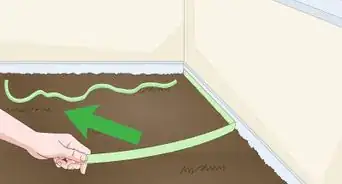
2Tape off the area to be removed. Use duct tape to outline a square section to be removed. Check the position of the tape with the measurements taken previously to make sure the inside edge of the tape matches those dimensions.[2]
- Try to farm the replacement carpet from an inconspicuous area, such as inside a closet or underneath a bed. Be sure that the place you farm the replacement carpet from isn't going to be visible.
- You can also keep extra carpet in your attic or storage for repairing damaged areas.
Advertisement -
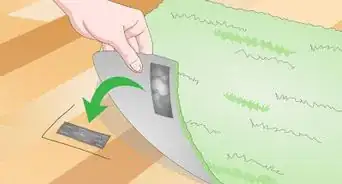
3Remove the damaged section of carpeting. Use a utility knife or a carpet cutting tool to gently cut along the inside edge of the duct tape. Apply just enough pressure to cut through both the surface of the carpet and the backing, but not enough to damage the underlying layer of padding. Once the section is completely cut, lift it off the carpet surface.[3]
- If working with a carpet cutting tool, use the tool to first make an imprint. Once an imprint has been made, attach the cutter blades and the pivot screw and make your incision, rotating as many as two or three times in order to remove it.[4]
-
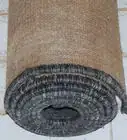
4Measure and cut the replacement patch. Turn a carpet remnant face down and measure a patch for the carpeting, using the measurements obtained earlier as a guideline. Mark the lines of the patch with the pencil, and then use a utility knife or carpet cutter to cut out the patch.
-
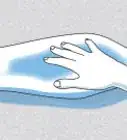
5Prepare the carpeting to receive the patch. Neutralize the disk temporarily by putting a small amount of water on it. Lift the edges of the carpeting around the hole and slide the adhesive disk underneath, with the adhesive side facing upward.[5]
- Make sure that the adhesive disk is significantly larger than replacement patch: you want the disk to hold onto all of the replacement patch, especially the corners, as well as some surrounding carpet.
- When the patch becomes sticky again, in about three to five minutes, press down on the outer edge of the carpet to secure it into place.
-
6Move the carpet patch into position. Groom away any loose carpet fibers from the edge of the hole. Check the fit before applying any glue. Then, put down a thin layer of carpet glue along the edges of the adhesive disk. Place the patch into the hole, taking care to make sure the fit is snug and even. Press lightly to allow the backing on the patch to come into contact with the underlying tape and adhere properly.[6]
- Align the patch so that the direction of the fibers in the patch match the direction of the fibers in the rest of the carpet.
- You have about 15 minutes to position and align the patch perfectly before the glue sets, permanently anchoring your patch in place. Work quickly.
-
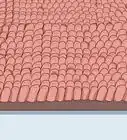
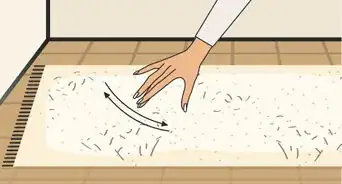
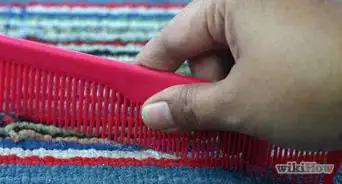
7Smooth the pile of the carpeting to hide the seams of the patch. Depending on the type of pile, this may be accomplished by brushing the fingers around the perimeter of the patch, or using a carpet brush to train the pile on the patch to move in the same direction as the rest of the carpeting pile.
- You can also vacuum the section with an agitator attachment to lift up the pile.


Using Heat-Activated Patch Pads
-
1Measure the damaged area of the carpeting. Determine the size of the carpet to be cut out, and whether you want to cut a rectangular or circular replacement patch to fill the area in.
- Rectangular patches can be cut using a utility knife, while circular patches can be cut using a circular carpet cutter.
-
2Remove the damaged section of carpeting. Use a utility knife or a carpet cutting tool to gently cut away the carpet. Apply just enough pressure to cut through both the surface of the carpet and the backing, but not enough to damage the underlying layer of padding. Once the section is completely cut, lift it off the carpet surface.
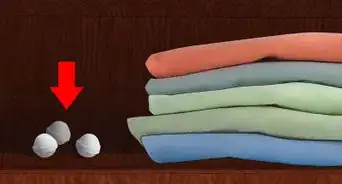
- You may want to save the damaged section in case you need to patch a smaller area that can be cut from this section.
-
3Measure and cut the replacement patch. Turn a carpet remnant face down and measure a patch for the carpeting, using the measurements obtained earlier as a guideline. Or remove a piece of carpeting from an inconspicuous area, such as the inside of a closet. Mark the lines of the patch with the pencil, and then use a utility knife or carpet cutter to cut out the patch.
-
4Wet the carpet patch pad. Carpet patch pads are used to iron on specially made adhesive disks that activate with the help of heat. Your carpet patch pad may be aluminum-sided on the top and contain a previous material on the bottom. Wet your carpet patch pad under water and wring out the excess; the pad should be damp but not dripping.
-
5Slide the adhesive pad underneath the cut-out carpet, centering it. Make sure the adhesive pad is adequately bigger than the patch, specially made for heat-application, and centered for even distribution. Smooth out any wrinkles if necessary
-
6Place the replacement patch onto the adhesive disk. Go over the patch with a carpet brush to remove loose fibers. Make sure that the direction of the fibers on the patch matches the direction of the fibers on the carpet.
-
7Place the patch pad on top of the patch, aluminum side up. Make sure the patch pad is centered and you know where the patch is underneath.
-
8Using an iron set on high, heat the patch pad up for one minute. Press down on the iron so that the heat transfers from the patch pad, through the carpet, to the adhesive pad underneath. Remember that the adhesive pad activates when subjected to heat.
- You should hear a light sizzle when you touch the iron onto the patch pad. This is the water reacting to the heat, not the carpet burning.
- If the patch is big, go over different spots the patch with the iron — enough to cover the entire patch. You don't want to fail to activate the head beneath the patch.
-
9Remove the iron and patch pad let the area cool. The glue on the adhesive pad won't fully dry until the carpet is cool. Go over the patch with a carpet brush and remove any loose fibers from the edge of the carpet.


Community Q&A
-
QuestionFrom where can I get the carpet patch pad?
 Sara MancillaCommunity AnswerIt is available at most home improvement stores, such as The Home Depot or Lowe's.
 -
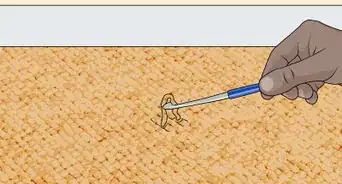
QuestionHow do I fix a small hole in my carpet?
 Josh NolanCommunity AnswerIf it's a cut pile plush, it should be fairly easy. Using residual carpet from the install or corner of closet or obscure area, cut a piece the approximate size of the hole. Using gorilla glue from Home Depot and a really sharp pair of scissors or razor blade, cut to fit and carefully glue the perimeter of the backing of the carpet. Place the donor piece in place and put a book over it until it dries. Using your scissors, brush the carpet back and forth and trim any taller tufts until it looks even. Bonus: for color difference, typically from wear or soil from foot traffic, spray a little Folex on the patch and surrounding area and scrub until the colors blend.
 -
QuestionWhat if the damaged carpet abuts a door frame?Josh NolanCommunity AnswerWatch out for the tack strip! It has sharp nails. Cut the donor carpet to match and glue the perimeter of the carpet backing with gorilla glue. Careful! A little goes a long way. Put the patch piece in place and cut as necessary. Lightly tap down the carpet onto the tack strip by the door frame. Tuck in place to the door frame, trim, or wall.
Things You'll Need
- Carpet remnant
- Pencil
- Duct tape
- Carpet tape
- Adhesive disk
- Utility knife or carpet cutter
- Tape measure


References
- ↑ https://www.bobvila.com/articles/how-to-patch-carpet/
- ↑ https://www.bobvila.com/articles/how-to-patch-carpet/
- ↑ https://www.familyhandyman.com/floor/carpet-repair/carpet-maintenance-tips-3-quick-carpet-fixes/
- ↑ https://www.thisoldhouse.com/how-to/how-to-patch-carpet
- ↑ https://www.thisoldhouse.com/how-to/how-to-patch-carpet
- ↑ https://www.familyhandyman.com/floor/carpet-repair/carpet-maintenance-tips-3-quick-carpet-fixes/
- ↑ http://safetytoolboxtopics.com/Small-Tools/utility-knife-safety.html
- ↑ http://safetytoolboxtopics.com/Small-Tools/utility-knife-safety.html
- http://www.thisoldhouse.com/toh/how-to/intro/0,,20255285,00.html
About This Article

To patch carpet using a patch repair kit with adhesive disks, first measure the damaged area of the carpeting and place duct tape around it. Then, use a utility knife to cut along the inside of the tape. Next, measure and cut the replacement patch. Once you have the replacement piece ready, slide the adhesive disk under the edges of the carpet surrounding the hole to keep it in place. Finally, press the new patch of carpet onto the adhesive. To learn how to use a patch repair kit with heat, keep reading!