X
This article was co-authored by Ashley Adams. Ashley Adams is a Licensed Cosmetologist and Hair Stylist in Illinois. She completed her Cosmetology education at John Amico School of Hair Design in 2016.
This article has been viewed 144,541 times.
Bangs are a timeless cut, but unless you have thin, wispy hair, your bangs will likely end up thick and choppy. Fortunately, it's easy to get wispy bangs. The trick is to cut vertically up into them after you make the base cut. Afterwards, you can style your bangs with a round-barrel brush to make them even wispier!
Steps
Part 1
Part 1 of 3:
Sectioning Your Hair
-
1Start with dry hair and part it down the middle. Hair shrinks a little as it dries, so it's important that it's dry when you cut it. If you cut your hair while it's wet, especially if it is wavy or curly, your bangs might end up too short after they dry.[1]
- Make sure that your hair is neatly combed and free of any knots and tangles.
-
2Create a horizontal part across the top of your head, like a headband. Somewhere around 1 to 1 1⁄2 inches (2.5 to 3.8 cm) behind your front hairline would be good, but you can make the part further back if your hair is thin at the front of your head. Use the handle of a rattail comb to create this part so that it's neat and clean.
- The further back you make the part, the thicker your bangs will turn out.
Advertisement -
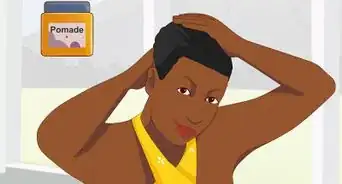
3Pull the hair behind the part into a ponytail. Leave the hair in front of the part hanging in front of your face. If you plan on straightening your bangs on a daily basis, then you should straighten your hair now. Be sure to apply a heat protectant first, however!
- You don't have to straighten all of your hair—just the part that you'll be cutting into bangs.
- Consider leaving the wisps of hair in front of your ears out of the ponytail. This will make it easier to blend the bangs in.
-
4Divide the hair into 3 sections, then clip the side sections out of the way. Use the handle of your rattail comb to divide your hair at the outer edges of your eyebrows to separate it into 3 sections. These sections should be about 1⁄2 inch (1.3 cm) wide. Pin or clip the thin sections out of the way.
- Bangs are rarely cut straight across; rather, they are longer on the sides and shorter in the middle. Creating 3 sections will make this variation in length easier to achieve.
-
5Pin the top two-thirds of the middle section out of the way. Use the handle of the rattail comb to divide the middle section horizontally, about a third of the way from the bottom. Twist and clip the thicker, upper section out of the way, and leave the thinner, bottom section hanging in front of your face.
- You'll be cutting the bangs in layers. Clipping the rest out of the way will make this easier.


Advertisement
Part 2
Part 2 of 3:
Cutting Your Bangs
-
1Comb the hair forward and pinch it where you want to cut. Use a big, round-barrel brush to comb the thin, middle section forward. Set the brush aside, then made a V-shape with your middle and index fingers. Close your fingers, like scissors, around the hair section, then drag them downward to where you want to cut your bangs.
- It would be an even better idea to pinch your hair a little lower than where you want to cut; you can always cut it shorter later.[2]
- For bangs that skim your eyebrows, pinch your hair at about nose-level.
-
2Cut straight across the hair, right below your fingers. Don't worry if your bangs look a little longer than you want them to. This is just the base-cut; you will be feathering them in the next step, which will make them shorter.
- Use a good pair of hairdressing shears or barber shears for this. Don't use plain, old scissors.
-
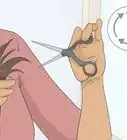
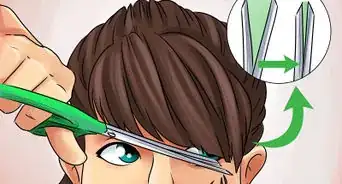
3Snip vertically into the bottom edge of your cut bangs. Pinch your bangs at about eyebrow level. Hold your scissors vertically, with the points facing the ceiling. Make little snips into the bottom edge of your bangs, cutting towards your fingers. Work your way across your bangs, from one side to the other.
- The further into your hair you cut, the more wispy your bangs will be. Anywhere between 1⁄2 and 1 inch (1.3 and 2.5 cm) would be good.
- This technique is known as point cutting.
-
4Let down another thin layer of hair, and trim it as well. Unclip the middle section and divide it in half horizontally. Clip the top part out of the way, and cut the bottom part using the already-feathered bangs as a guide. Hold the scissors vertically, and snip upwards into it as well.
- Repeat this step for the top and final layer of the middle section.
-
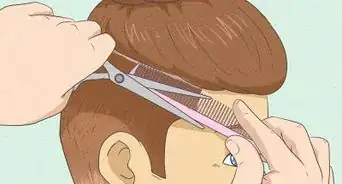
5Unclip and cut the side sections, angling them towards the bangs. If your hair is very long, trim the side sections first so that they are 2 to 4 inches (5.1 to 10.2 cm) longer than your feathered bangs. Next, cut them so that they angle upwards to meet the side edges of your bangs.
- Be sure to cut vertically up into the bottom edges of the side sections as well.
- Because the side sections are so thin, you don't need to cut them in layers like you did the bangs.
-
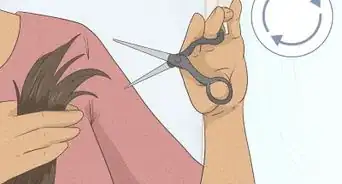
6Snip vertically into your bangs until you get the wispiness you want. Pinch your bangs between your middle and index fingers, and snip vertically up into them. Do the middle first, then the sides. Keep doing until your bangs are as thin and wispy as you desire.[3]
- Don't cut more than 1 inch (2.5 cm) up into your bangs.[4]


Advertisement
Part 3
Part 3 of 3:
Finishing and Styling Your Bangs
-
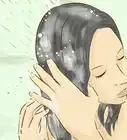
1Dampen your bangs with water from a bottle. You can also just wet your brush, then comb your bangs with it. Your bangs should be damp, not dripping wet. The rest of your hair should still be pulled back, however.[5]
- Dampening your hair first will make it easier to style with a hairdryer and round-barrel brush.
- Skip this step if you prefer to straighten your bangs.
-
2Hold a large, round-barrel brush under your bangs. Give the brush a slight twist so that it catches onto you bangs. The round-barrel brush will not only make your bangs smooth, but also straight, with a gentle, downward curve.
- The smaller the barrel, the tighter the curve will be. The larger the barrel, the larger the curve will be.
- If you're straightening your bangs, apply a heat protectant to them instead.
-
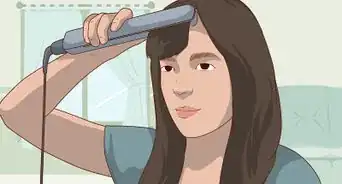
3Blow-dry your bangs with a round-barrel brush. Turn on your hairdryer, and point it down onto your bangs. Slowly pull the brush and hairdryer down at the same time towards the ends of your bangs.[6]
- Repeat this step as often as needed until your bangs are dry.
- If you're straightening your bangs instead, simply clamp them between a flat iron, then pull the flat iron downward.
-
4Brush your bangs out with a paddle brush. You can leave the side edges of your bangs as they are, straighten them with a flat iron, or style them with a round-barrel brush in the same way that you style the bangs. Once you are happy with your look, undo the ponytail holding the rest of your hair back.[7]
-
5Apply some shine serum or hair oil to the ends of your bangs, if desired. This will not only help your bangs look smooth, but it will also allow them to clump together and create a piece-y, wispy look.


Advertisement
Things You'll Need
- Hairdressing shears
- Rattail comb
- Paddle brush
- Round-barrel brush
- Hair clips
- Hair tie
- Hairdryer
- Shine serum (optional)
- Spray bottle filled with water

References
- ↑ https://www.youtube.com/watch?v=PJ6OfpbOySI&t=2m5s
- ↑ https://www.youtube.com/watch?v=RNH-p6oJVVM
- ↑ https://www.youtube.com/watch?v=PJ6OfpbOySI&t=5m40s
- ↑ https://www.youtube.com/watch?v=RNH-p6oJVVM
- ↑ https://www.youtube.com/watch?v=PJ6OfpbOySI&t=6m45s
- ↑ https://www.youtube.com/watch?v=PJ6OfpbOySI&t=6m50s
- ↑ https://www.youtube.com/watch?v=PJ6OfpbOySI&t=7m5s
- ↑ https://www.youtube.com/watch?v=RNH-p6oJVVM
About This Article

Ashley Adams
Professional Hair Stylist
This article was co-authored by Ashley Adams. Ashley Adams is a Licensed Cosmetologist and Hair Stylist in Illinois. She completed her Cosmetology education at John Amico School of Hair Design in 2016. This article has been viewed 144,541 times.
Co-authors: 8
Updated: August 10, 2021
Views: 144,541
Categories: Trimming Hair
Advertisement