X
This article was co-authored by Brianna Bowling. Brianna Bowling is a Hair Stylist and the Co-Owner of The CRAFT Salon in Glendora, California. With more than 11 years of experience, she specializes in balayage, blonding, and vivid colors. Brianna has received years of in-depth training on advanced color techniques.
This article has been viewed 40,371 times.
See-through bangs are a popular look that suits most face shapes. This style allows your forehead to be seen, unlike regular bangs. Don’t worry if you can’t make it to the hair salon; create the look at home! All you need is a mirror, a pair of scissors, and a bit of patience. Take your time and trim your bangs to your desired shape and length.[1]
Steps
Part 1
Part 1 of 2:
Parting Your Hair
-
1Part your hair in the middle of your forehead with a comb. Use the point of a comb to draw a straight line from the middle of your forehead back towards the top of your head. Use your comb to brush the hair on the right of your parting towards your right ear. Similarly, brush the hair from the left of your parting towards your left ear.[2]
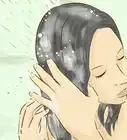
- Avoid parting or combing your hair when it is wet as this can damage your hair. Dry your hair before you start. This will stop your hair from shrinking when it dries and leaving you with shorter bangs than you intended.
-
2Mark the point 1 inch (2.5 cm) back from the front of your parting. Estimate 1 inch (2.5 cm) and place the tip of your comb in that spot. This measurement determines the thickness of your bangs.[3]
- If you want very thin bangs, place the tip of your comb 0.5 inches (1.3 cm) from the front of your parting.
- If you want thicker bangs, measure 1.5 inches (3.8 cm) back from the front of your parting.
- Keep in mind that cutting thicker bangs will make it harder to see through your bangs. This is particularly true if your hair is dense.
Advertisement -
3Pull the comb towards your ears at a 45 degree angle. Comb forward at a 45 degree angle from the 1-inch mark you made on your parting. This will create a triangle shaped parting. Repeat this process on the right side of the middle parting. Try to make the triangle partings symmetrical.[4]
- If one of the partings is narrower than the other, brush your hair and start the parting process again. Keep trying until you achieve an even triangle parting.
-
4Push the triangle of hair down towards your nose. Gather the strands of hair that you have sectioned off in the triangle parting and let them hang over the front of your face. Tuck the rest of your hair behind your ears to keep it out of the way.[5]
- If the rest of your hair isn’t long enough to tuck behind your ears, use a few bobby pins to secure the hair.
-
5Spread the front section of hair across your face.[6] This section of hair will form your bangs. Spread the hair out across your face so that the strands fall over both your eyebrows.[7]
- If you find that the hair doesn’t cover as much of your forehead as you wanted, redo the triangle parts at a wider angle. This will give you a greater width of hair to spread across your face.


Advertisement
Part 2
Part 2 of 2:
Cutting the Bangs
-
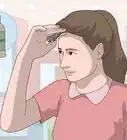
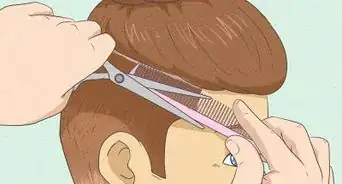
1Hold your hair between your fingers just below your eyebrows. Grip your hair between your middle and index fingers. Hold your fingers horizontally so that they form a guide for you to cut along. Position your fingers so that the bottom of your middle finger sits just below your eyebrows.[8]
- If you want longer bangs, move your fingers further down your hair toward your eyes.
-
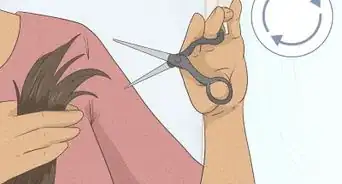
2Cut the hair below your fingers. Use a sharp pair of hairdressing scissors to trim the hair that falls below your fingers. If you think that your bangs are too long, cut .5 centimetres (0.20 in) layers off your hair until you are happy with the length. [9]
- If you don’t have hairdressing scissors, use a sharp pair of fabric scissors instead. However, it's best to purchase or borrow a pair of hairdressing scissors, as other types of scissors can damage your hair and cause split ends.
- Cut your hair over the sink to make it easier to clean up afterward.
- If you want your bangs to frame the sides of your face, cut your hair in a slight semi-circle shape. This will give you longer strands towards your ears which will make the fringe look more natural.
-
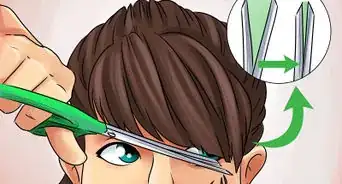
3Make small vertical cuts across your bangs to make them less blunt.[10] Vertical cuts in your bangs will soften their look and help to make them look more natural. Hold the scissors vertically so that they are pointing towards the sky. Make small 0.5 centimetres (0.20 in) vertical cuts every 0.25 centimetres (0.098 in) along the bottom of the bangs.[11]
- Only cut a few strands of hair at a time to avoid the bangs looking uneven. As you cut, use the first section of hair as a guide for cutting the remaining sections.
-
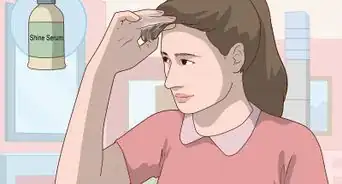
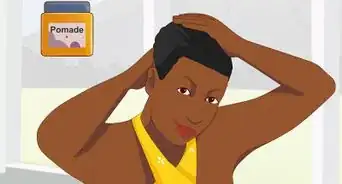
4Straighten the bangs if you want to achieve a sleek look. Straightening your bangs will help them to stay in place throughout the day. Plug your straightener into the wall and wait for it to heat up. Clamp the straightener at the top of the bangs and gently turn the iron towards you as pull it down the bangs. This will create a soft, slightly rounded look.[12]
- Make sure your hair is completely dry before straightening it to avoid damaging your hair. Additionally, apply a light coat of heat protectant to your hair before you straighten it.


Advertisement

References
- ↑ http://asia.be.com/beauty/hair/how-to/cut-see-bangs-82999.html#item=1
- ↑ http://asia.be.com/beauty/hair/how-to/cut-see-bangs-82999.html#item=1
- ↑ http://asia.be.com/beauty/hair/how-to/cut-see-bangs-82999.html#item=1
- ↑ http://asia.be.com/beauty/hair/how-to/cut-see-bangs-82999.html#item=1
- ↑ http://asia.be.com/beauty/hair/how-to/cut-see-bangs-82999.html#item=1
- ↑ Brianna Bowling. Hair Stylist. Expert Interview. 25 February 2022.
- ↑ http://asia.be.com/beauty/hair/how-to/cut-see-bangs-82999.html#item=1
- ↑ https://www.brit.co/diy-bangs/
- ↑ http://asia.be.com/beauty/hair/how-to/cut-see-bangs-82999.html#item=1
- ↑ Brianna Bowling. Hair Stylist. Expert Interview. 25 February 2022.
- ↑ http://asia.be.com/beauty/hair/how-to/cut-see-bangs-82999.html#item=1
- ↑ https://theklog.co/how-korean-girls-style-bangs/
- ↑ http://www.beautyundercover.sg/See-Through-Korean-Bangs-not-suitable/
About This Article

Brianna Bowling
Hair Stylist
This article was co-authored by Brianna Bowling. Brianna Bowling is a Hair Stylist and the Co-Owner of The CRAFT Salon in Glendora, California. With more than 11 years of experience, she specializes in balayage, blonding, and vivid colors. Brianna has received years of in-depth training on advanced color techniques. This article has been viewed 40,371 times.
Co-authors: 9
Updated: March 10, 2022
Views: 40,371
Categories: Trimming Hair
Advertisement