This article was co-authored by wikiHow staff writer, Sophia Latorre. Sophia Latorre is a Content Manager on the wikiHow team. Before joining wikiHow, Sophia worked as a technical editor and was published in six International Energy Agency (IEA) Wind Annual Reports. Now, she writes, edits, and reviews articles for the wikiHow Content Team, working to make the content as helpful as possible for readers worldwide. Sophia holds a BA in English from Colorado State University.
This article has been viewed 17,179 times.
Learn more...
Crown molding is a type of decorative trim used to cover the seam between a wall and the ceiling. Cutting it may seem like a daunting task, but it's actually pretty simple. Start by finding the angle of the outside corner using a pair of 1 by 4 in (2.5 by 10.2 cm) boards. Then, cut the crown molding to the correct angle using a miter saw. With this DIY trick, you’ll ensure that the pieces line up perfectly. Note that this strategy is for crown molding that sits flush against the wall, not at an angle between the wall and ceiling.
Steps
Finding the Outside Angle
-
1Hold a pair of 1 by 4 in (2.5 by 10.2 cm) boards to the outside corner of the wall. Position one board flush against the ceiling so it extends along the length of the wall past the outside corner. Position the other board flush against the ceiling so it extends along the length of the other wall past the outside corner, overlapping the first board.[1]
- Use spare 1 by 4 in (2.5 by 10.2 cm) boards rather than trying to find the angle on the crown molding itself in case you make a mistake.
Tip: Though it seems like you should be able to cut the edge of each piece of crown molding to a 45-degree angle so they line up evenly, this rarely works. Most walls are not perfectly square, so using this strategy will often leave a gap between the pieces or cause them to line up incorrectly.
-
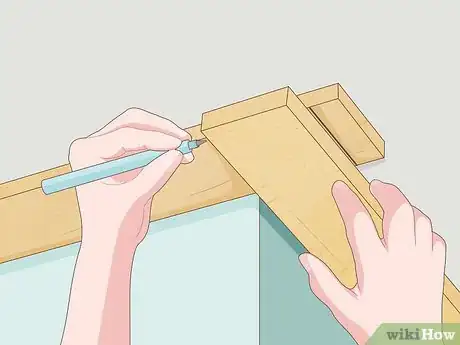
2Trace the top board onto the bottom board to find the angle. Use a pencil or marker to trace both edges of the top board onto the board beneath it. Take the boards down and use a straightedge to draw a diagonal line between the 2 marks on the bottom board. Use a protractor to find the angle of the diagonal line.[2]Advertisement
-
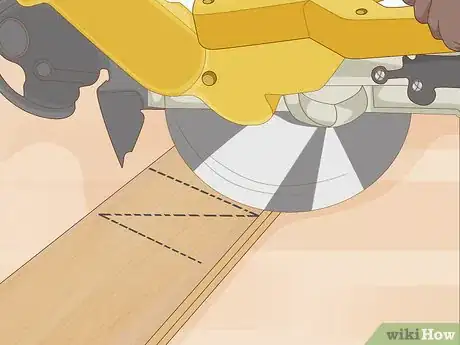
3Cut through both boards at the correct angle and test-fit them to the wall. Stack the marked 1 by 4 in (2.5 by 10.2 cm) board on top of the other one and put them flat beneath the miter saw blade. Set the saw to the angle of the diagonal line and cut through both boards. Hold the boards up to against the wall so the top edges are flush to the ceiling and the mitered edges meet each other at the outside corner of the wall.[3]
- If the edges of the boards meet snugly, lock the miter saw to the angle you set it at.
- If the edges don’t meet snugly, adjust the saw as necessary and make another cut through both boards. Test them again and then lock the miter saw to the correct angle.
Making Your Cuts
-
1Mark each piece of molding to the correct length. Measure the length of the wall on the left-hand side from the inside corner to the outside corner. Mark the length of the wall on the back of one piece of molding and label it “left.” Repeat for the other wall and mark that piece of molding “right.”[4]
-
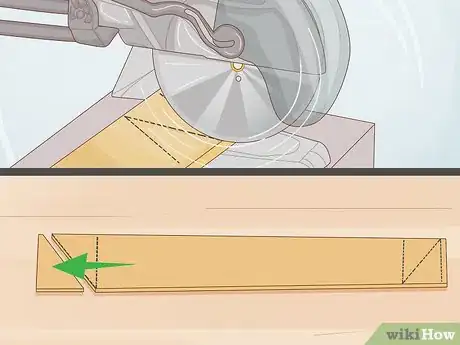
2Cut one piece of crown molding. Position a piece of crown molding so it’s flat beneath the blade of the miter saw. Make sure the length mark lines up with the saw blade. With your saw set to the locked-in angle used to create the test boards, cut through the first piece of molding.[5]
- Put on goggles and gloves and use caution when operating a saw!
Tip: Remember that for an outside corner, the front of the molding should be longer than the back. In other words, make sure the saw is set to the left when cutting the left-hand piece and set to the right when cutting the right-hand piece![6]
-
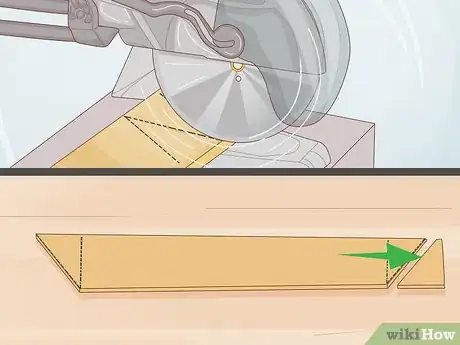
3Make an opposing miter cut on the other piece of crown molding. Set the miter saw to the same angle in the opposite direction. If you cut the left piece first, set the saw the right and vice versa. Once you have the blade locked in place, position the second piece of molding so the length measurement lines up with the blade. Cut through the crown molding.[7]
-
4Install both pieces. First, mark the locations of the studs in each wall just below where the crown molding will go. Then, hold one piece of crown molding against the seam between the wall and the ceiling and use a nail gun to attach it to each stud in the wall. Repeat with the other piece, then erase the marks you made.[8]
Things You’ll Need
- 1 by 4 in (2.5 by 10.2 cm) boards
- Pencil or marker
- Straightedge
- Protractor
- Goggles
- Gloves
- Miter saw
References
- ↑ https://www.popularmechanics.com/home/how-to-plans/how-to/a4832/4335690/
- ↑ https://www.popularmechanics.com/home/how-to-plans/how-to/a4832/4335690/
- ↑ https://www.popularmechanics.com/home/how-to-plans/how-to/a4832/4335690/
- ↑ https://www.architecturaldigest.com/story/how-to-install-crown-molding
- ↑ https://www.architecturaldigest.com/story/how-to-install-crown-molding
- ↑ https://www.bobvila.com/articles/crown-molding/
- ↑ https://www.architecturaldigest.com/story/how-to-install-crown-molding
- ↑ https://www.familyhandyman.com/carpentry/trim-carpentry/how-to-install-crown-molding-three-piece-design/

