wikiHow is a “wiki,” similar to Wikipedia, which means that many of our articles are co-written by multiple authors. To create this article, 33 people, some anonymous, worked to edit and improve it over time.
This article has been viewed 671,570 times.
Learn more...
If you want to hide the end grain of a board, a miter joint is the joint to make. Miter joints are decorative joints used for picture frames, door and window trim, and around openings. Miter joints are weak joints but useful when you want something to look nice without needing it to support a lot of weight. Just get started with Step 1 below to make your own.
Steps
Setting Up for Success
-
1Get the right cutting and measuring tools. There are a couple of different tools that you can use to miter corners and what you can use will depend on what you're cutting and how it needs to be cut. Basic, standard cuts can be done on simple materials using a miter box and a hand saw. More complex cuts will need a circular or table saw. These can be rented from your local big box hardware store and they can advise on exactly which type of machine you need.[1]
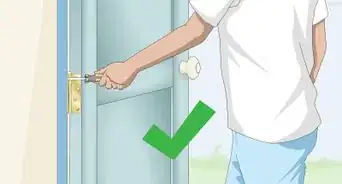
- For many interior molding situations such as baseboard and crown, etc., you should not miter the inside corners. It won't fit right and miters tend to separate in these situations. For inside corners, you should learn a technique called "coping." This is not difficult (do a search for instructions).
-
2Determine your miter angle. Measure the complete angle change. Divide that by the number of pieces that will make the turn. The resulting number is the angle to which you will need to set your miter. The most common miter angle is 45 degrees.[2]Advertisement
-
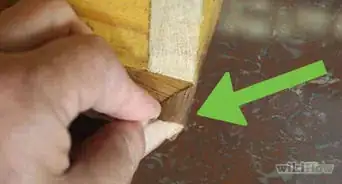
3Measure for your starting points. Since the cuts are angled, you'll have one side of the wood longer than the other. You'll need to keep track of which side will be which and make your measurements correctly. For example, on an inside corner piece, the measurement of the wall will need to equal the longer, back side of the wood. For an outside corner piece, the inside will need to be equal to the wall but will b the shorter distance.
-
4Measure for your angle gap. If you want to make use of as much wood as possible, you'll want to be able to use scraps whenever you can. Because the piece will need to be longer on one side then what might actually appear (such as on inside corners), you'll need to be able to calculate how much extra material you'll need at the end. If your mitered corner is at the standard 45 degree angle((360/2)/corners), then you'll need a gap at the end equal to the depth of the piece of wood.
- If you're using a non-45 angle, you'll need to do some math. Don't worry: it's easier than it sounds. Use a calculator or the interactive circle on this page to find the sin and cos for the angle of the cut you're making. Next, take your calculator and divide the sin by the cos. Take the resulting number and multiply it by the depth of your wood. The resulting number is how much extra space you'll need.


Cutting the Material
-
1Line up the saw. Set the miter saw to the angle it will need to cut at. Use the included instructions for your machine, as each is different.
-
2Line up the wood. Place the wood on the machine so that it is upside down, when possible. Always make sure you know where the short and long sides of your wood need to be. Make use of a laser guide if your machine has one (most newer machines do). If you're unsure about how a piece of wood is lined up, keep scrap wood handy to test the cut on. Testing is important.[3]
- When cutting a picture frame style cut, place the flat side on the cutting surface.
- When cutting a box style cut, place the flat side against the fence (or back piece of the cutting surface).
-
3Clamp the wood in place. If you are not using a piece long enough to hold and have your hands well out of the way of the saw, you should use clamps to hold the wood in place. Seriously, a lot of people lose fingers this way. Be careful.[4]
-
4Start and lower the saw. Usually there are a series of buttons and actions you have to take to start and lower the saw. Follow the instructions that came with the machine you have. When you lower the saw, keep your hands away and do not press down very hard. Simply guide it to where it needs to go and let the saw do the cutting.
-
5Raise the saw and wait for the blade to stop moving. Once it's done, you can unclamp and remove your piece.


Joining the Material
-
1Use clamps. No matter what method of joining you use, using clamps to keep the joint steady while it sets in important. There are lots of different styles of clamps depending on what project you're working on. See your local hardware store for help choosing what's right for you.[5]
-
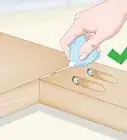
2Use glue and nails. The most basic way to join the pieces is to glue the angles, fit them together, and then nail them into place using a pneumatic brad nailer. This works best if the pieces can be nailed onto something else, like a door frame, because the ends will not hold together well. Set the nails if they do not go in far enough with a nail setter, then fill the holes with wood putty and stain or paint the putty to match the wood.[6]
-
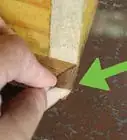
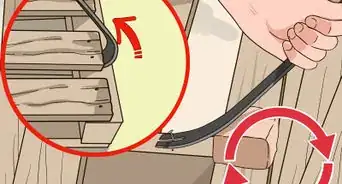
3Use dowels. You can drill dowel holes and place dowels in the joined ends of the wood if it is thick enough. This can add support and make the joint much stronger. Simply drill the hole, cover a dowel in wood glue, and join the pieces. Use a dowel size appropriate to the thickness of your wood.[7]
-
4Use a notch joint. Once the ends are joined, you can also try a notch joint. Using a thick circular saw, cut a notch in the corner of the joint. Then, fill the notch with glue and fit in a triangular shim, cut to the correct size and shape. This is a more advanced method but can be beautiful if done correctly.


Community Q&A
-
QuestionHow do I round edges on a miter corner?
 Community AnswerYou can try sanding.
 -
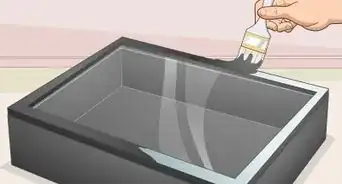
QuestionI am trying to miter inside molding for a covered skylight. I have insulated and covered a sheet of styrofoam, but I want to give it a more finished look. How do I measure to cut the miter to length?
 Community AnswerJust put the material you want to use in the slot and mark the outer linings of the board.
 -
QuestionHow do I use a router to create a 45-degree edge?Community AnswerIf the bottom part of the side is straight as shown in the picture, the easiest way would be to use a 45-degree router bit with a guide bushing. These bits can be obtained from Amazon. The only issue with this routing detail is that you can only do it in one pass unless you use small sacrificial strips to provide a surface to ease onto the final 45-degree cut.


References
- ↑ https://www.bobvila.com/articles/how-to-make-a-mitered-corner/
- ↑ http://www.woodworkersjournal.com/make-perfect-miter-joint/
- ↑ http://www.woodworkersjournal.com/make-perfect-miter-joint/
- ↑ https://www.finewoodworking.com/2009/04/01/safety-manual-miter-saw
- ↑ http://www.woodworkersjournal.com/make-perfect-miter-joint/
- ↑ https://www.familyhandyman.com/carpentry/trim-carpentry/how-to-tips-for-tight-miters/
- ↑ https://www.bobvila.com/articles/how-to-make-a-mitered-corner/
- Videos provided by Jon Peters Art & Home
About This Article
To create a miter joint, you’ll need to first gather appropriate materials, such as a miter box and handsaw. Once you have what you need, determine the angle at which you’ll need to make your cuts, which is usually 45 degrees. To make your cut, set up your saw at the appropriate angle and line the wood up in your machine or miter box, then cut through it with the saw. You may have to do a test cut on some scrap wood to determine the best position for the board. After making the cuts, you’ll need to clamp the cut pieces together before joining them. Keep reading to learn how to join the material using nails, dowels, or a notch joint!