This article was co-authored by wikiHow Staff. Our trained team of editors and researchers validate articles for accuracy and comprehensiveness. wikiHow's Content Management Team carefully monitors the work from our editorial staff to ensure that each article is backed by trusted research and meets our high quality standards.
This article has been viewed 53,481 times.
Learn more...
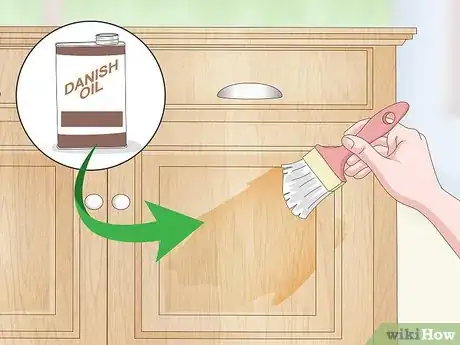
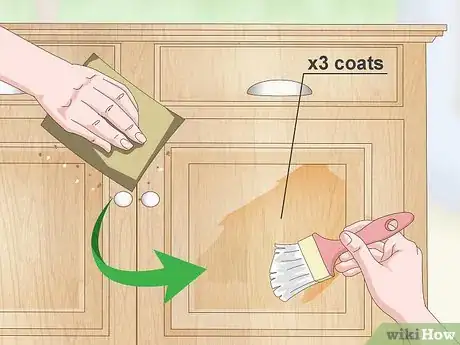
Danish oil can add a beautiful finish to your wood and is fairly easy to use. Always apply it to clean, sanded wood for the best results. For an easy project, opt for a quick, one-day finish using two coats of oil. If you want a smoother finish, go all out and apply three coats over three days, sanding the wet wood before drying it.
Steps
Sanding the Wood
-
1Cover your work area. Before sanding, cover the floor or other surface that your wooden object is placed on to protect it from dust and staining. Lay out plastic sheeting on ground or surface area. Tape down the edges with masking tape to keep it in place.
-
2Sand the wood with 80-grit sandpaper. Use small, circular motions to gradually buff away any visible flaws or marks. Be sure to cover the entire surface of the wood evenly.[1]
- To make the process easier and faster, purchase a sanding block from your local hardware store.[2]
- To sand the difficult-to-reach corners of a wooden object, attach sand paper to the end of a flexible putty knife.
Advertisement -
3Remove sanding dust from the wood before applying the oil finish. For a quick and easy clean-up, use a hand-held vacuum to suck up dust. You can also use a brush or can of compressed air to push dust away from the surface of the wood.[3]
Applying Danish Oil with the Wet-on-Wet Method
-
1Put on an initial coat of Danish oil. After sanding the wood, apply Danish oil to a clean, lint-free cloth. Generously apply the oil to the wood in broad strokes, reapplying oil to the cloth as needed. Continue this until the wood stops absorbing the oil.[4]
- When the wood stops absorbing the oil, it will lose its shine and look dull.
-
2Let the wood rest for twenty minutes. After this break the wood will be able to absorb more oil. Set an alarm or reminder to keep track of the time.[5]
-
3Apply a second coat of oil. After twenty minutes, apply more oil to the surface of the wood. Apply a thinner coat this time, as less oil will be absorbed into the wood than the first time. Stop applying the oil when the wood stops absorbing it. [6]
-
4Let the wood sit, then wipe it down. Let the wood rest for another twenty minutes. Using a clean, lint-free cloth, wipe away excess oil from the surface of the wood. Let it sit for an hour, then wipe the surface again with a clean cloth.[7]
-
5Air dry the wood. Let your wood dry in a warm room for a full 48 hours before touching it. Moving it too soon is likely to cause marks or disrupt the drying process of the oil. Keep the object out of direct sunlight, which can affect the finish.[8]
Creating a Very Smooth Finish with Danish Oil
-
1Apply oil to the wood and keep it wet. After sanding, apply Danish oil to your sanded wood surface with a brush or clean cloth. Re-wet any part of the wood surface that become dull because the oil is being absorbed. Keep the surface wet for three to four minutes, reapplying the oil as needed.[9]
-
2Wipe off excess oil and let the wood dry. Make sure that no oil is pooled or clustered in corners of the wood. Allow it to dry overnight in a warm room.[10]
-
3Apply a second coat of oil and sand it. The next day, apply a second coat of oil to the wood with a clean cloth or brush. While the oil is still wet, use very fine sandpaper to sand the surface. Use long, light strokes and move in the direction of the grain.[11]
- For best results, use 600-grit wet/dry sandpaper, available at hardware stores.
-
4Remove excess oil and dry the wood. Be sure that all sanding debris is also removed from the wood surface. Once again, leave the wood to dry overnight in a warm room.[12]
-
5Repeat the process a third time. The nest day, repeat the process of applying oil and sanding the wet wood. Wipe off the excess oil and debris. Let the wood sit overnight to dry.[13]
-
6Repeat the process if needed. As a general rule, three days is enough to achieve a smooth finish with Danish oil. If you feel that your wood could be smoother, repeat the process for a fourth day. Continue the process for as many full days as needed to achieve the finish you want.[14]
-
7Let the wood dry for 24 hours in a warm, dry room. Given the multiple, deep-penetrating layers of Danish oil applied using this method, your wood will require more drying time than lighter applications. If you notice any debris or particles on the wood while it is drying, do not remove them until the 24 hour drying period is completed.
Things You'll Need
- Danish oil
- Plastic sheeting
- Masking tape
- 80-grit sandpaper
- A hand-held vacuum, brush, or can of compressed air
- Clean, lint-free cloths
- A clean paintbrush
- 600-grit wet/dry sandpaper
References
- ↑ http://www.ebay.com/gds/How-to-Apply-Danish-Oil-Finish-/10000000206551689/g.html
- ↑ https://www.familyhandyman.com/woodworking/how-to-sand-woodwork-by-hand/view-all/
- ↑ http://www.popularwoodworking.com/techniques/rules_for_sanding_wood
- ↑ http://www.ebay.com/gds/How-to-Apply-Danish-Oil-Finish-/10000000206551689/g.html
- ↑ http://www.ebay.com/gds/How-to-Apply-Danish-Oil-Finish-/10000000206551689/g.html
- ↑ http://www.ebay.com/gds/How-to-Apply-Danish-Oil-Finish-/10000000206551689/g.html
- ↑ http://www.ebay.com/gds/How-to-Apply-Danish-Oil-Finish-/10000000206551689/g.html
- ↑ http://www.ebay.com/gds/How-to-Apply-Danish-Oil-Finish-/10000000206551689/g.html
- ↑ http://www.popularwoodworking.com/article/rub_to_create_a_great_finish
- ↑ http://www.popularwoodworking.com/article/rub_to_create_a_great_finish
- ↑ http://www.popularwoodworking.com/article/rub_to_create_a_great_finish
- ↑ http://www.popularwoodworking.com/article/rub_to_create_a_great_finish
- ↑ http://www.popularwoodworking.com/article/rub_to_create_a_great_finish
- ↑ http://www.popularwoodworking.com/article/rub_to_create_a_great_finish
About This Article
Danish oil can add a beautiful finish to your wood and is relatively easy to apply. Start by sanding your wood to make it smooth. Then, apply your Danish oil to the wood with a clean-lint free cloth in broad strokes. For a really smooth finish, sand the wood while the oil is still wet. Otherwise, leave it for 20 minutes to absorb the oil, then apply a second, thinner coat of oil. After another 20 minutes, wipe the excess oil off with another clean cloth. Wait 1 hour and wipe any more excess oil away. Leave your wood for 48 hours before you touch it or set anything on it. Repeat the process to create a smoother finish. For more tips, including how to keep your carpet clean from sawdust, read on!


