This article was co-authored by wikiHow staff writer, Hunter Rising. Hunter Rising is a wikiHow Staff Writer based in Los Angeles. He has more than three years of experience writing for and working with wikiHow. Hunter holds a BFA in Entertainment Design from the University of Wisconsin - Stout and a Minor in English Writing.
There are 14 references cited in this article, which can be found at the bottom of the page.
This article has been viewed 16,137 times.
Learn more...
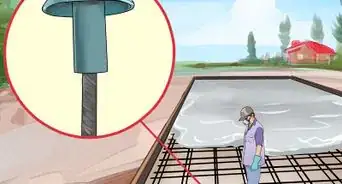
Rebars are usually steel rods running through concrete slabs that help reinforce their strength. If you’re doing any construction that involves cutting or coring into the concrete, the rebar could damage your tools or slab if you hit it. To avoid expensive repairs, use a rebar detector to accurately measure the depth and location of the rods. Handheld units are cheaper and more accessible, but you may get more accurate results if you use a ground penetrating radar system.
Steps
Using a Handheld Rebar Locator
-
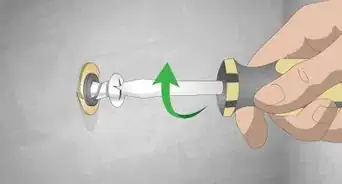
1Buy or rent a rebar locator from a surveying company. Reach out to a concrete surveying company in your area and ask them if they have equipment available. Make sure the unit is made for detecting metal rebar, or else it won’t give you accurate results. If they don’t have units available for sale, see if you can rent the unit at a daily or weekly rate instead.[1]
- A rebar locator looks similar to a stud finder and has a flat side that sits flush against the concrete so you can move it around easily.
- Rebar locators usually cost around $200 USD when you buy them.
- Handheld locators usually only detect rebar that’s 6–8 inches (15–20 cm) deep.
-
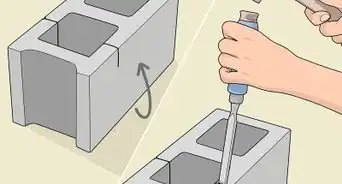
2Hold the rebar locator flat against the concrete and turn it on. Start along the edge of the concrete so the locator handle points down. Press the back of the locator firmly against the concrete. Press the power button on the front or side of the locator and wait for the display to come on.[2]
- If the concrete has a rough surface, put a piece of cardboard between it and the locator so you’re able to move it around easier.
Advertisement -
3Slide the rebar locator horizontally over the concrete until it beeps. Guide the locator slowly along the edge of the concrete and pay attention to the display. Watch for a bar or circle appearing in the middle of the screen, which means you’re close to the rebar. When you hear the machine beep, stop moving the locator and hold it in place.[3]
- You may see plus (+) or minus (-) signs on the display as well. If you see a +, then you’re moving the locator closer to the rebar. When you see a -, then you’re moving the locator farther away.
- If the machine doesn’t beep, then the concrete doesn’t contain any rebar in the top 6–8 inches (15–20 cm). If you need to dig deeper than that, use ground penetrating radar to check for rebar deeper within the concrete.
-
4Mark the location on the concrete with a piece of chalk. Hold the locator still against the concrete so you don’t lose the location. Use your other hand to put a dot on the concrete just above the top of the locator. The mark indicates there’s rebar underneath or directly next to the line.[4]
- Use paint or a marker if you’re worried about the chalk getting washed away.
-
5Write down the depth from the bar chart on the locator’s display. Look for a bar chart in the center of the display on your locator. Find where the top of the bar lines up with the number scale on the side. Make note of the depth on a sheet of paper or write it directly on the concrete.[5]
- Typically, the measurement is listed in inches and centimeters. Pay attention to which units your locator uses.
- Handheld locators only give a general depth of the rebar, so the actual depth may vary slightly.
-
6Continue marking the concrete in horizontal rows. Keep moving the locator horizontally across the concrete until you hear it beep again. Mark each of the locations and depths of the rebar you find. When you reach the other side of the concrete, move the locator down by 6 inches (15 cm) and work your way back horizontally. Continue going over the entire piece of concrete until you reach the opposite edge.[6]
- Usually, the rebar will line up in each row, but they may have bent or warped during construction.
-
7Move the locator over the concrete in vertical columns to find the cross bars. Start in the top left corner of the area you’re checking, and hold the locator vertically. Move the locator down along the left edge and wait until it beeps. Mark the spot at the top of the locator and continue working down until you hear it beep again. When you reach the bottom, move the locator over 6 inches (15 cm) and start marking a new column.[7]
- Rebar rods are usually placed a grid-like pattern within the concrete, so always check both horizontally and vertically to ensure you locate all of them.


Scanning the Concrete with Radar
-
1Rent a ground penetrating radar unit from a surveying company. Contact a concrete surveying company in your area to see if they have a ground penetrating radar (GPR) cart, which has a small display and handle on top and a radar unit on the bottom. Ask about daily or weekly rental rates depending on how large of a project you’re working on. Sign the rental agreement from the service and bring the unit to your job site.[8]
- GPR carts send radio waves through the concrete, which bounces off the rebar and back into a sensor. The cart makes a chart on the display so you’re able to see the rebar location and depth.
- You can buy GPR carts, but they usually cost over $1,000 USD.
-
2Set the cart along the edge of the concrete and turn it on. Put the cart in the bottom right corner of your work area so the handle points to the left. Located the power button on the handle or the main body of the cart. Wait for the display to turn on completely before you begin.[9]
- If your GPR cart doesn’t have a handle, point the wheels toward the left side of the work area.
-
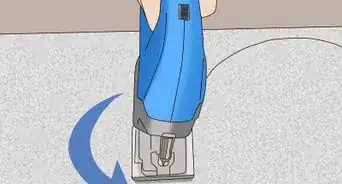
3Push the cart horizontally along the concrete until the display screen is full. Hold the handle and slowly push the cart toward the left side of your work area. Watch the display on the cart to see a series of curves appear as you move the cart. Keep guiding the cart forward until you reach the other side or until the display screen fills up with a chart. Leave the cart on the concrete.[10]
- If you keep moving the cart after the display fills up with charts, you may lose information from the beginning of the scan.
- The scan length of the GPR cart depends on the model, but it’s usually around 20 feet (6.1 m).
-
4Move the cart back until the cursor aligns with the top of a curve on the display. Move the cart back toward the right side of the work area, making sure it stays on the same path. Watch the vertical white line move to the right on the chart. Stop moving the cart when the line crosses the peak of a white curve in the middle of the chart, which marks the location of rebar.[11]
- The rebar looks like curves on the chart due to how the radar waves bounce off of them.
-
5Check where the top of the curve intersects the display’s rulers for the depth. Hold a straightedge so it crosses the peak of the curve and the depth scale on the left side of the display. Write down the measurement on a piece of paper or directly on the concrete with a piece of chalk so you don’t forget it later on.[12]
- Usually, the scale is listed in inches, but you may be able to adjust the settings in the menu for the GPR cart.
Tip: The depth accuracy may be off by 5–10% since the radar takes a relative measurement from multiple rebar posts.[13]
-
6Mark the concrete where the cart’s laser guides touch the ground. Look on the left and right side of the cart to see where the laser guides light up the concrete. Put a dot of chalk behind the guides to show where the rebar extends through the concrete. Make sure you mark the locations on both sides of the cart.[14]
- Ignore the laser guide on the front of the cart when marking rebar.
- If you don’t see laser guides on the sides, look for straight vertical lines instead. Mark where the vertical lines meet the ground.
-
7Continue pulling the cart backward to mark the other rebar locations. Guide the cart backward along the same path until the cursor lines up with the next curve peak on the chart. Write down the depth and mark the locations on the sides of the cart. Keep working back until you reach your starting point.[15]
- Mark any curves you see on the display since you may find rebar or pipes deeper in the concrete.
-
8Move the cart up 6 in (15 cm) and scan in horizontal rows. Pick up the cart and set it back down 6 inches (15 cm) higher than your first row. Slowly push the cart toward the left side of your work area. Pull the cart backward to mark the rebar locations. Continue working in rows until you reach the top of your work area.[16]
- It’s okay if you need to overlap your rows when you reach the top of your work area.
-
9Find the cross bars by running the cart in vertical columns. Set the cart in the bottom left corner of the work area so the handle points up. Move the cart toward the upper edge of your work area to scan it vertically. Guide the cart back down, being sure to mark all of the rebar locations. When you reach the bottom, move the cart to the right by 6 inches (15 cm) to start the next column. Work until you reach the right side of the work area.[17]
- Rebar rods are usually installed in a grid-like pattern, so make sure you always locate it from each direction.


Warnings
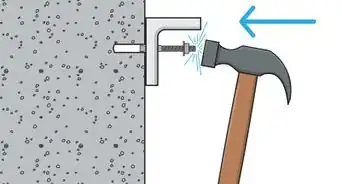
- Avoid cutting or coring into concrete without checking for rebar first since you could break or damage your tools.[18]⧼thumbs_response⧽
Things You’ll Need
Using a Handheld Rebar Locator
- Handheld rebar locator
- Chalk
Scanning the Concrete with Radar
- Ground penetrating radar cart
- Chalk


References
- ↑ https://www.structuremag.org/wp-content/uploads/2014/10/SF-RebarLocators1.pdf
- ↑ https://youtu.be/E8Qn3Eu87h4?t=91
- ↑ https://youtu.be/Bnsjl__pmyM?t=302
- ↑ https://youtu.be/uGz2F_YuNT0?t=59
- ↑ https://youtu.be/Bnsjl__pmyM?t=289
- ↑ https://youtu.be/E8Qn3Eu87h4?t=111
- ↑ https://youtu.be/E8Qn3Eu87h4?t=119
- ↑ https://www.structuremag.org/wp-content/uploads/2014/10/SF-RebarLocators1.pdf
- ↑ https://youtu.be/hyFT-hs41T8?t=35
- ↑ https://youtu.be/LpJQ9UR02H4?t=147
- ↑ https://youtu.be/hyFT-hs41T8?t=71
- ↑ https://www.sensoft.ca/wp-content/uploads/2015/11/Concrete-Scanning-with-GPR-book.pdf
- ↑ https://www.sensoft.ca/wp-content/uploads/2015/11/Concrete-Scanning-with-GPR-book.pdf
- ↑ https://www.geophysical.com/wp-content/uploads/2019/12/GSSI-GPR-ConcreteandUtilitySystems.pdf
- ↑ https://youtu.be/hyFT-hs41T8?t=127
- ↑ https://youtu.be/hyFT-hs41T8?t=190
- ↑ https://www.sensoft.ca/wp-content/uploads/2015/11/Concrete-Scanning-with-GPR-book.pdf
- ↑ https://www.sensoft.ca/wp-content/uploads/2015/11/Concrete-Scanning-with-GPR-book.pdf
About This Article