This article was co-authored by Daniel Stoescu. Daniel Stoescu is a Master Electrician and the Owner and Operator of Home Tech Solutions, LLC in Hampton, Virginia. With over a decade of experience, Daniel specializes in wiring residential, commercial, and light industrial structures. The Home Tech Solutions team has over four decades of combined experience and offers comprehensive solutions for residential electrical needs.
There are 15 references cited in this article, which can be found at the bottom of the page.
This article has been viewed 28,199 times.
A broken ceiling fan is a drag, especially when it’s hot outside. Before you replace the entire fan, you should do a quick check to see exactly what’s wrong with it. To properly diagnose the issue with your fan, you should check your breaker box first, then the wall switch, and finally the fan itself. If you perform a diagnosis and the problem is a more complex electrical issue or an issue with the fan’s motor, you should contact an electrician or the fan’s manufacturer to help you fix it.
Steps
Checking the Fan’s Circuit
-
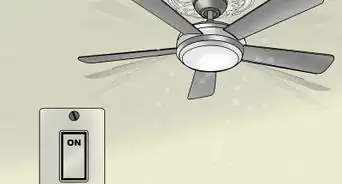
1Locate your circuit breaker box if the fan doesn’t turn on. Pull the chain on your fan and flip the wall switch to turn your fan on. If nothing happens, it could be because the circuit to the fan has been tripped. In this case, you'll need to check the switches in your breaker box.[1]
- The breaker box has a metal door and can be found in the basement or garage. If you live in an apartment, it might be in a hallway or utility room.
- If you can, use the wall switch to operate the fan rather than a remote.
- When the circuit to your fan is tripped, the power to your fan is disconnected.
- If the fan trips your circuit breaker, other appliances may also not work in your house.
-
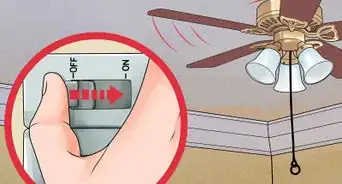
2Open the breaker box door and look at the black switches. All of the switches should be on and positioned in the same direction. If one of the switches is in the off position, there’s a good chance it’s the switch connected to your fan.[2]
- Most breaker boxes will have a diagram that lists the appliances that each switch is connected to. Look for the switch that connects to your ceiling fan or the room that it’s in.
- If your breaker box doesn’t have any tripped circuits, the problem could be in the fan’s motor or in the wall switch for your fan.
Advertisement -
3Flip the switch on the circuit connected to your fan. Push the black switch to the left, then to the right. Flip the switch on so that it’s positioned in the same direction as the other switches in your breaker box.[3]
- Push the switch to the side all the way until you hear a click.
-
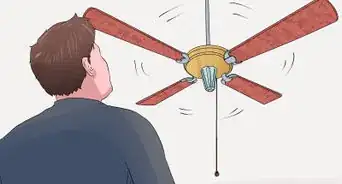
4Turn the fan back on and see if it works. Flip the switch on the wall and see if the fan turns on. Resetting the circuit should resume electrical flow to your ceiling fan. If the fan still doesn't come on, the issue could be with your wall switch or the fan's motor.
- If the circuit regularly trips when you turn the fan on, it could be overloading the circuit and points to a more serious electrical problem. If this is the case, contact an electrician.[4]


Checking the Wall Switch
-
1Purchase a volt reader or multimeter online or at a hardware store. Voltmeters and multimeters are handheld electrical devices that are able to read the electrical current coming from your switch. If there is no current running through your switch, it means that the wiring or switch is faulty and should be replaced.[5]
- Voltmeters are typically cheaper than multimeters.
-
2Unscrew the plate covering the switch for the fan. Wear a pair of rubber gloves when working with the switch so you don’t accidentally electrocute yourself. Use a Phillip’s head screwdriver to remove the screws in the top and bottom of the plate covering the switch on the wall. Then, slide the plate off to expose the wires inside of the switch.[6]
- Your switch should have 2-3 wires connected to the wall and a metal "ground" wire hanging from the top of the switch.
-
3Unscrew the switch from the wall. Use the screwdriver to unscrew the top and bottom screws that hold the switch in place. Remove any electrical tape that might be holding the switch or the wires in place and pull the switch out from the wall so that you can look at its wiring. Check to make sure that all of the wires running from the wall are properly connected to the switch.[7]
- Most ceiling fan switches will have 2-3 wires running from the wall to the switch as well as a metal ground wire that’s not connected to anything, coming out from the wall.
- If the wires are disconnected, you'll have to turn off the power from your breaker box and properly connect the switch to the wires in your wall.
-
4Hold one probe against the bottom contact on the side of the switch. Flip the switch to the fan to the off position. Then, turn on your voltmeter or multimeter on and hold one of the probes against the black metal screw, or contact, on the side of the switch.[8]
- The black metal screw is the power that’s running to the switch.
- If you’re using a multimeter, remember to set the device to volts.
-
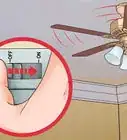
5Hold the other probe against the metal wire and read the display. Place the other wire against the metal wire. The display should read around 120V. If it doesn’t read anything, it means that there is no power running to your switch and your switch is faulty or your wiring is damaged.[9]
-
6Test the top contact on the switch. Remove the probe from the bottom screw and place it against the top screw. Then, take the other probe on your voltmeter or multimeter and hold it against the ground wire again. The top switch should also read 120V.[10]
- If you aren’t getting any volts coming into either screw, it could mean that the wiring connected to the switch is faulty.
-
7Test the red wire on the other side of the switch if you have one. Hold one probe against the ground wire and the other probe to the contact connected to the red wire on the opposite side of the switch. Again, this should read 120V. If the wires are connected and you’re getting a 0 voltage reading on the switch, contact an electrician to check your wiring.[11]
- Some ceiling fans will have a 2-part switch while others will have a 3-part switch.
-
8Flip the switch and measure the volts from the switch again. Turn the switch on and test the screws on the side of the switch again. If you have a 2-part switch, one of the screws should be showing 120V while the other screw should be reading 0V. If this isn’t the case, you know the problem is with the switch itself and you should buy and install a replacement.[12]
- If you have a 3-part switch, the red contact should still read 120V when the switch is flipped off. If it doesn’t, it means that the switch is bad and you need to install a new one.


Diagnosing Motor Problems
-
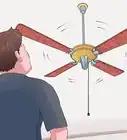
1Turn the fan’s lights on, if it has them. Flip the switch and pull the fan chord that controls the lights to the fan. If the lights turn on but the fan doesn’t work, there is most likely an issue with the fan’s motor. If the lights and fan both don’t turn on, then it’s possible the fan isn’t receiving power.[13]
- Make sure that the light bulbs in the fan aren’t burnt out by replacing them with new ones.
-
2Turn off the power from the fan at the circuit box. Go to the breaker box in your home and flip the switch to the circuit that’s connected to your fan to the off position. This will cut power to the fan and prevent you from being electrocuted while you examine the motor and the wiring.[14]
-
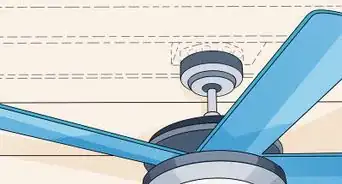
3Remove the ceiling fan cover with a screwdriver. The cover is the portion that connects the fan to the ceiling. Unscrew the screws holding the fan in place and carefully lower the cover to expose the fan’s wires.[15]
-
4Check that the ceiling fan wires are properly connected. The ceiling fan should have 3-4 wires running from the fan to your ceiling. Make sure that all the wires are properly connected and not damaged. If you notice frayed or burned wires, it means that the wiring is bad and needs to be fixed or replaced.[16]
- If wires are disconnected, you’ll have to properly re-install the ceiling fan.
-
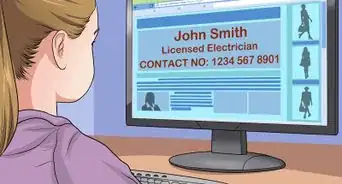
5Contact an electrician if the fan still doesn’t turn on. If all the wires are connected and undamaged and you’ve checked the breaker box and wall switch but the fan still doesn’t work, it could mean that your motor is broken or that you’ve blown a capacitor in it. In this case, you’ll need to contact an electrician or your fan’s manufacturer to help replace or repair the fan’s motor.[17]


Identifying Other Common Problems
-
1Tighten the screws on the fan if it’s noisy.[18] Use a ladder to reach the fan blades and tighten all of the screws connecting the blades to the fan itself with a Phillip’s head screwdriver. Then, tighten the screws on the motor cover and any other screws that connect the fan to the ceiling. This should get rid of any clicking noises coming from the fan.[19]
- Make sure that all the lightbulbs in the fan are also fully screwed in.
- Sometimes a fan will sound noisy or make a clicking noise if the components aren’t seated properly due to loose screws.
-
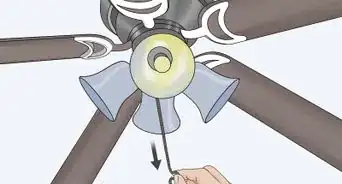
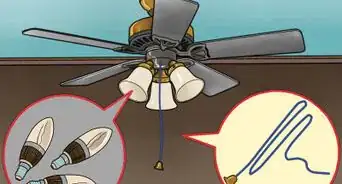
2Replace the pull chain if the fan is stuck on one speed. To fix a broken pull chain, remove the cover to the motor with a screwdriver to expose the wires in the fan. Then, manually unscrew the fastener holding the chain in place and pull the chain through the hole from the inside of the motor. If the chain has broken off, you can purchase a replacement online or from a hardware store.[20]
- If the chain isn’t broken but doesn’t change the speed of the fan when you pull it, it could mean that the internal chain switch is broken.[21]
- If the chain switch is broken, you can get a replacement switch online or from a hardware store.[22] Take note of the wires connecting the motor to the switch and connect those same wires to the new switch.
- Remember to turn off the power at the breaker box and get some help if you’re not familiar with working with electrical equipment.[23]
-
3Tighten the screws in the fan bracket if the fan is wobbly.[24] If the fan wobbles, it could mean that the bracket connecting the fan to the ceiling is loose. To fix it, use a Phillip’s head screwdriver to remove the cover to the fan bracket. Then, tighten the screws connecting the hanger ball to the fan as well as the screws connecting the fan bracket to the ceiling.[25]
- A wobbling fan may also be a sign of improper installation or warped fan blades. If you believe that this is the case, hire an electrician to come and look at your ceiling fan.
- Sometimes, fans are installed with the wrong electrical box or with the wrong bolts.
-
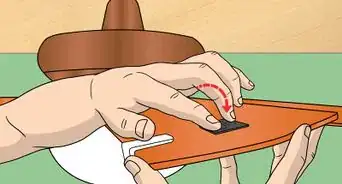
4Balance the blades if the fan still wobbles after you’ve tightened the screws. You can purchase a balancing kit online or from a hardware store, or you can do it yourself using coins. Tape a coin to the center of a fan blade and turn the fan on high. Repeat the process on each blade until you notice that the wobble has lessened. Once you figure out which blade needs to be balanced, tape 2-3 quarters to that blade to make it heavier. This may stop the wobble from your fan.[26]


Expert Q&A
-
QuestionWhy did my ceiling fan stop working?
 Kevin TurnerKevin Turner is a handyman and the owner of Red Gator Maintenance, a handyman business based in Fresno, California. Working on handyman-related projects since the age of 12, Kevin specializes in a wide variety of home improvement projects such as (but not limited to) lighting/electrical, plumbing, deck staining, drywall repairs, cabinet installation, air conditioning, trash removal, and window, roof, and appliance repairs.
Commercial HandymanFans often stop working if you pull too hard on the chain, which causes the switch inside to break.


References
- ↑ https://www.familyhandyman.com/electrical/how-to-reset-a-circuit-breaker/view-all/
- ↑ https://www.thesawguy.com/fix-ceiling-fan/
- ↑ https://www.familyhandyman.com/electrical/how-to-reset-a-circuit-breaker/view-all/
- ↑ https://www.familyhandyman.com/electrical/how-to-reset-a-circuit-breaker/view-all/
- ↑ https://www.familyhandyman.com/electrical/how-to-use-a-multimeter/view-all/
- ↑ https://youtu.be/QAGdLJMkLjw?t=29
- ↑ https://youtu.be/QAGdLJMkLjw?t=41
- ↑ https://www.familyhandyman.com/electrical/how-to-use-a-multimeter/view-all/
- ↑ https://www.familyhandyman.com/electrical/how-to-use-a-multimeter/view-all/
- ↑ https://www.familyhandyman.com/electrical/how-to-use-a-multimeter/view-all/
- ↑ https://www.familyhandyman.com/electrical/how-to-use-a-multimeter/view-all/
- ↑ https://youtu.be/QAGdLJMkLjw?t=97
- ↑ https://www.thesawguy.com/fix-ceiling-fan/
- ↑ https://www.familyhandyman.com/electrical/how-to-install-ceiling-fans/view-all/
- ↑ https://youtu.be/M3XTn0IyfbQ?t=169
- ↑ https://youtu.be/M3XTn0IyfbQ?t=74
- ↑ https://www.thesawguy.com/fix-ceiling-fan/
- ↑ Daniel Stoescu. Master Electrician. Expert Interview. 21 June 2021.
- ↑ https://youtu.be/P0N56vXcX4w?t=54
- ↑ https://www.todayshomeowner.com/how-to-repair-and-replace-a-ceiling-fan-pull-chain-switch/
- ↑ Kevin Turner. Commercial Handyman. Expert Interview. 15 July 2020.
- ↑ Daniel Stoescu. Master Electrician. Expert Interview. 21 June 2021.
- ↑ Daniel Stoescu. Master Electrician. Expert Interview. 21 June 2021.
- ↑ Daniel Stoescu. Master Electrician. Expert Interview. 21 June 2021.
- ↑ https://youtu.be/P0N56vXcX4w?t=82
- ↑ https://www.familyhandyman.com/ceiling/how-to-fix-a-wobbly-ceiling-fan/view-all/
About This Article

To diagnose a problem with your ceiling fan, start by flipping the switch to the fan and pulling on the cord that turns on its light. If both the fan and light don’t turn on, you might just need to see if the fan’s circuit has been tripped. In that case, find your circuit breaker and flip the switch connected to your fan. If the light turns on, but the fan doesn’t work, there’s most likely an issue with the motor. In that case, head to the circuit boxes and turn the power off to the fan before removing the cover that connects the fan to the ceiling. Once the fan’s wires are exposed, check that they are all properly connected and not frayed or burnt. You’ll need to contact an electrician if everything looks fine and your fan still doesn’t work, as it might have a broken motor. For more tips, like how to check the wall switch with a volt reader, scroll down!