X
This article was co-authored by Kevin Snow. Kevin Snow is a Commercial Painting Professional and the Owner of Ridge Painting Company. With over 12 years of experience, he specializes in painting commercial facilities and new build constructions. Kevin and his team are fully licensed and insured.
This article has been viewed 79,425 times.
You don't need to replace your existing ceiling fan when remodeling. Whether you want a fan that blends into your ceiling for more visual space, a sparkly new color to jazz it up, or you just want to take it out of the 1970s, a newly painted ceiling fan can look expensive and brand new in the matter of an afternoon for just a few bucks and a few dusty fingers.
Steps
Part 1
Part 1 of 3:
Disassembling and Prepping Your Ceiling Fan
-
1If your ceiling fan has a light kit, start disassembling that first. First, remove the glass shades by unscrewing the thumbscrews holding them in place. Then remove the light kit fitter assembly by removing the screws holding it in place. Install them into the holes in the motor and screw them halfway in place.
- A drill will make this go much faster, but a Phillips head screwdriver will work, too.
-
2Remove each blade and blade bracket from the motor housing assembly. They will most likely come off together. Set them and their screws aside for later.
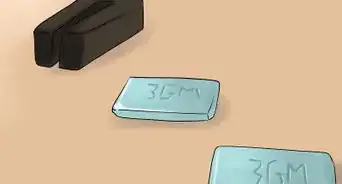
- It's best to keep the screws all together in a bowl so none mysteriously run away from you. Keep it off to the side where it won't get hit by wide-swinging fan blades or small children.
Advertisement -
3Remove the screws holding the canopy in place. Slide the canopy down and disconnect the wiring. At this point you can remove the ceiling fan from the ceiling. Leave the mounting bracket attached to the ceiling.
-
4From the ground, start disassembling the body of the fan. As you take apart each piece, place it down in your work area on top of a surface covered by newspaper, a tarp, or any material you don't mind getting painted. Here's how to finish disassembly:
- Start by removing each blade from each blade bracket. Install the screws into each blade bracket halfway in place.
- Then remove the down rod from the motor housing assembly. Install the screws into the holes in the top of the motor housing assembly.
- After that, remove the bottom faceplate from the motor housing assembly. Set the bolts and screws aside for later.
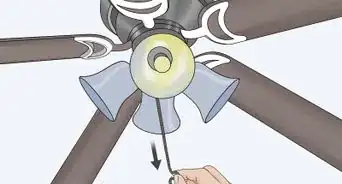
- Finish by removing the pull chains. Set them aside for later, too.
-
5Clean the fan. With some multi-purpose spray and a damp rag, get to town on making that fan cleaner than it’s probably ever been.[1] You don’t want to paint over dust, dead bugs, and grime. This goes for the blades, the brackets, switch housing cover, download, and anything else that you’re going to paint (even if you’re not painting certain parts, these could probably go for a cleaning anyway).[2]
- Either let it air dry or wipe it dry thoroughly with a clean rag when you're done. And dry it thoroughly – you don't want to be working with a wet or damp fan.


Advertisement
Part 2
Part 2 of 3:
Painting Your Ceiling Fan
-
1Sand the blades with 120-grit sandpaper. This will help strip the fan of any leftover dirt, dust, or old, flaky paint. This part could be optional if you’re working with a fan that’s in very good condition, but for older fans, it makes the job much easier.
- After sanding, make sure to wipe off any grains of residue. A clean rag and some soapy water is simple and works well. Let the parts air dry.
-
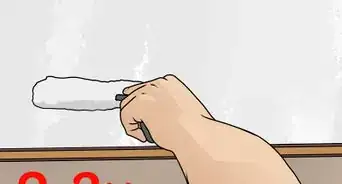
2Paint all parts with white-colored primer. In an old t-shirt and gloves, shake up the bottle and test it on an area of old newspaper or cardboard. Once it’s ready to go, spray the blades and/or hardware pieces with a thin, even coat.[3] Allow them to air dry.
- It’s easiest to work with primer in spray paint form when it comes to a ceiling fan. You could use generic liquid primer, but this stuff is much less messy and goes on easier and more evenly.
-
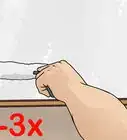
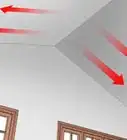
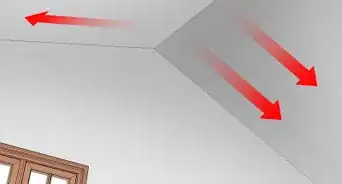
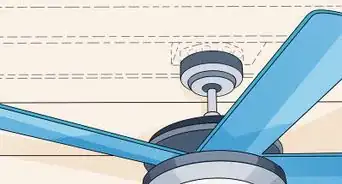
3After the white-colored primer is dry, paint all of the parts. Again, using spray paint is easiest (though not mandatory), and for any color you should be spraying from about 6–8 inches (15.2–20.3 cm) away.[4] Move the can in a side-to-side motion to get an even coat of paint.[5] It’s best to start with the blades first, so they can get to drying.
- Neutral colors (grey, white, brown) generally always work, but brighter colors can add a splash of fun that match the room’s look, too. What’s more, you could even buy paint in shades of metal, like nickel or copper, to give your fan an updated, more modern look.
- If you don’t want certain bits to get painted, cover them with painter’s tape.
-
4After the first coat of paint is dry, apply a second coat of paint to all parts. Let it dry, too, and inspect the pieces for any parts that have gone missed or that need a thicker coat in certain areas.
- If you’ve only missed a teeny, tiny section, you could always touch it up with the right shade of permanent marker.


Advertisement
Part 3
Part 3 of 3:
Reassembling Your Ceiling Fan
-
1From the ground, begin reassembling your fan. Start with re-installing the down rod and securing the screws (aren’t you glad you put them off to the side in that bowl?). Let the canopy drop to the top of the motor housing assembly. Then, also from the ground, re-install the faceplate and the blades to the blade brackets.
-
2Hang the ceiling fan into the mounting bracket. Once that’s done, reconnect all wiring with electrical tape and wire nuts. Slide the canopy up to the ceiling and secure it.
- If this is getting a little confusing, wikiHow has articles on both installing ceiling fans and replacing ceiling fans that could help you decode how to do it correctly.
-
3Secure each blade and blade bracket to the motor housing assembly. Make sure all the screws are placed in tightly and line up – this will likely be the most tedious task of them all. It’s not difficult; it’s just time consuming.
-
4If your ceiling fan has a light kit and pull chains, re-install them. After you’ve completed this task, pull the chains and turn on the light. If it works, great. If it doesn’t, you’ll have to go back and retrace your steps. Odds are something was just done in the wrong order.
- After that, your only job is to sit back and enjoy your newly painted ceiling fan!


Advertisement
Warnings
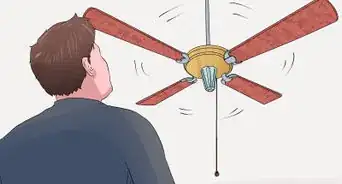
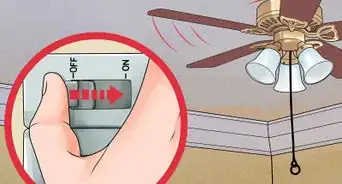
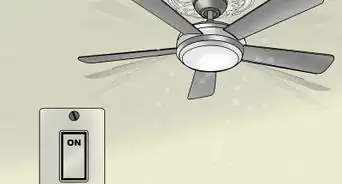
- Turn off the power before disassembling and re-assembling your ceiling fan.⧼thumbs_response⧽
Advertisement
Things You'll Need
- Ceiling fan
- Can of spray paint/regular interior paint
- Can of white spray primer/regular white interior primer
- Wire nuts
- Cardboard or newspaper
- Philips screwdriver
- 120-grit sandpaper
- Rags
- Multi-purpose cleaner
- Painter’s tape (optional)


References
- ↑ Kevin Snow. Commercial Painting Professional. Expert Interview. 23 March 2022.
- ↑ http://www.prettyhandygirl.com/update-your-ceiling-fan-with-paint/
- ↑ Kevin Snow. Commercial Painting Professional. Expert Interview. 23 March 2022.
- ↑ http://www.delmarfans.com/educate/diy/paint-your-ceiling-fan/
- ↑ Kevin Snow. Commercial Painting Professional. Expert Interview. 23 March 2022.
About This Article

Kevin Snow
Commercial Painting Professional
This article was co-authored by Kevin Snow. Kevin Snow is a Commercial Painting Professional and the Owner of Ridge Painting Company. With over 12 years of experience, he specializes in painting commercial facilities and new build constructions. Kevin and his team are fully licensed and insured. This article has been viewed 79,425 times.
Co-authors: 16
Updated: March 30, 2022
Views: 79,425
Categories: House Painting | Ceiling Fans
Advertisement