wikiHow is a “wiki,” similar to Wikipedia, which means that many of our articles are co-written by multiple authors. To create this article, 46 people, some anonymous, worked to edit and improve it over time.
wikiHow marks an article as reader-approved once it receives enough positive feedback. In this case, 83% of readers who voted found the article helpful, earning it our reader-approved status.
This article has been viewed 265,547 times.
Learn more...
A dig is one of the basic moves in volleyball, but doing it effectively is a challenge, especially when attempting to save a hard spike from hitting the ground (or your face!). Done properly, digging a spike is not simply a defensive maneuver -- preventing the opponent from scoring -- but the transition into your team’s offence. Proper preparation, positioning, and technique are critical to an effective spike dig, but so too is the ability to quickly adapt.
Steps
Preparing for the Dig
-
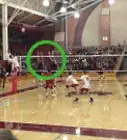
1Study the opposing hitter(s).[1] Watch him/her in warmups before the game even starts, if you can. Watch his/her hitting motion on spikes and take note of any tendencies that might give you a split-second advantage in knowing where a spike is headed.
- Keep an eye out for “tells.” Does he strongly favour spiking to his left? Does she exaggerate her backswing when faking a spike?
-
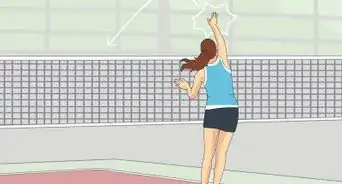
2Watch the hitter’s motion as you prepare to dig. Even deceptive spikers tend to align their shoulders in the direction they intend to hit.[2] Take an educated guess on where the ball is headed, but also don’t assume it has to go there. (Lean a bit that way, don’t “sell out.”)Advertisement
-
3Always expect the ball to come to you. Even if your read on the hitter says you’re in the clear, be prepared to be wrong and to react. Good misdirection spikers are betting on you relaxing.
-
4Be light on your feet. This applies generally to volleyball positioning, but especially for digging. Keep your weight forward on your toes so you can move more quickly. There’s a reason why the phrase “on your heels” has a negative connotation.
Executing the Dig
-
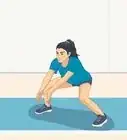
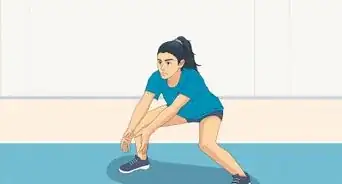
1Get low and lean forward. Get into a low "ready" position,[3] even lower than you would to receive a serve. It is easier to rise for a high ball than to dip lower for a low one.
- Keep your knees bent and bend at the waist so that your shoulders are out past your knees. Place your feet wider than your shoulders. Hold your arms out away from your body.
- Keep your weight balanced on your toes so you can spring forward or to either side to get the ball.
-
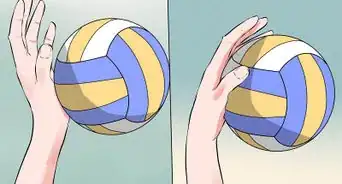
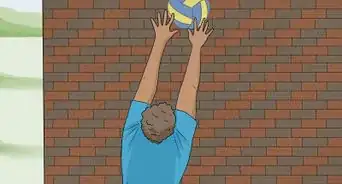
2Place your arms in a receiving position. When the spike is imminent, stretch your arms, pressed together from hands to elbows, in front of you. Bend and lock elbows.
- You are creating a “platform” from wrists to elbows upon which the ball will bounce.[4] You’re not a carpenter but a volleyball player, so don’t make it a level platform unless you want the ball to bounce back over your head (or off your forehead). Keep your wrists lower than your elbows to direct the ball forward.
- To hold your hands together, place your thumbs side by side and overlap the fingers of your stronger hand over the curled fingers of your weaker hand.[5]
-
3Move to meet the ball. Remember your footwork, and don’t lunge unless you have to. Otherwise, take a quick step or a shuffle and remain in your ready position. Keep low as you relocate.
-
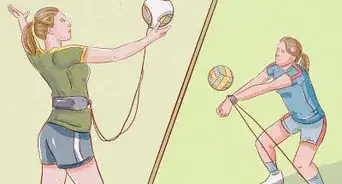
4Aim for your target. Your goal on a dig is not just to get the ball up in the air, but to pass it to a teammate to set up your offensive series.[6] You’ll most likely be aiming for your setter up by the net. Align your body as much as possible towards that target while receiving the spike. Use all that geometry you learned in school to set your platform at the right angle.
- Aim a little short of your target if necessary to keep from digging the ball back over the net. Don’t give your opponents an easy second chance.
-
5Absorb and redirect the spike. You don’t need to swing at the ball; the spiker has supplied all the necessary power (and then some, most likely) for your purposes. Keep your elbows locked and your angle of deflection the same, but let your shoulders dip to absorb some of the power of the shot.
- Even though you aren’t swinging at the ball, do follow through with your platform, moving your arms slightly upward and towards your target. Think of it as nudging the ball in the right direction.
Adapting the Dig
-
1Dive and dig. A good spiker won’t always give you the luxury of properly setting your feet and platform to direct the ball cleanly to your teammate. Sometimes, you’re just going to have to hit the floor (or the sand).
- To dive for a spike in front of you, bend your knees to get even lower and drive your body forward. Your platform and upper body will be parallel and close to the ground. Slide on your chest as you hit the ball, ideally on your platform but even with your wrist or knuckles.
- When you need to stretch out as far as possible, you can try a “pancake.” Extend your hands, palms down, while you dive so that the ball bounces off the back of your hand(s). Slide on your palms along with your upper body.
- Keep your head up as you dive. Do this not only so you can see the ball but also so you don’t smack your chin on the ground as you land.
-
2Sprawl and dig. Similar to a dive, a sprawl is directed more toward one side or the other. If the ball is to your right or left, step out in that direction and extend outward as in a dive. Dip your inside shoulder (the side away from the ball) while keeping your arms together. This will allow you to maintain the angle of your platform in the intended direction.[7]
- Bend your elbows more or curl your wrists if necessary to keep them off the floor as you stretch and to maintain at least part of your platform at the correct angle.
-
3Get the ball in the air. Proper technique is fantastic and will make you a better and more consistent digger, but in the end, your essential job is to get the ball back up in the air. (They don’t award points for good technique as the ball bounces past you.) Especially on partial blocks or deflections that send the ball on an unexpected trajectory, you may have to lurch your body, flail your arms, and land a little less gracefully. Do what you have to.
- Unless you’re in the Olympics or something like that, don’t risk injury just to dig a spike, though. Landing awkwardly can cause leg, arm, or even head injuries. Proper equipment, such as knee pads and ankle wraps, will help quite a bit.
Community Q&A
-
QuestionWhere is the ball supposed to hit my arm?
 Community AnswerThe ideal spot for the ball to hit your arm is around halfway between your wrist and elbow.
 -
QuestionHow does it not break your wrist?
 Emily NewtonCommunity AnswerYou don’t hit the ball with your wrist. It hits on your platform, which is the part of your arms from right above your wrist to halfway to your elbow.
 -
QuestionCan someone provide a few more examples to help me understand stance and positions in volleyball?
 Community AnswerBack row: looking at the court from the back is left back, middle back and right back (one of these players is usually replaced with a libero). The front is outside, middle and right side. Right back or right front is usually the setter. Stay low when playing back row, but be tall and powerful when playing front row.
References
- ↑ http://www.strength-and-power-for-volleyball.com/volleyball-strategies-digging.html
- ↑ http://www.strength-and-power-for-volleyball.com/volleyball-strategies-digging.html
- ↑ http://volleyball.about.com/od/glossary/g/ReadyPosition.htm
- ↑ http://www.volleyballadvisors.com/volleyball-digging.html
- ↑ http://woman.thenest.com/return-spiked-volleyball-17228.html
- ↑ http://www.volleyballadvisors.com/volleyball-digging-skills.html
- ↑ http://www.strength-and-power-for-volleyball.com/volleyball-skills-digging.html
About This Article
To dig a volleyball, plant your feet wider than your shoulders, bend your knees, and be ready to move quickly by shifting your weight forward on your toes. Next, get into a receiving position by stretching both arms out in front of you and pressing them together from hands to elbows. Then, shuffle your feet quickly to meet the ball, aligning your body as much as possible towards your target as you receive the spike. Finally, keep your elbows locked, absorb the spike, and redirect it to your target. For more tips on getting into the ready position, read on!