This article was co-authored by Ashley Adams. Ashley Adams is a Licensed Cosmetologist and Hair Stylist in Illinois. She completed her Cosmetology education at John Amico School of Hair Design in 2016.
There are 8 references cited in this article, which can be found at the bottom of the page.
This article has been viewed 49,498 times.
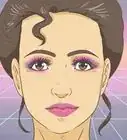
There is something appealing and glamorous about fashion from the 50s, so it is no surprise that it is making a comeback. If you already have clothing and accessories inspired by the 1950s, why not try to style your hair that way too? Some of the most popular styles were the pin-up, poodle, and pompadour. The techniques can take some time to get right, but with enough practice, they can be a cinch!
Steps
Doing the Pin-Up Style
-
1Prep your hair. Brush your hair to remove any tangles, then spray it with some heat protection spray. Comb your hair once more help distribute the product. If you just washed your hair, spray it with dry shampoo to help give it more hold and volume.[1]
- This method is will work best with hair that's goes past your shoulders, but you can try it if your hair reaches your shoulders too.
- This method will focus on using a curling iron. If you want to use regular hair rollers instead, start with wet hair.[2]
-
2Use a rattail comb to make an angled side part. Slide the handle of a rattail comb through your hairline above your eyebrow. Angle the handle towards the center-back of your head as you slide it through your hair. Use the handle to part you hair off to the side. Smooth down any stray hairs.[3]
- It does not matter which side the part is on. Choose whichever side looks most flattering on you.
Advertisement -
3Start curling the hair on the thicker side of the part. Gather a small section of hair from the thicker side of your part. Use a ¾ to 1-inch (1.91 to 2.54-centimeter) curling iron to curl your hair downward towards your scalp. Rolling the curl downward, not upward, will help give your style a little more volume.[4]
- You can also use regular hair rollers instead. Make sure that your hair is wet.[5]
-
4Pin the curl in place. Carefully slide the curling iron out of your hair. Use your fingers to roll your hair back into a spiral. Hold the curl gently with one hand, then use your other hand to pin it in place with a pin curl clip, such as a single-prong hair clip, or a bobby pin. This will allow your curl to hold its shape as it cools.[6]
-
5Continue making similar curls around your head. Work your way in straight rows. Once that side of your head is filled, make similar curls on the other side of your head. Finish off with a final set of curls on the back of your head. Make sure that all of the curls are facing downward towards the floor.
- When you reach the back of your head, it might be helpful to turn your back to the mirror, then hang a smaller mirror up in front of you. This will allow you to see what you are doing.
-
6Let your hair cool off completely. This will take about 30 minutes. Your hair must be completely cooled off. If you take the curls out too soon, your hair will lose its shape.[7]
- If you are using wet hair and hair rollers, let your hair air dry completely. You can also speed things up with a hair dryer. Sleeping with the rollers in is another option.[8]
- Set your hair with a little finishing spray. This will help your hair retain its shape. Once again, let your hair dry before moving on to the next step.[9]
-
7Remove the pins. Start from the bottom-most curls and work your way up to the top of your head. Work your way in rows so that you don't miss any curls by mistake.
-
8Fluff and shape the curls. Comb through the curls with your fingers or a wide-toothed comb. Next, use your fingers to gently loosen the curls and twist them away from your face. At this point, you can adjust the shape of the style to better suit your face shape.[10] For example, you can gently backcomb your hair to give it more volume and lift.[11]
- If you have bangs, you can use a fine-toothed comb to backcomb your bangs and give them volume.
-
9Finish your hair. Brush the hair on the thinner side of the part back. If you have long hair, you can tuck your hair behind your ear and secure it with a pretty clip or flower. If you have bangs, you can comb them back towards your ear with a boar bristle brush, then secure them with bobby pins.[12]
- Hide the bobby pins from view by draping a few strands of hair over them. Choose bobby pins in the same color as your hair in case you aren’t able to hide them fully.


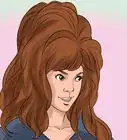
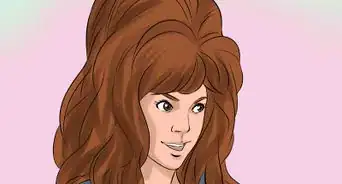
Doing the Poodle Style
-
1Brush your hair and apply a heat protectant to it. Brush your once more to help distribute the product more evenly. This method will focus on using a curling iron. If you prefer to use hair rollers instead, dampen your hair first, then apply a styling mousse to it instead.
- This style is great for short hair.
- This style is great for very curly or frizzy hair. If you have hair like this, you can skip over to the clipping portion.[13]
-
2Start curling your hair using a thin curling iron. Take a small section of hair from your forehead. Use a ¼-inch (0.64-centimeter) curling iron to curl your hair towards the back of your head. Make sure that you are curling towards your head and not the ceiling. This will help give you more volume.[14]
- If you can't find a curling iron that small, a ¾-inch (1.91-centimeter) one will also work.[15]
- You can do this with thin hair curlers as well. Make sure that your hair is wet.
-
3Pin the curl into place. Use your fingers to gently roll the curl back into place, facing downward. Next, slide a pin curl clip or a bobby pin through the curl and pin it to your head.
-
4Continue curling your hair. You will need curls on the top, sides, and back of your head. The curls on the top of your head need to be paraelle to your forehead and pointing towards the back. The curls on the sides and back of your head should be paraelle to the floor. All curls need to be rolled downward (not upwards).[16]
-
5Let your hair cool completely before removing the pin curls. How long this takes depends how thick your hair is and how cold the room is. Once your hair cools, you can remove the pins. Start from the bottom layers first, then work your way towards the top.[17]
- If you used hair curlers on wet hair, you will need to dry your hair first using one of the previously outlined methods.
-
6Fluff your curls. Use your fingers to gently fluff out the curls. Be careful not to comb them out and loosen them, however. You want the curls to look fluffy, not wavy.
- If you have very long hair, you may need to tease your curls. You can do this by backcombing your curls with a tail comb. This will help give you more volume make them appear shorter.[18]
-
7Use the handle of a rattail comb to make two side parts at eyebrow level. You will need to do two identical side parts, one on each side of your head. The hair below the parts should be hanging down, and the hair above the side parts gathered on top of your head.[19]
-
8Tease or spray your hair, if necessary. If your hair isn't naturally curly, it may not want to stay in place on top of your head. Use a comb to gently tease it towards the roots. Lightly mist it with hairspray, then let the hairspray dry. Only do this to the hair on top of your head, between the two side parts. Leave the hair on your sides alone.
-
9Comb the hair at the back of your head upwards. Use a fine-toothed comb to pull the hair upwards and to smooth it down. Keep you hair taut as you comb it. Apply some wax or pomade, if needed, to help smooth down any flyaways.[20]
-
10Pin the hair into place. Hold the hair at the crown (top-back) of your head with one hand. Use your other side to slide a bobby pin the same color as your hair through the right side and another one through the left.[21]
- You could also gather your hair, give it a slight twist, then pin it in place using a two-prong French twist pick.[22]
-
11Comb and pin the hair on the sides of your head the same way. Use a fine-toothed comb to brush the hair on the left side of your head up towards the part you made earlier. Hold it against your head, then slide a bobby pin or two straight through it, parallel to the part. Leave the excess hair loose on top of your head. Repeat for the right side of your head.[23]
- Insert the pins with the wavy/bumpy sides down. This will give you a better grip.
- The hair on the sides of your head should be smooth as they go up towards the side parts.
-
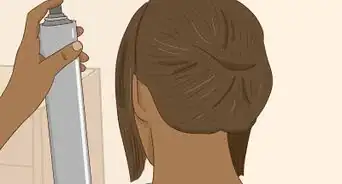
12Fluff the curls and touch up your hair, if needed. Your hair should be pulled up taut and smooth on the back and sides of your head. The curls should all be gathered on the top of your head. Use your fingers to gently fluff them out. Give your hair a final, light misting of hairspray.[24]
- If you have very curly or frizzy hair, you can skip this step.
- If you see any gaps between the side and back sections of your hair, go over them with a boar bristle brush to smooth them down.[25]
- If you have long hair, you may need to roll a few curls into place and pin them down.[26] Once you are happy with your look, give your hair a final misting of hairspray.
- You can leave some curls across your forehead, or brush/pin them out of the way.


Doing the Pompadour Style
-
1Start with longer hair. Something between 7 and 9 inches (17.78 and 22.86 centimeters) works best, but you could get away with hair that's between 4 and 5 inches (10.16 and 12.7 centimeters) long too. It would be even better if your hair is cut short at the sides.[27]
- Your hair can be dry or slightly damp.[28]
-
2Apply pomade to your hair. Work a small scoop of pomade between your palms, then start working it into your hair with your fingers. Focus on the roots and work your way towards the middle of the hair shaft. The ends of your hair should have hardly any pomade.[29]
-
3Use a rattail comb to part your hair on both sides of your head. Make the part at about eyebrow level using the handle of your rattail comb. It needs to go along the side of your hair, straight towards the back. Try to make the parts on the left and right sides of your head as even as possible.[32]
- If you have shorter hair on the sides, simply use the fade as a guide.[33]
-
4Start combing your hair up and back. Use a fine-toothed comb to comb the hair above your eyebrow up towards the middle of your head, and back towards your crown. Repeat for the other side of your head. You are going for something cone-shaped.[34]
- Only comb the hair above the part.
- Don't worry about forming the pomp yet.
-
5Comb the sides of your hair, if needed. If you have longer hair on the sides of your head, you will need to brush it into place. Use a boar bristle brush to comb the hair below the part at a downward angle towards the nap of your neck. Do this for both sides of your head.[35]
- Only comb below the part.
- If you have shorter hair on the sides of your head, you may need to comb it downward slightly to make the part more pronounced.[36]
-
6Start forming the pomp. Go back to the hair above the two parts you made. Slide a dressing comb with long bristles into your hair at the hairline. Slowly pull the comb upwards, keeping it parallel to your head. When you reach the height you want your pomp to be, pull the comb out.[37]
- If you don't have a dressing comb, another way to form a pompadour would be to use a round brush and a blow dryer. Brush the hair out and up to create volume. Next, apply product, such as pomade, to hold to pompadour in place. Use bobby bins the same color as your hair to secure the style, if needed.
-
7Finish forming the pomp. Continue combing your hair upwards at the hairline using short, upward strokes, until your hair bumps out at the front. It can be as high or as low as you want it to be. If any hairs at the sides of the pomp get out of place, comb them back into place.[38]
- Dig the comb deeper into your hair at the roots, and shallower at the ends.
- Keep your free hand on the crown of your head—it should be lightly touching your hair, not pressing down. This will help further shape the pomp at the front.


Community Q&A
-
QuestionHow would I get hair like Danny and Sandy from Grease?
 Community AnswerFor Danny, pick up a bottle or tin or pomade. Pour it on a comb and comb it through your hair. Sandy likely uses curlers to give herself big curls.
 -
QuestionHow do I do my hair like the actors, actresses, models and singers from the 50s?
 Community AnswerUsually you will see celebrities with short or medium-length, curled hair. Long hair became less popular after the 1920's as a way that women "rebelled", which carried through the fifties.
Things You'll Need
Doing the Pin-Up Style
- Heat protection spray
- Curling iron
- Setting spray
- Bobby pins or pin curl clips
- Rattail comb
- Boar bristle brush (optional)
Doing the Poodle Style
- ¼ to ¾-inch (0.64 to 1.91-centimeter) curling iron
- Heat protection spray
- Hairspray
- Bobby pins
- Rattail comb
- Boar bristle brush (optional)
Doing the Pompadour Style
- Pomade
- Dressing comb
- Rattail comb
- Boar bristle brush (optional)


References
- ↑ https://www.youtube.com/watch?v=0yW0FlyIem8
- ↑ https://www.youtube.com/watch?v=fd59Wy2ICxk
- ↑ https://www.youtube.com/watch?v=Uw90n9zWEGE
- ↑ https://www.youtube.com/watch?v=0yW0FlyIem8
- ↑ https://www.youtube.com/watch?v=fd59Wy2ICxk
- ↑ https://www.youtube.com/watch?v=Uw90n9zWEGE
- ↑ https://www.youtube.com/watch?v=0yW0FlyIem8
- ↑ https://www.youtube.com/watch?v=fd59Wy2ICxk
- ↑ https://www.youtube.com/watch?v=Uw90n9zWEGE
- ↑ https://www.youtube.com/watch?v=Uw90n9zWEGE
- ↑ https://www.youtube.com/watch?v=0yW0FlyIem8
- ↑ https://www.youtube.com/watch?v=Uw90n9zWEGE
- ↑ https://www.youtube.com/watch?v=aheqFm-dpRY
- ↑ https://www.youtube.com/watch?v=aheqFm-dpRY
- ↑ https://www.youtube.com/watch?v=Yp10fa0Ciuo
- ↑ https://www.youtube.com/watch?v=mw9_31C4JNA
- ↑ https://www.youtube.com/watch?v=Yp10fa0Ciuo
- ↑ https://www.youtube.com/watch?v=Yp10fa0Ciuo
- ↑ https://www.youtube.com/watch?v=mw9_31C4JNA
- ↑ https://www.youtube.com/watch?v=mw9_31C4JNA
- ↑ https://www.youtube.com/watch?v=Yp10fa0Ciuo
- ↑ https://www.youtube.com/watch?v=aheqFm-dpRY
- ↑ https://www.youtube.com/watch?v=aheqFm-dpRY
- ↑ https://www.youtube.com/watch?v=Yp10fa0Ciuo
- ↑ https://www.youtube.com/watch?v=mw9_31C4JNA
- ↑ https://www.youtube.com/watch?v=Yp10fa0Ciuo
- ↑ https://www.youtube.com/watch?v=U2Y89lp_1L0
- ↑ https://www.youtube.com/watch?v=U2Y89lp_1L0
- ↑ https://www.youtube.com/watch?v=U2Y89lp_1L0
- ↑ https://www.youtube.com/watch?v=U2Y89lp_1L0
- ↑ https://www.youtube.com/watch?v=U2Y89lp_1L0
- ↑ https://www.youtube.com/watch?v=6ojKQ_VCbNI
- ↑ https://www.youtube.com/watch?v=U2Y89lp_1L0
- ↑ https://www.youtube.com/watch?v=6ojKQ_VCbNI
- ↑ https://www.youtube.com/watch?v=6ojKQ_VCbNI
- ↑ https://www.youtube.com/watch?v=U2Y89lp_1L0
- ↑ https://www.youtube.com/watch?v=U2Y89lp_1L0
- ↑ https://www.youtube.com/watch?v=6ojKQ_VCbNI
About This Article