This article was co-authored by wikiHow Staff. Our trained team of editors and researchers validate articles for accuracy and comprehensiveness. wikiHow's Content Management Team carefully monitors the work from our editorial staff to ensure that each article is backed by trusted research and meets our high quality standards.
The wikiHow Video Team also followed the article's instructions and verified that they work.
This article has been viewed 46,919 times.
Learn more...
In the 80's٫ DIY was all the rage٫ and many people cut their sweatshirts for a more unique look. If you have an 80's party coming up, or are simply feeling nostalgic, you might want to add a sweatshirt to your attire. Off the shoulder sweatshirts are popular at the time , and while you might be able to find one in the store, it may not match the style of the 80's. Luckily, with a pair of fabric scissors and some creativity, you can make your own 80's off the shoulder sweatshirt.
Steps
Making a Basic Sweatshirt
-
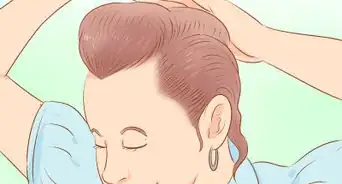
1Get a plain, hoodless sweatshirt. Baggy clothes were really popular in the 80s, so consider getting a sweatshirt that is one or two sizes larger than your normal shirt size. Avoid getting one that's too big, however; you will be cutting the neck hole to be larger.
- If you can't find a hoodless sweatshirt, you can try using a hooded one. You will have to use the seam line between the hood and the sweatshirt as a guide for the following steps.
-
2Fold the sweatshirt in half lengthwise. Make sure that the collar, shoulders, and seams all match up. It would be a good idea to insert sewing pins along the shoulder and fold.[1]Advertisement
-
3Draw a curved line around the collar. Start the line 2 inches (5.08 centimeters) from the edge of the collar. Finish the line 1 inch (2.54 centimeters) below the collar, right at the fold. Use a dressmaker's chalk for dark fabrics, and a dressmaker's pen for light fabrics.
- If you can't find a dressmaker's pen, a regular marker will do.
-
4Cut along the line that you drew. Try to cut through both layers at the same time. If you can't, cut the top layers first, then use it as a guide for the bottom. Don't worry if your marks show up; if you used a dressmaker's chalk or pen, they will come off in the wash.
- If you used a regular marker, cut outside the edge of the line so that it doesn't show up on the finished sweatshirt.
-
5Try the sweatshirt on to test the fit. Depending on which side you shift the collar to, you will reveal either the left or right shoulder. If you are happy with this, you are done! If you want to reveal both shoulders, take the sweatshirt off, and cut another 1 to 2 inches (2.54 to 5.08 centimeters) off using the same method as before.
- If you used sewing pins earlier, be sure to pull them out first.


Enhancing the Look
-
1Enhance your sweatshirt, but don't get too carried away. This section is filled with lots of radical ideas that can enhance your sweatshirt. You don't have to do all of them, in fact, that would make the shirt too busy. Instead, choose one, two, or three ideas, and stick with them.
-
2Cut down the hem and sleeves if you want a crop top. Chop off the bottom of your sweatshirt so that it comes up to your ribcage. Next, cut the bottom half of your sleeves to turn them into short sleeves.
-
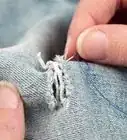
3Trim off the cuffs and bottom hem for a simple, vintage look. If you don't want to go to the lengths of a crop top, you can just cut off the cuffs and bottom hem instead. This won't change the length by much, but it will give you looser, more vintage-y look.
-
4Draw designs with neon-colored puffy paint. Choose 2 to 3 colors of puff paint. Draw, simple designs, such as spirals, squiggles, zigzags, circles, and squares. Bright, neon colors, such as hot pink, lime green, and fluorescent yellow will work the best.
- Puffy paint is also called "puff paint" and "dimensional fabric paint."
-
5Use fabric paint and a bristle brush to create a platter effect. Choose 2 to 3 color of regular fabric paint (not puffy paint). Dip your brush into it, then shake it over the sweatshirt. This will fling the paint off of the bristles and onto the fabric. Do this a few times using different colors until you get the design you want.[2]
- Mask off areas you don't want painted with masking tape or freezer paper.
-
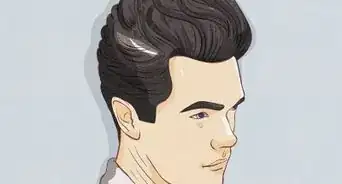
6Add designs with iron-on transfers. Find an 80's image that you like, then revere it using an image-processing program. Print it off on iron-on transfer paper, then iron it onto your sweatshirt following the directions on the package. Peel the paper away when you are done.
- This works best on light-colored sweatshirts. If you are decorating a dark-colored sweatshirt, get the kind of iron-on transfer paper that's made for dark fabrics.
- Search for images or logos from 80's cartoons, movies, and bands.
-
7Paint your own design using fabric paints. Sketch out your designs using a pencil, then fill them in using regular fabric paint and a paint brush. For more texture, outline your design using a matching puffy paint color.[3]
- Add details using a contrasting puffy paint color.
- Use fabric glue to add embellishments, like rhinestones.
-
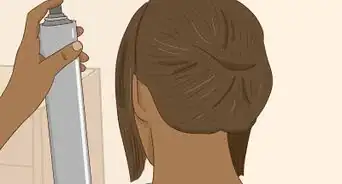
8Dye a white sweatshirt to make it more colorful. You can use a store-bought fabric dye, but if you want to really get into the whole 80's feel, try an unsweetened, powdered drink mix, such as Kool Aid. Keep in mind that the drink mix will fade much faster than the store-bought dye. If you are going the powdered drink mix route, do the following:
- Soak the sweatshirt in lukewarm water for 30 minutes.
- Stir 5 packets of drink mix into a large pot with water.
- Add the sweatshirt into the pot and wait overnight.
- Bring the pot (with the sweatshirt inside it) to a boil.
- Switch the stove off, then let the water cool.
- Remove the sweatshirt, rinse it in cold water, then dry it.


Community Q&A
-
QuestionWhat kind of crop tops would they wear?
 Hermi Jane PuckleCommunity AnswerMost of the crop tops worn in the 1980s were loose and looked more like a shirt cut short than a shirt made short. Like most other 80s clothing, the colors were bright and bold.
Things You'll Need
- Plain, hoodless sweatshirt
- Dressmaker's chalk or pen
- Fabric scissors
- Fabric paints, stencils, iron-on transfer, etc. (optional)


References
About This Article