This article was co-authored by wikiHow Staff. Our trained team of editors and researchers validate articles for accuracy and comprehensiveness. wikiHow's Content Management Team carefully monitors the work from our editorial staff to ensure that each article is backed by trusted research and meets our high quality standards.
This article has been viewed 26,112 times.
Learn more...
Arwen is a character from Lord of the Rings. She is a half-elf of Rivendell and in love with Aragorn. Although she does not get a lot of screen-time in the films, her outfits and hairstyles are memorable. Romantic and beautiful, Arwen's hair is suitable not just for dressing up, but also for special occasions, such as weddings. If you love to do braids and have lots of patience, consider giving one of her styles a try!
Steps
Creating Arwen's Fishtail Braids
-
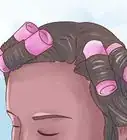
1Start with long, brushed hair. This style is what Arwen wore while saving Frodo from the Ring Wraiths in The Fellowship of the Rings. Arwen has long hair—so the longer your hair is, the better. You can leave your hair wavy or straight.
- If you have short hair, use a black or dark-brown wig, preferably a lace-front one.
- If your hair is too thin or not quite long enough, add some hair extensions that match your hair color.[1]
- If you have very curly hair, consider straightening it slightly to get a more wavy texture.
-
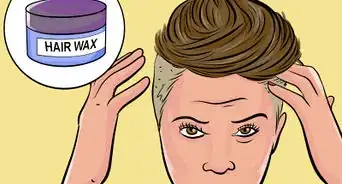
2Gather a triangular section of hair from the top of your head. Create two deep side parts, one on either side of your forehead. Angle them towards the back of your crown, joining them in a V-shaped point. Gather everything within that V into a bun and secure it with a clip.[2]
- Use the handle of a rat-tail comb to make the parts nice and clean.
Advertisement -
3Split the section in half, then cross the right side over the left. Part the gathered section in the middle, like creating a center part. Pull both sections towards the back of your head, then cross the right side over the left, making an X. Be careful not to mix these into the rest of your hair.[3]
- If you are doing the style yourself, hold the bottom section between your teeth.
- If you are doing the style for someone else, have them hold the bottom section in front of their face.
-
4Gather some hair into the top section. Gather the hair from right behind the bottom section, and add it to the top section. This will lock the bottom section inside the top one.[4]
-
5Fishtail braid the top section. Split the top section in half. Gather a thin strand of hair from the outer edge of the left section, then cross it over to the inner edge of the right section. Repeat the process for the right side. Keep braiding like this until you run out of hair, then secure it with a clear hair elastic.[5]
- If you are doing this on your own hair, angle the braid back so that it doesn't sag.[6]
- If you want to create her Rivendell style, braid about three-quarters of the way down.
-
6Fishtail braid the bottom section to create a second braid. Gather some hair from, just behind the bottom section. Add it to the bottom section, then fishtail braid it. Secure it with a clear hair elastic once you reach the end.[7]
-
7Create a third fishtail braid between the first two. You will have a triangle of hair between the first two fishtail braids. Gather that hair and split it in two. Fishtail braid it until you reach the end, then secure it with a clear elastic.[8]
- If you are doing her Rivendell style, skip the third braid, and tie the two braids together behind your head with a clear elastic instead.
-
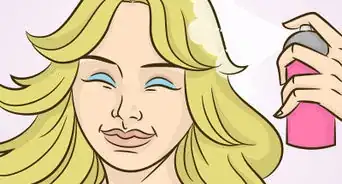
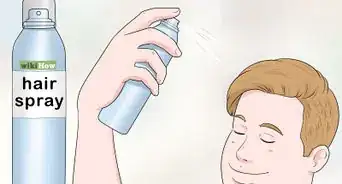
8Set the style with hairspray, if desired. Once you have the three fishtail braids done, you are good to go. If you want to, however, you can mist the hair on the top of your head with hairspray to ensure that the hairs lay smooth. Don't tuck your hair behind your ears, however; you want the hair at your temples hanging in front of them. This will hide the seams from the elf ears, if you are wearing them.
- For her Rivendell style, slip a silver circlet over your head to finish the look. You can also purchase a replica circlet and use that instead.


Doing Arwen's Helm's Deep Braid
-
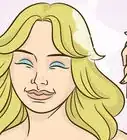
1Brush out your hair, then add extensions, if desired. This style works best on long hair—the longer, the better. It is the elaborate braid Arwen wore while at Helm's Deep.[9]
- If you are adding extensions, make sure that they match your hair color.
-
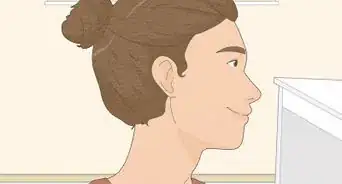
2Part your hair down the center, towards the back of your crown. Use the handle of a rat-tail comb to create a neat, even part. Drape the left side over your left shoulder, and the right side over your right.[10]
-
3Lace braid the left side of your hair. A lace braid is just like a French braid, except that you are only adding hair to the bottom strand. Smooth the hair from your part down under the braid as you work, and braid until you reach the back of your ear.[11]
- Gather a thin section of hair from your hairline to the left of the part.
- Split it into three sections and begin a regular braid.
- Add some hair to the bottom strand and cross it over the middle one.
- Cross the top strand over the middle one without adding any hair.
- Keep lace braiding, adding hair only to the bottom strand.
-
4Finish off with a regular braid. Once you reach the back of your ear, stop. Braid whatever you have left as normal, without adding any hair. Secure the braid with a small hair tie. The color does not matter because you will be removing it later.[12]
-
5Lace braid the other side of your head. Begin with a regular braid, then do a lace braid, adding hair only to the bottom strand. When you reach the back of your right ear, finish off with a normal braid, and secure it with a hair tie.[13]
-
6Braid the rest of your hair into six individual braids. Part the rest of your hair down the middle, then divide each half into thirds. Braid each section until you have six thin braids. Secure each braid with a mini hair tie.[14]
- You will have six regular braids and two lace braids for a total of eight braids.
-
7Cross and pin the lace braids over the back of your head. Cross the two lace braids against the back of your head, right above where the six normal braids start. Secure them with bobby pins, then let them dangle down your back.[15]
-
8Tie the braids together in groups of two. Take the first two braids on the left side of your head. Tie them together at the ends with another hair tie. Repeat this step for the rest of the braids, until you have four groups of two braids each.[16]
- You will treat each group as one braid from now on.
-
9Weave the four braids into a 4-strand braid. Take the left group of braids. Weave it over and under across the other three groups until you reach the other side. Take the next braid on the left, and weave it under and over across until you reach the other side. Keep going until you reach the bottom of the braids where the hair ties are.[17]
- Always weave starting from the left.
-
10Secure the braid with a regular hair tie. Choose a hair tie that matches your hair color. Wrap it around the base of your 4-strand braid, right above all the little hair ties.[18]
-
11Remove the mini hair ties and unravel the ends of the braids. Pull all of the mini hair ties off first. Then, carefully unravel the ends of the mini braids. If you need to, gently comb the tail end of your braid with a comb or brush. When you are done, you should have an elaborate braid, bound with a single hair tie, that's loose and fluffy at the end.[19]
-
12Set your style with a light misting of hairspray. Once the hairspray dries, you are set to go!


Things You'll Need
Creating Arwen's Fishtail Braids
- Rat-tail comb
- Clear hair elastics
- Hairspray
- Extensions (optional)
Doing Arwen's Helm's Deep Braid
- Rat-tail comb
- Hair tie
- Mini hair ties
- Bobby pins
- Hairspray
- Extensions (optional)
References
- ↑ https://www.youtube.com/watch?v=dwS9UtMJetk
- ↑ https://www.youtube.com/watch?v=n2ebZ_kP3xA
- ↑ https://www.youtube.com/watch?v=n2ebZ_kP3xA
- ↑ https://www.youtube.com/watch?v=n2ebZ_kP3xA
- ↑ https://www.youtube.com/watch?v=n2ebZ_kP3xA
- ↑ https://www.youtube.com/watch?v=dwS9UtMJetk
- ↑ https://www.youtube.com/watch?v=n2ebZ_kP3xA
- ↑ https://www.youtube.com/watch?v=n2ebZ_kP3xA
- ↑ https://www.youtube.com/watch?v=DNiQgOonU0s
- ↑ https://www.youtube.com/watch?v=DNiQgOonU0s
- ↑ https://www.youtube.com/watch?v=DNiQgOonU0s
- ↑ https://www.youtube.com/watch?v=DNiQgOonU0s
- ↑ https://www.youtube.com/watch?v=DNiQgOonU0s
- ↑ https://www.youtube.com/watch?v=DNiQgOonU0s
- ↑ https://www.youtube.com/watch?v=DNiQgOonU0s
- ↑ https://www.youtube.com/watch?v=DNiQgOonU0s
- ↑ https://www.youtube.com/watch?v=DNiQgOonU0s
- ↑ https://www.youtube.com/watch?v=DNiQgOonU0s
- ↑ https://www.youtube.com/watch?v=DNiQgOonU0s
About This Article