X
wikiHow is a “wiki,” similar to Wikipedia, which means that many of our articles are co-written by multiple authors. To create this article, 10 people, some anonymous, worked to edit and improve it over time.
There are 9 references cited in this article, which can be found at the bottom of the page.
This article has been viewed 33,982 times.
Learn more...
The Peacock Pose, or Mayurasana, is an advanced yoga pose that supports your whole body onto your arms. In yoga tradition, this pose is said to stimulate digestion, among other benefits.
Steps
Part 1
Part 1 of 2:
Preparing for the Peacock
-
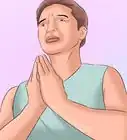
1Identify risks. Do not attempt the peacock if you have injured arms or hands. Consult a doctor before trying this if you have a medical condition affecting your abdomen, digestive system, blood circulation, or heart, or if you are pregnant.[1]
- Some yoga students avoid this pose during menstruation.[2]
-
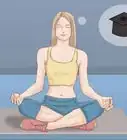
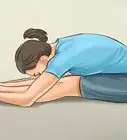
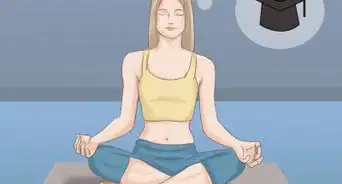
2Lead up to the peacock pose with other poses. The peacock pose is quite advanced. It requires strong arm and upper body muscles, flexible wrists, and excellent balance. Before you attempt the peacock, improve these attributes by perfecting the Four-Limbed Staff Pose and Upward Facing Bow Pose. Even the resting Child's Pose can help stretch out your back, especially if you roll up part of your yoga mat and place it in front of your hips.[3]
- The Salabhasana (Locust Pose) and Gomukhasana (Cow Face Pose) are also helpful.[4]
Advertisement -
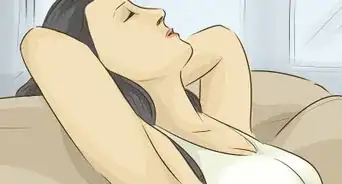
3Place a pillow under your head. If you lose your balance in this pose, you may fall forward onto your head or neck. For safety's sake, keep a pillow there to catch you if you fall.[5]
-
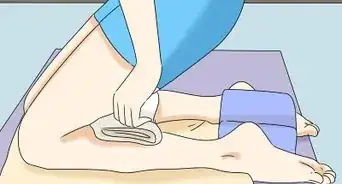
4Consider using a yoga strap. You may use a yoga strap to bind your arms together just above the elbows, to prevent them slipping to the side.[6] Keep in mind that this may make it more difficult to catch yourself if you fall.


Advertisement
Part 2
Part 2 of 2:
Performing the Peacock Pose
-
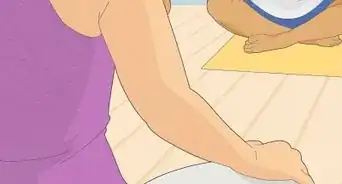
1Kneel on all fours. When you are ready to attempt the peacock, kneel onto the floor and sit on your heels. Place your palms flat on the floor in front of you, with your fingers turned back toward you. Bring your hands just close enough together that your hands and forearms touch, bending your elbows slightly.[7]
-
2Bring your knees out and your elbows in. Bend your elbows to a right angle to bring them in close to your abdomen. Gradually slide your knees outward, until they are in front of your hands and to either side of them.[8]
- Stand on your toes with the rest of your feet off the ground, so you can move more easily.
- The closer you get your elbows to your center of gravity (low on your torso), the easier this will be.[9]
-
3Lean onto your upper arms. Push your stomach down onto your elbows. Support your chest with your upper arms.
- Women may place their arms further to the side if necessary for comfort.
-
4Hold your stomach in. This pose requires you to form a "tripod" composed of your stomach and both shoulder blades. Pull in your stomach so it stays firm against your elbows and helps support your weight.
-
5Rest your forehead on the ground and extend your legs. Keep your weight on your arms as you bring your head forward and onto the floor. Stretch out both your legs behind you and rest all your weight on your hands, toes, and forehead.
-
6Draw your shoulders back and slightly down. Pin back your shoulders to make two sturdy legs of the tripod. Your shoulders and stomach will need to support most of the weight of your lower body.
-
7Engage your glutes. This should help make your body as stiff as a plank. Try to keep your shoulder blades, stomach, and butt in a straight line. This is vital for achieving the strength and balance you need to support your feet off the floor.
-
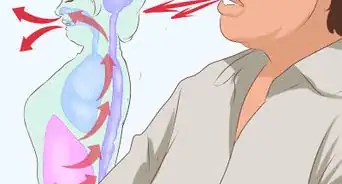
8Lift your head and legs. Lift your head and look forward, stretching the muscles in the front of the neck.[10] Shift your weight forward onto your arms. If your body is stiff and straight, this should bring your legs and feet up off the ground.[11] Rise until your legs are parallel with the floor. Bend your toes back behind you.
- You must keep your weight forward to support yourself. If your elbows shoot backward, you will fall.[12]
-
9Hold for about ten seconds. Breathe evenly for three or four breaths, or about ten seconds, then lower your forehead and feet gradually to the floor.[13] Bring your knees up to a kneeling position before you lift your torso off your arms. As you practice, you can gradually increase this time up to thirty seconds.[14]


Advertisement
Things You'll Need
- Yoga mat
- Pillow (optional)
- Yoga strap (optional)
Warnings
- This exercise can worsen symptoms of spondylosis, or a painful condition of the spine caused by degeneration of intervertebral disks. This yoga asana requires a lot of physical strength and balance. Since you make your navel the central point of balance, there's a lot of pressure on it, and any imbalance can worsen your condition if you're suffering from cervical spondylosis.⧼thumbs_response⧽
- This pose can injure your wrists or shoulders if they are not strong enough to support your weight.⧼thumbs_response⧽
Advertisement


-Step-16.webp)


References
- ↑ http://www.yogawiz.com/yoga-poses/yoga-asanas/peacock-pose.html
- ↑ http://www.yogapoint.com/yoga-poses/yoga-for-menstruation.htm
- ↑ http://www.yogajournal.com/article/practice-section/go-with-your-gut/
- ↑ http://www.doyouyoga.com/5-yoga-poses-to-prepare-for-peacock-pose/
- ↑ http://wellbeyondmars.tumblr.com/post/62071009548/asana-of-the-week-peacock-external-imgur-link
- ↑ http://wellbeyondmars.tumblr.com/post/62071009548/asana-of-the-week-peacock-external-imgur-link
- ↑ http://www.yogajournal.com/pose/peacock-pose/
- ↑ http://www.yogajournal.com/pose/peacock-pose/
- ↑ http://www.yogamagazine.com/peacock-pose/
- ↑ http://wellbeyondmars.tumblr.com/post/62071009548/asana-of-the-week-peacock-external-imgur-link
- ↑ http://www.yogajournal.com/pose/peacock-pose/
- ↑ http://www.athleta.net/2012/01/06/embrace-mayurasana-peacock-pose/
- ↑ http://www.yogajournal.com/article/practice-section/go-with-your-gut/
- ↑ http://www.yogajournal.com/pose/peacock-pose/
- ↑ https://yogainternational.com/article/view/peacock-pose
About This Article
Advertisement